
Firebase is arguably the most popular backend as a service (BaaS) offering. It’s created by Google and comes with almost everything you’d need to create a great app, including a database, file storage, user authentication, and real-time communication. However, it’s closed source, meaning all your and your users’ data is under Google’s control.
That’s where Supabase can help. Supabase is an open source Firebase alternative that aims to provide a similar set of functionalities and development experience, without controlling your data.
In this article, you’ll learn how to use Supabase together with Replit, a cloud-based IDE, to create a real-time chat app. You’ll see how powerful and versatile both Supabase and Replit are and how you can use them to create an amazing app in no time.
You can follow along with the tutorial using this repl.
How the Chat App Works
Before diving into the code, let’s talk about the stack and how the chat works.
To make a chat app, you need two things: the frontend and the backend. The frontend UI should contain an input form and a list of posted messages. The backend requires only a simple database to store users and their messages, and a reliable transfer method to post and retrieve messages.
For this tutorial, the real-time chat app will be powered by Vue 3 and Tailwind CSS, and will allow users to post short text messages to a public space. For the sake of simplicity, users will be recognized only through IDs stored across sessions in localStorage. All of this can be done quickly using Replit.
The backend will be handled with Supabase’s hosted solution. They offer a free plan that is more than sufficient for this particular tutorial. All you have to do is create an account and set up a project.
Creating the Chat App
Let’s talk through how you can implement a chat app, starting with the initial setup.
Initial Setup in Replit
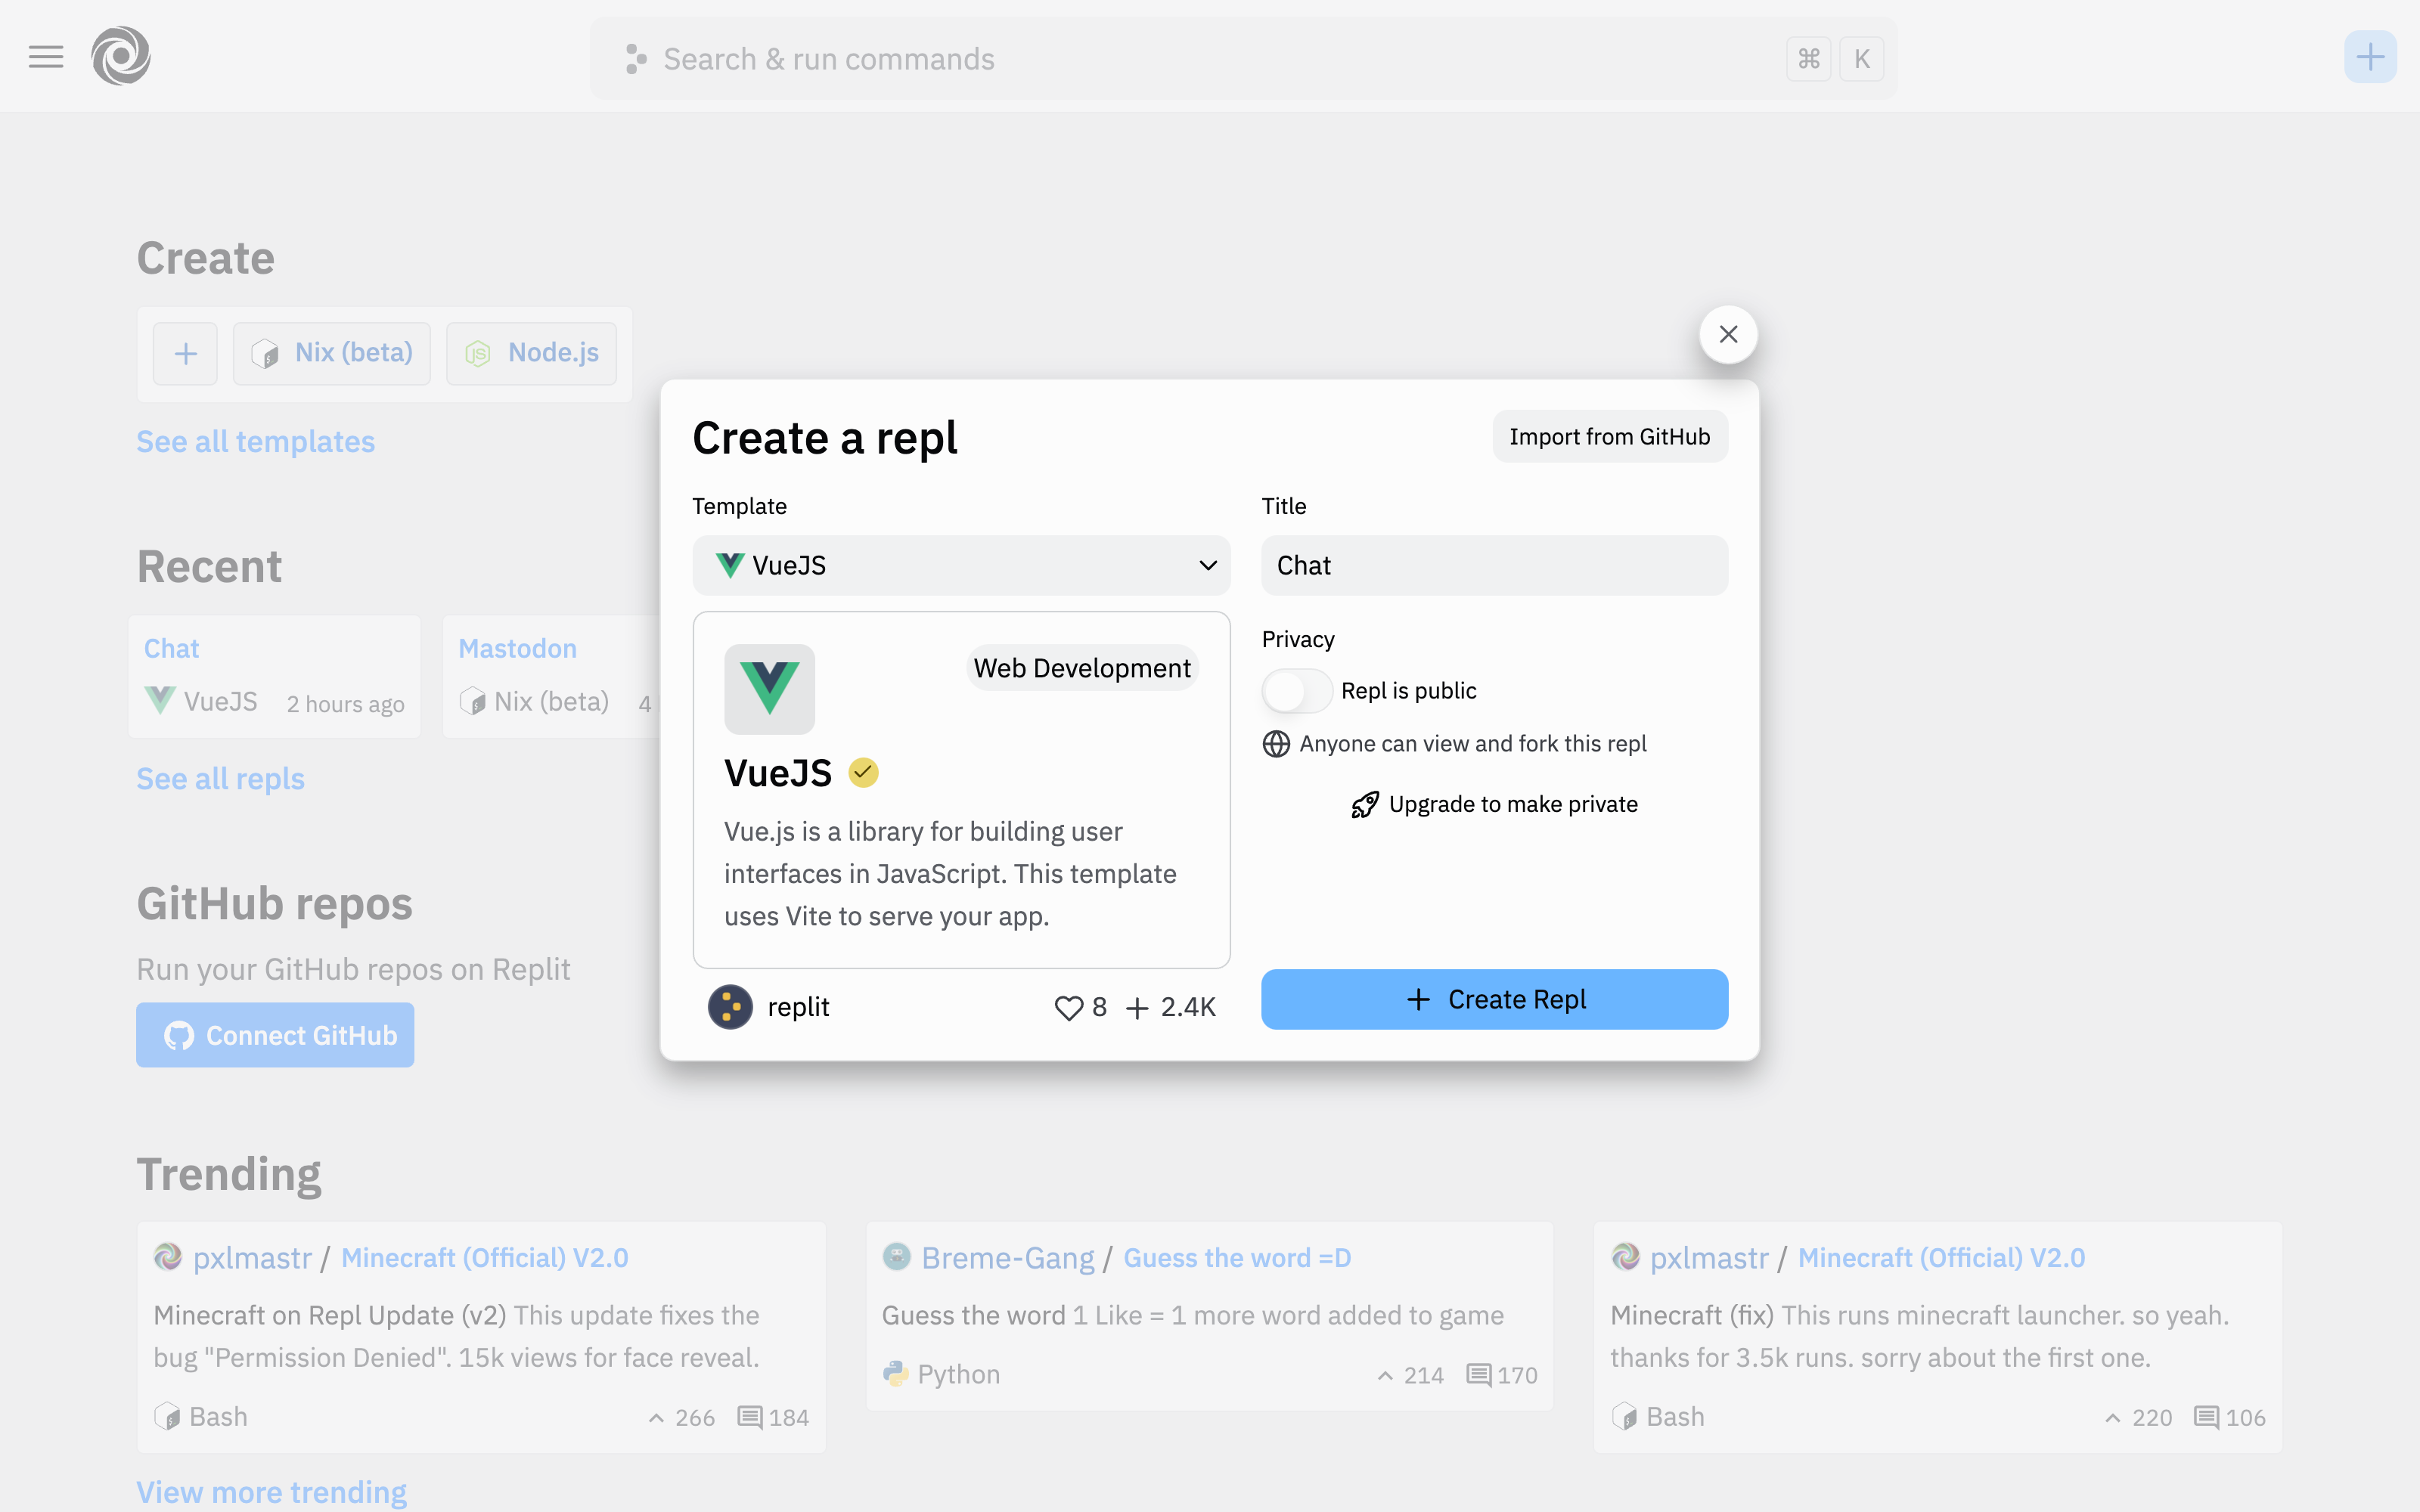
If you haven’t already, start by creating a Replit account. Then, log in and create a new repl using the VueJS template:
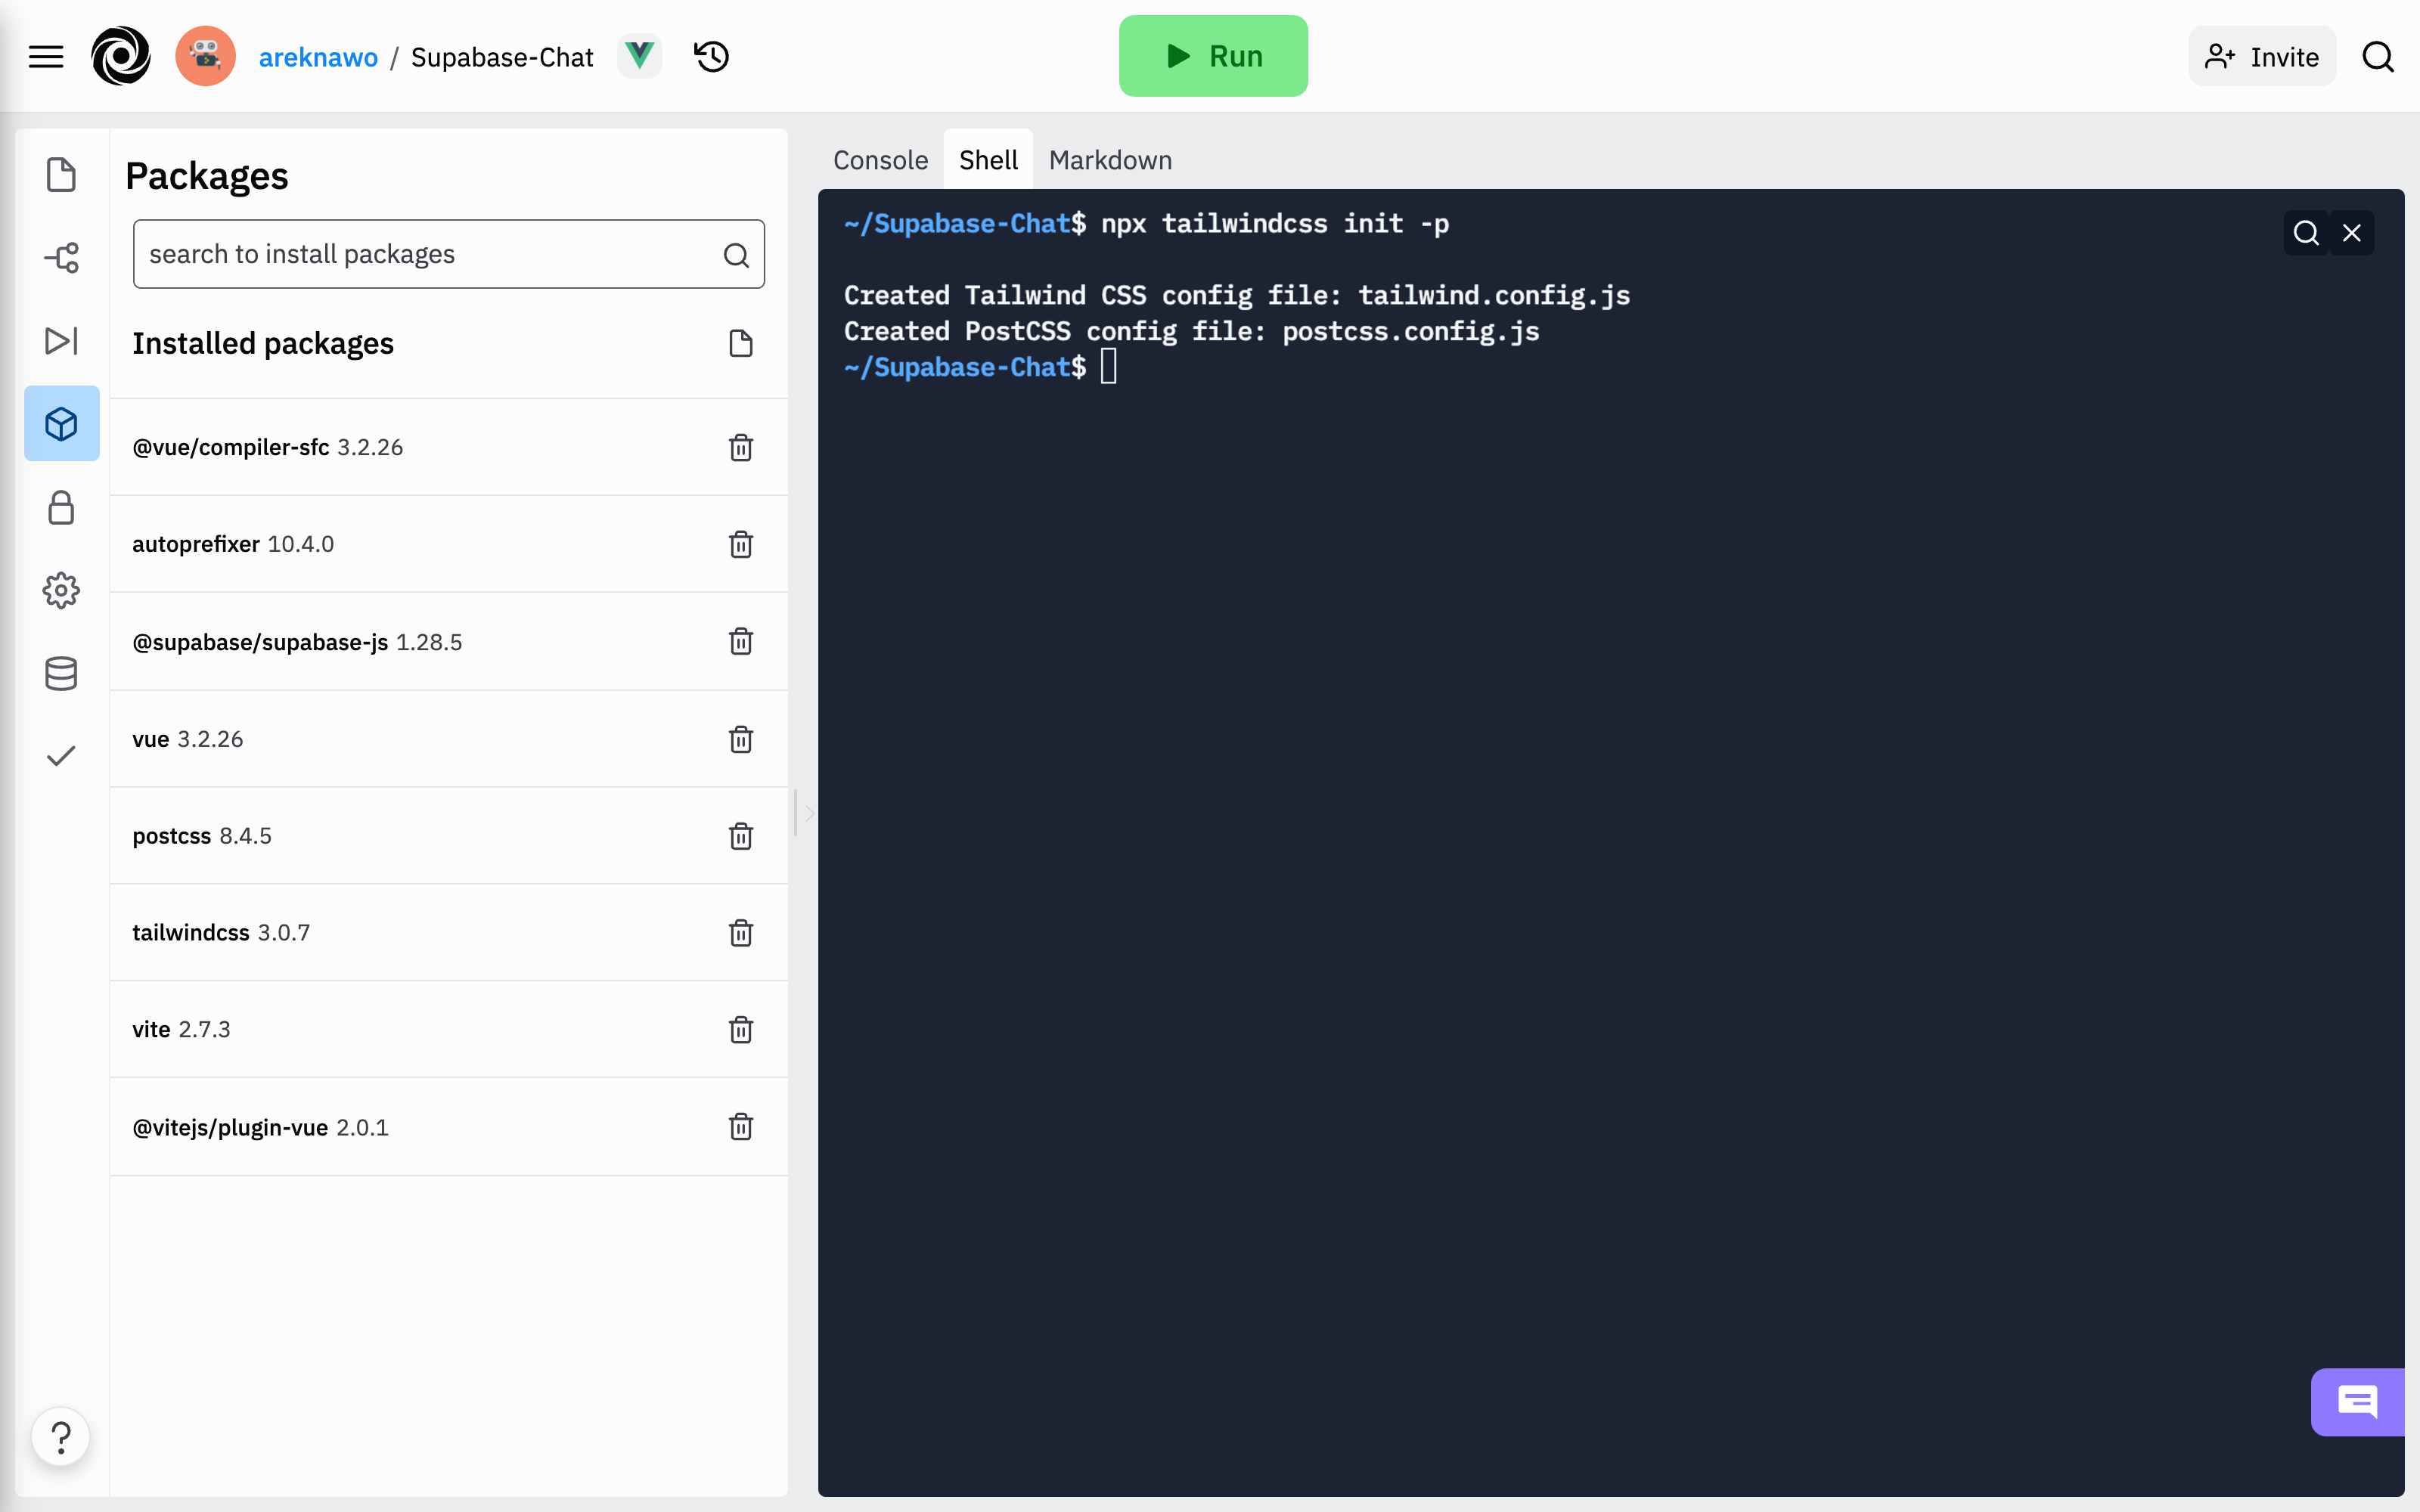
Inside your repl, use the shell to install the necessary dependencies:
npm install -D tailwindcss postcss autoprefixer
npm install @supabase/supabase-js
npx tailwindcss init -p
This command installs all npm dependencies required, including the official @supabase client library. Then it initializes the config files for Tailwind.
To finish configuring Tailwind, add your project source files to the config file:
// tailwind.config.js
module.exports = {
  content: ["./index.html", "./src/**/*.{vue,js,ts,jsx,tsx}"],
  theme: {
    extend: {},
  },
  plugins: [],
};
Lastly, create and import a CSS file that includes all Tailwind layers:
/* src/tailwind.css */
@tailwind base;
@tailwind components;
@tailwind utilities;
// src/main.js
import { createApp } from "vue";
import App from "./App.vue";
import "./tailwind.css";

createApp(App).mount("#app");
Supabase Project Setup
With the initial frontend repl set up, you can now move over to Supabase to set up the backend of your application.
Log in into your Supabase account and create a new project:

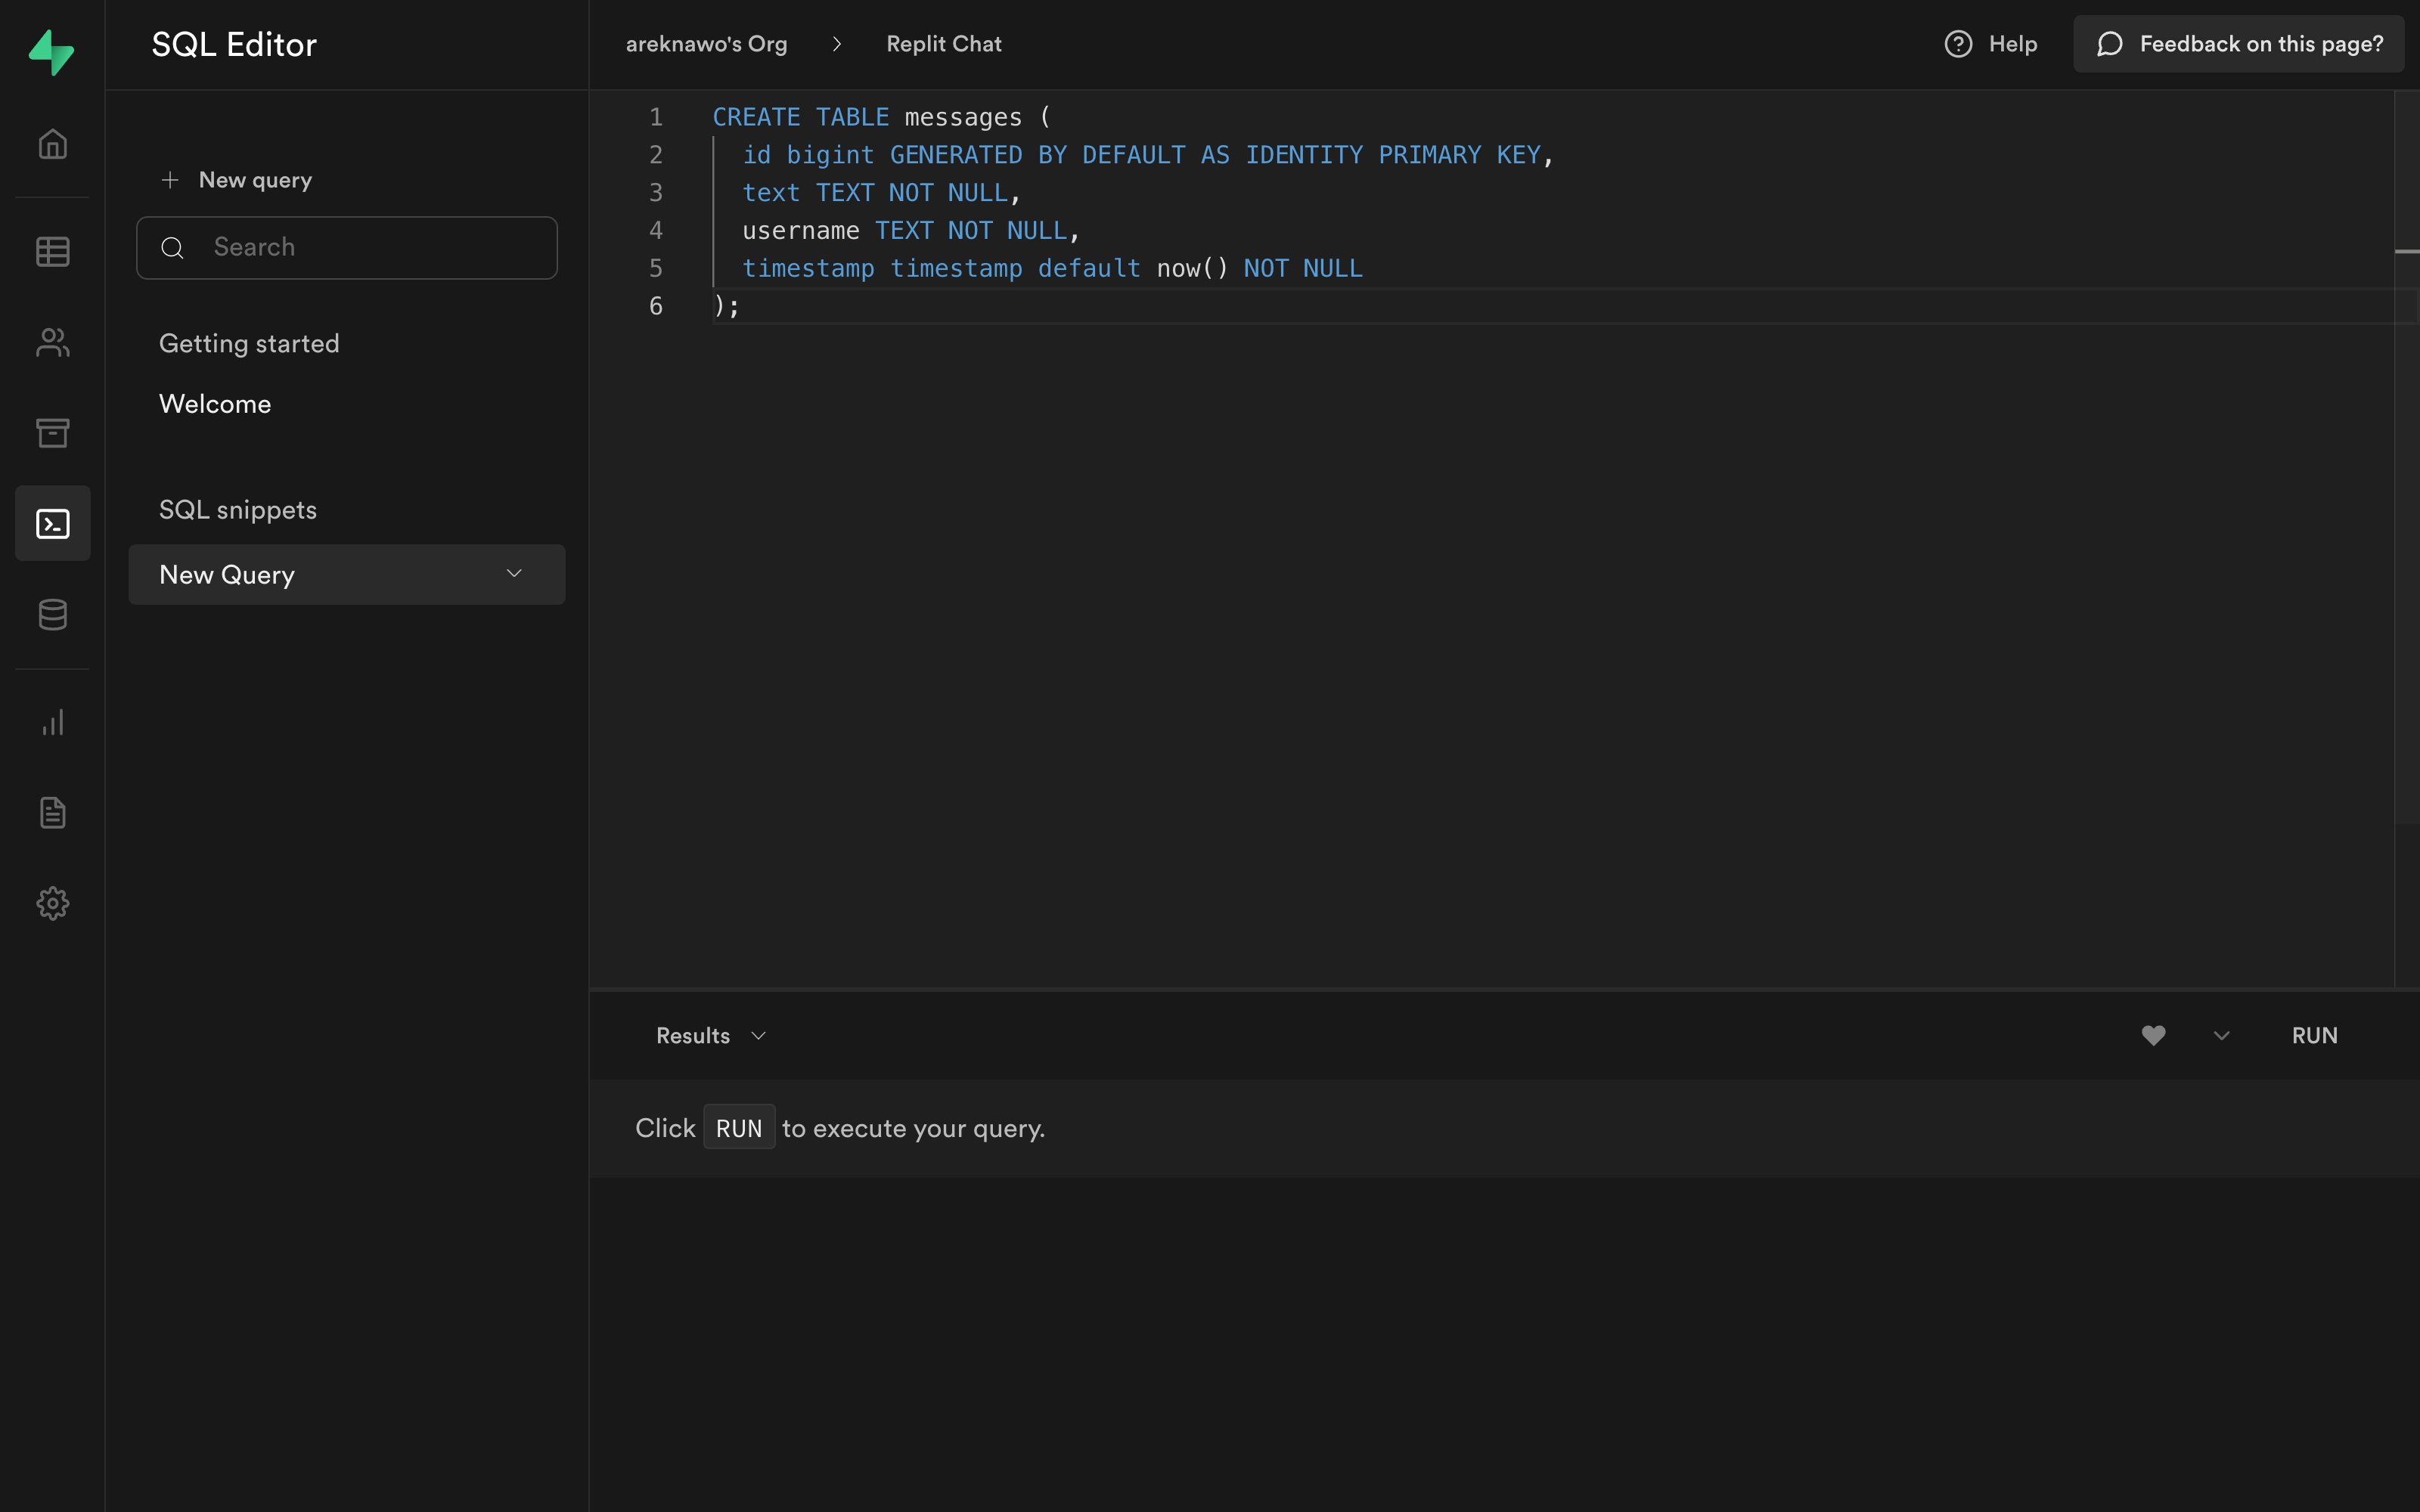
Inside the new project, you’ll need to create a new table in the Postgres database to hold all your chat messages. To do that, you can use the following SQL query:
CREATE TABLE messages (
  id bigint GENERATED BY DEFAULT AS IDENTITY PRIMARY KEY,
  text TEXT NOT NULL,
  username TEXT NOT NULL,
  timestamp timestamp default now() NOT NULL
);
You can run it from the SQL Editor in the Supabase dashboard:
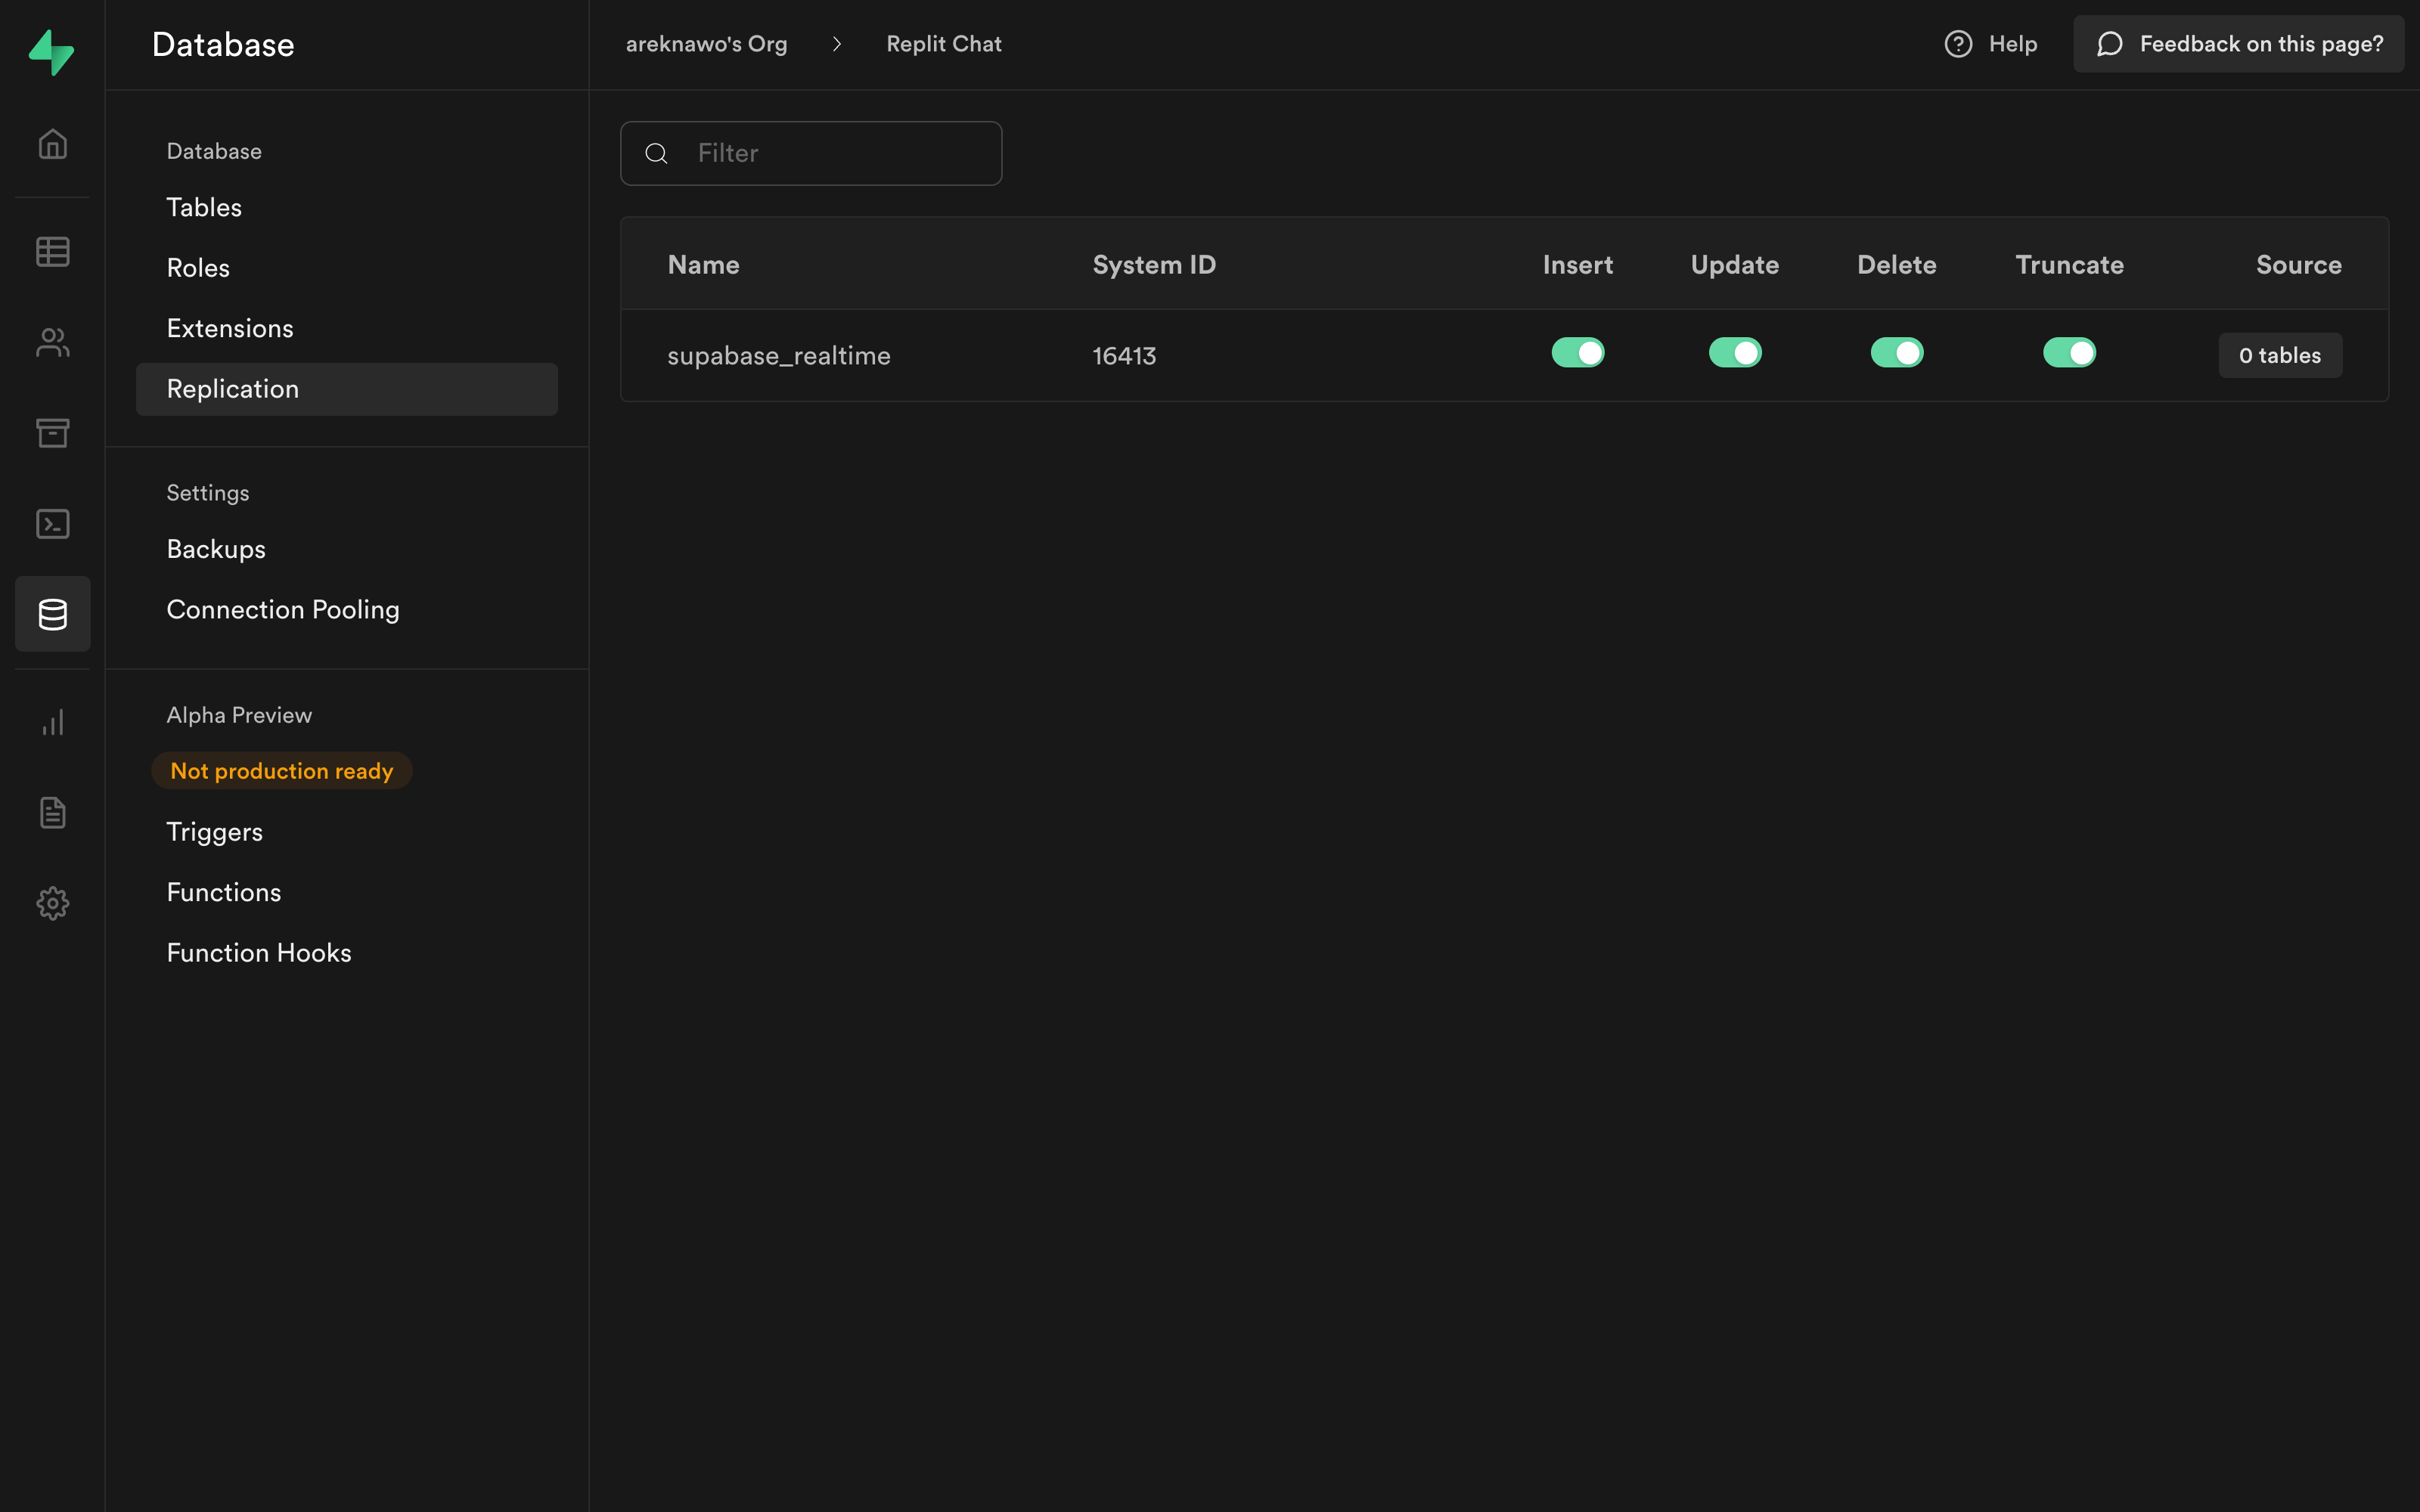
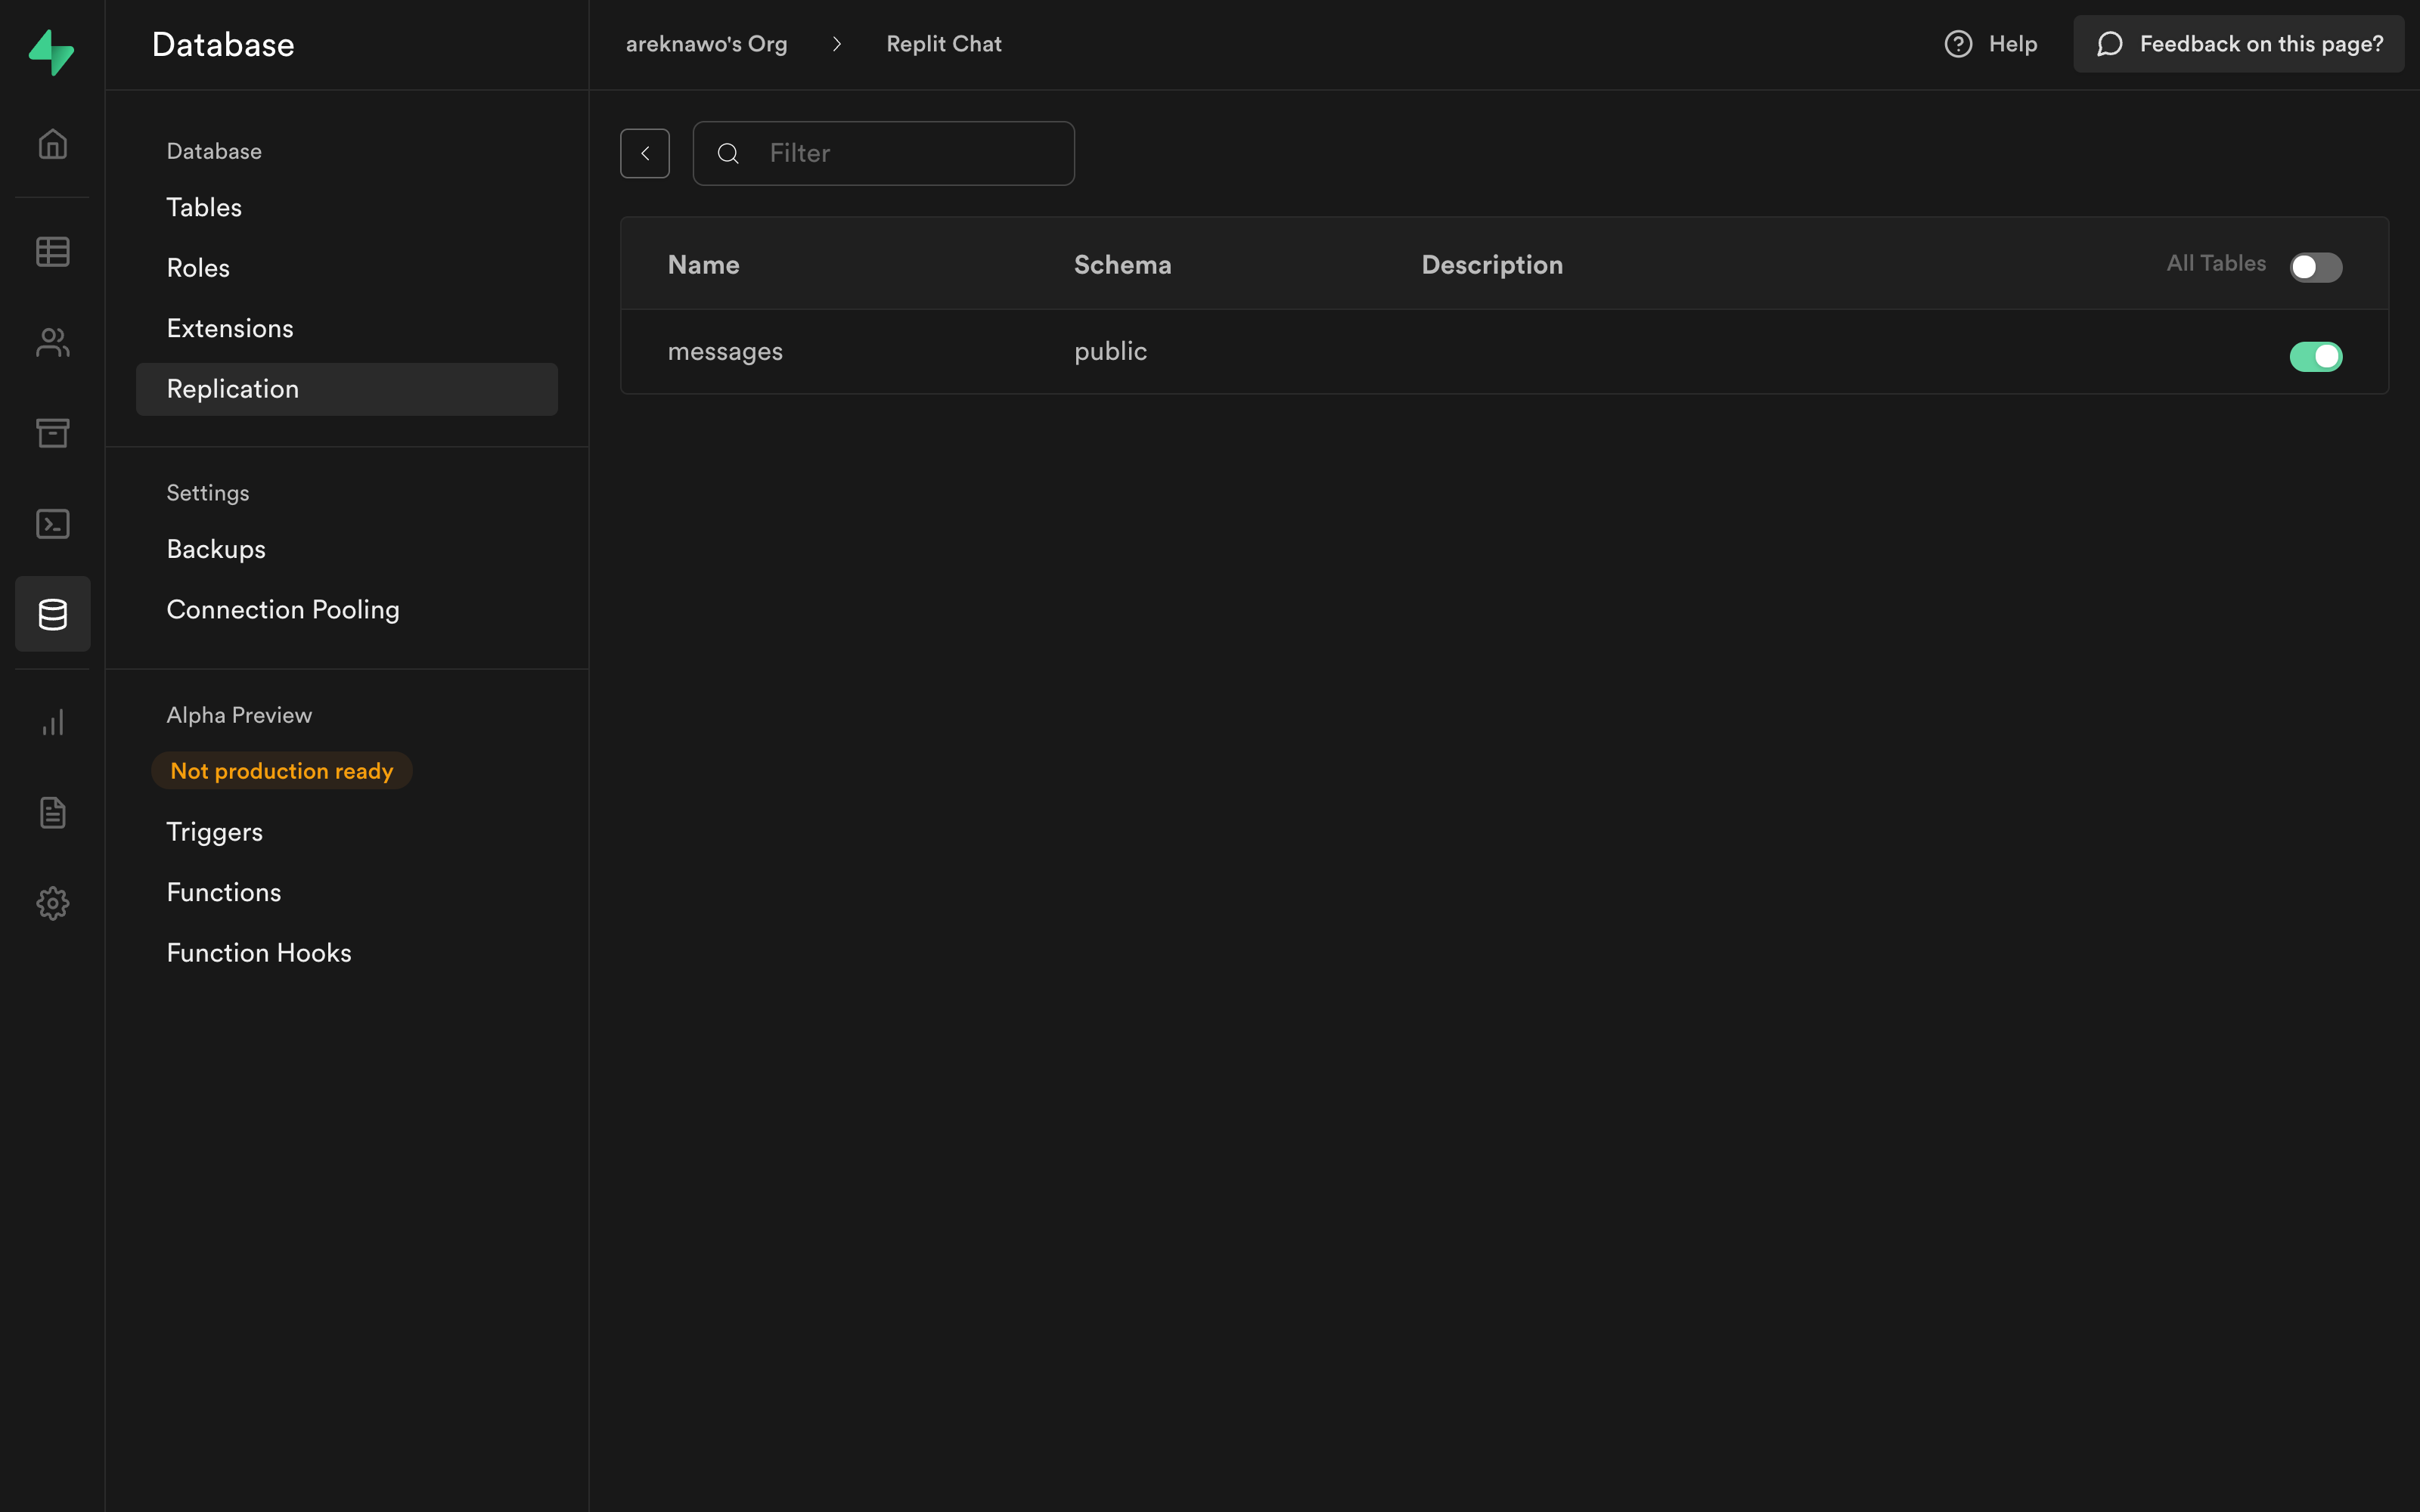
Lastly, enable real-time events on the table by first navigating to Database > Replication and clicking the 0 tables button under Source.
Connecting with Supabase
You’ve now set up both the frontend and backend of your application. To connect the two, you’ll need the public API key and the database endpoint of your Supabase project. You can find them in the Settings > API menu:
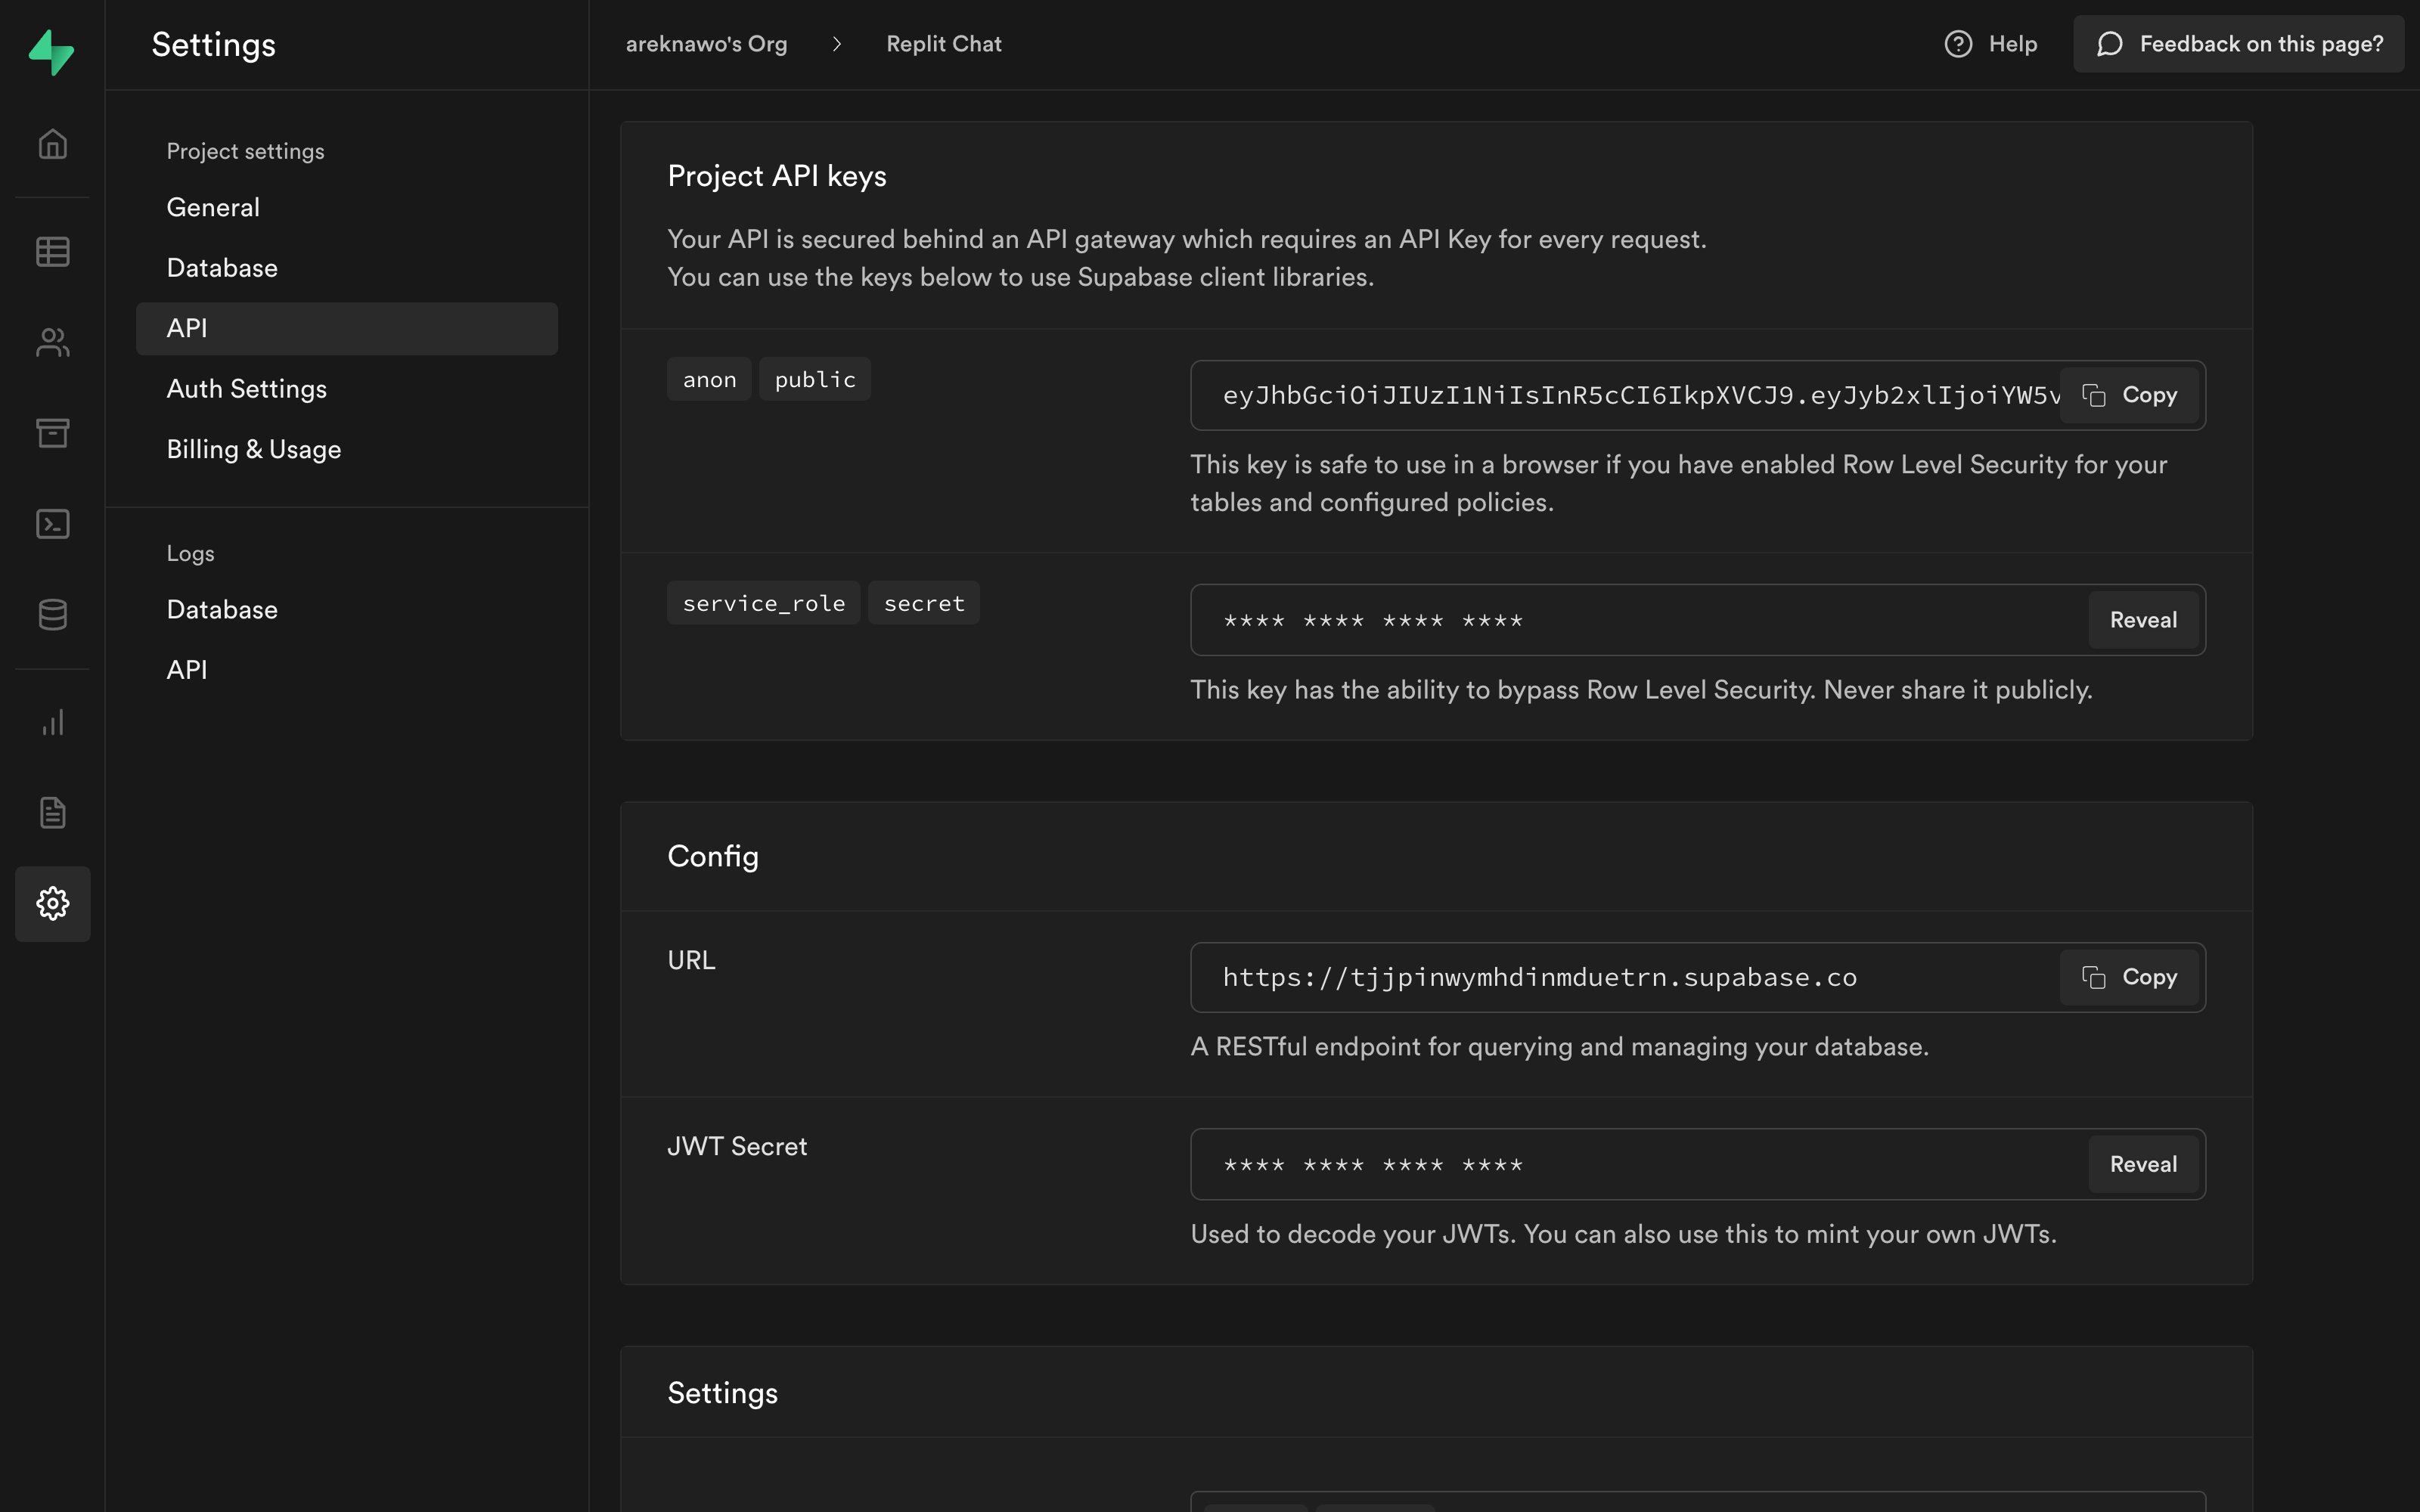
Connecting with Supabase on the frontend can be done with its client library. All you need are the above credentials and the createClient function.
// src/api.js
import { createClient } from "@supabase/supabase-js";
import { ref } from "vue";

const supabase = createClient("DATABASE_ENDPOINT", "PUBLIC_KEY");
The supabase client instance will serve as a base for a simple composable function based on the Vue Composition API. It’ll control all the message-related actions like sending, loading, and listening for new messages.
To implement this, start by creating the following helper functions:
// ...
const getUsername = () => {
  const previousUsername = localStorage.getItem("username");

  if (previousUsername) {
    return previousUsername;
  } else {
    const username = `user_${Math.random().toString(36).substring(2, 6)}`;

    localStorage.setItem("username", username);

    return username;
  }
};
const getMessages = async (from, to) => {
  const { data } = await supabase
    .from("messages")
    .select()
    .range(from, to)
    .order("timestamp", { ascending: false });

  return data;
};
const onNewMessage = (handler) => {
  supabase
    .from("messages")
    .on("INSERT", (payload) => {
      handler(payload.new);
    })
    .subscribe();
};
const createNewMessage = async (username, text) => {
    const { data } = await supabase.from("messages").insert({ username, text });

    return data;
}
The above code takes several actions, including:
getUsername, which generates a random username and saves it in persistentlocalStorage. This username will be used to identify messages that the current user sends.getMessages, which uses the Supabase client to fetch messages from the given range. They’re selected from themessagestable and arranged in descending order by their timestamps.onNewMessage, which relies on the Supabase real-time system to listen toINSERTs into themessagestable. The newly-created messages are passed on to the provided handler.createNewMessage, which inserts a new message into the Supabase database with the provided username and text.
You’ll use all the above functions in the useMessages composable to wrap the actions needed for the UI:
// ...
const useMessages = () => {
  const username = getUsername();
  const messages = ref([]);
  const messagesCount = ref(0);
  const maxMessagesPerRequest = 50;
  const loadMessagesBatch = async () => {
    const loadedMessages = await getMessages(
      messagesCount.value,
      maxMessagesPerRequest - 1
    );

    messages.value = [...loadedMessages, ...messages.value];
    messagesCount.value += loadedMessages.length;
  };

  loadMessagesBatch();
  onNewMessage((newMessage) => {
    messages.value = [newMessage, ...messages.value];
    messagesCount.value += 1;
  });

  return {
    username,
    messages,
    async send(text) {
      if (text) {
        await createNewMessage(username, text);
      }
    },
    loadOlder() {
      return loadMessagesBatch();
    },
  };
};

export { useMessages };
This function uses the Vue Composition API to create the necessary refs, then sets up the new message listener and loads the initial batch of messages.
The returned object contains values required for the UI, like username (to check and appropriately style the user’s own messages) and messages, in an array. It also includes two wrapper methods, send and loadOlder, for sending new messages and loading older ones.
Frontend UI
With the API connector ready, it’s time to design the frontend UI. Start by editing src/App.vue to include a chat container and the rest of the boilerplate:
<template>
  <div
    class="max-w-screen-sm relative h-full w-full bg-gray-100 flex flex-col"
  ></div>
</template>
<script>
import { useMessages } from "./api";
import Message from "./components/Message.vue";
import { defineComponent, ref } from "vue";

export default defineComponent({
components: { Message },
  setup() {
    // ...
  },
});
</script>
<style>
  html,
  body,
  #app {
    @apply h-full;
  }
  #app {
    @apply flex justify-center items-center;
  }
</style>
With that in place, you can focus on the actual template to create the message list and message input form:
<div class="max-w-screen-sm relative h-full w-full bg-gray-100 flex flex-col">
  <ul
    class="flex flex-col-reverse flex-1 overflow-y-auto"
    @scroll="handleScroll"
  >
    <Message
      v-for="message in messages"
      :username=”message.username”
      :personal="message.username === username"
      >{{ message.text }}</Message>
  </ul>
  <div
    class="w-[calc(100%-2rem)] h-16 m-4 p-4 bg-gray-200 rounded-lg flex justify-center items-center"
  >
    <input
      placeholder="Message"
      class="bg-white rounded-lg px-2 py-1 mr-2 w-full focus:outline-none focus:ring focus:ring-gray-300"
      v-model="input"
      @keydown="handleSend"
    />
    <button
      :disabled="!input"
      class="bg-blue-500 px-2 py-1 text-white rounded-lg hover:bg-blue-600 disabled:opacity-50"
      @click="handleSend"
    >
      Send
    </button>
  </div>
</div>
<Message> is a separate Vue component used to display and adequately style each chat message. It’s located in the src/components/Message.vue file:
<template>
  <li class="flex" :class="personal ? 'flex-row-reverse' : 'flex-row'">
    <div
      class="p-2 rounded-lg mx-4 my-3 relative"
      :class="personal ? 'bg-blue-500 text-white' : 'bg-gray-200'"
    >
      <slot></slot>
      <div v-if="!personal" class="absolute text-xs bg-gray-300 p-0.5 rounded-lg">{{username}}</div>
    </div>
    <div class="flex-1"></div>
  </li>
</template>
<script>
import { defineComponent } from "vue";

export default defineComponent({
  props: {
    personal: Boolean,
    username: String
  },
});
</script>
The component will display the user’s own messages on the opposite side and in a different color.
Lastly, back in src/App.vue, you should edit the <script> section to register components, define event handlers, and handle user input data:
import { useMessages } from "./api";
import Message from "./components/Message.vue";
import { defineComponent, ref } from "vue";

export default defineComponent({
  components: { Message },
  setup() {
    const { username, messages, send, loadOlder } = useMessages();
    const input = ref();
    const handleScroll = (event) => {
      if (event.target.scrollTop === 0) {
        loadOlder();
      }
    };
    const handleSend = (event) => {
      if (!event.key || event.key === "Enter") {
        send(input.value);
        input.value = "";
      }
    };

    return {
      input,
      username,
      messages,
      handleScroll,
      handleSend,
    };
  },
});
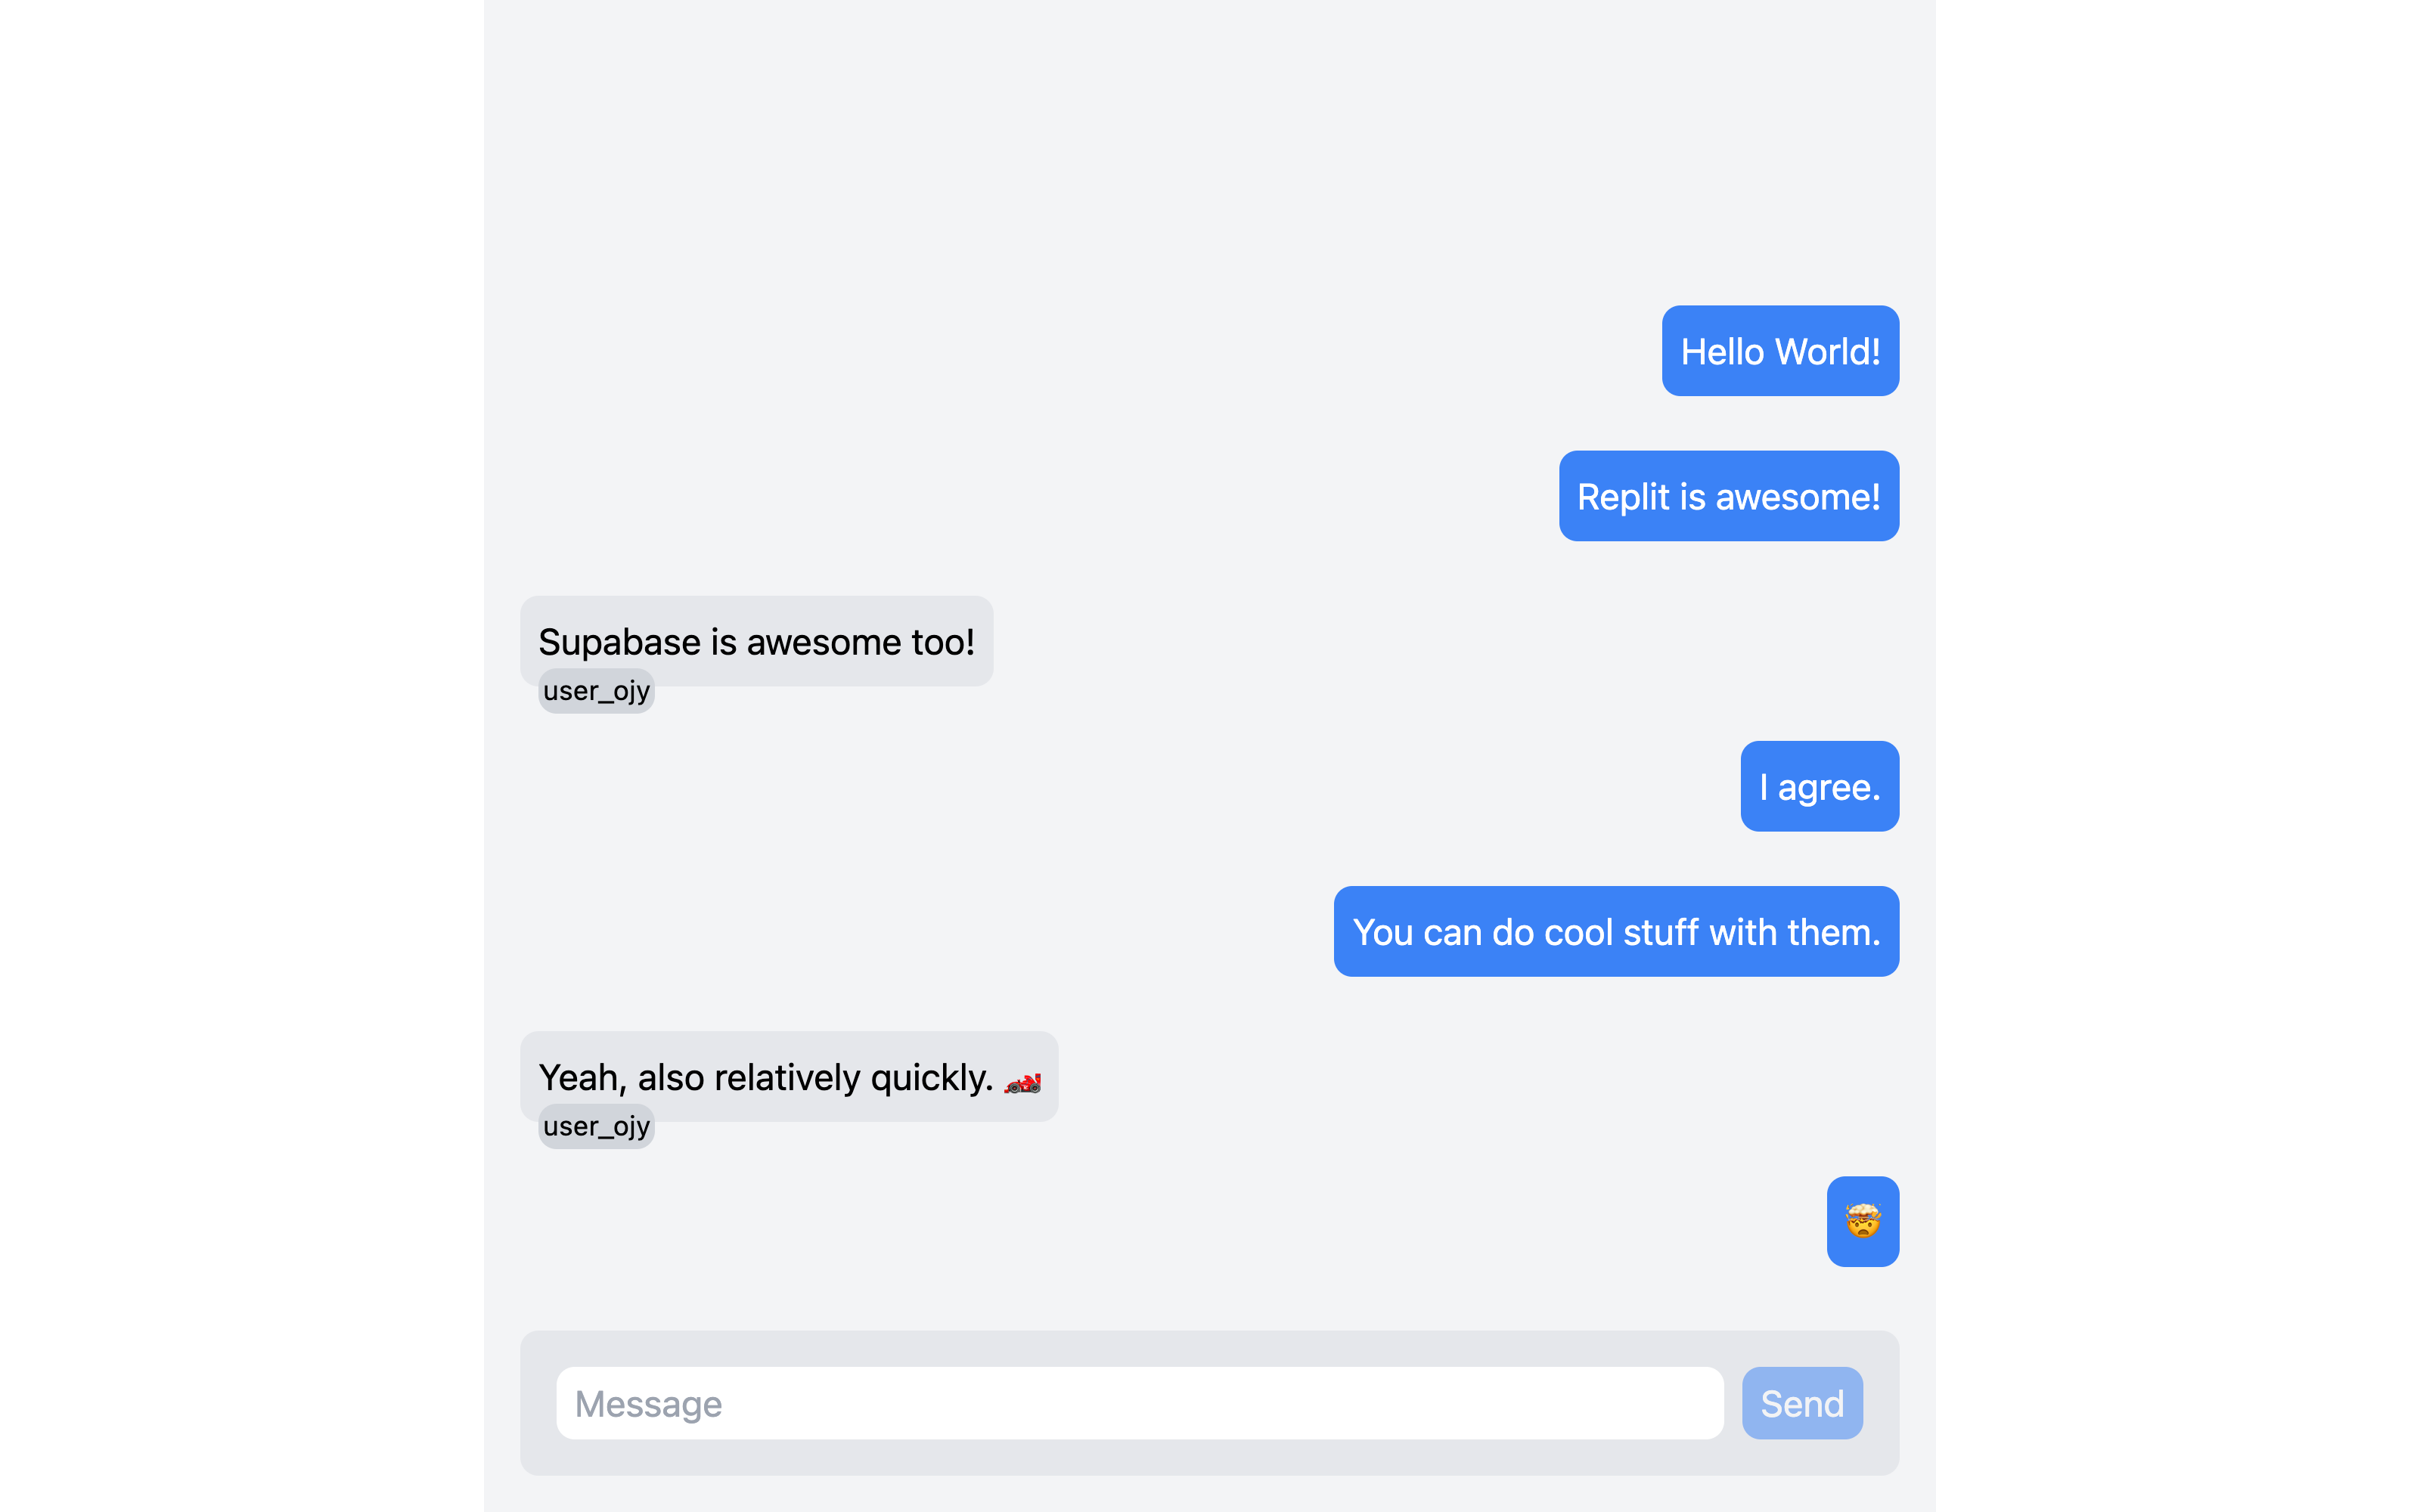
The chat is now ready! Insert some data into the database to test it, either through the API, the created chat form, or right from Supabase’s Table Editor.
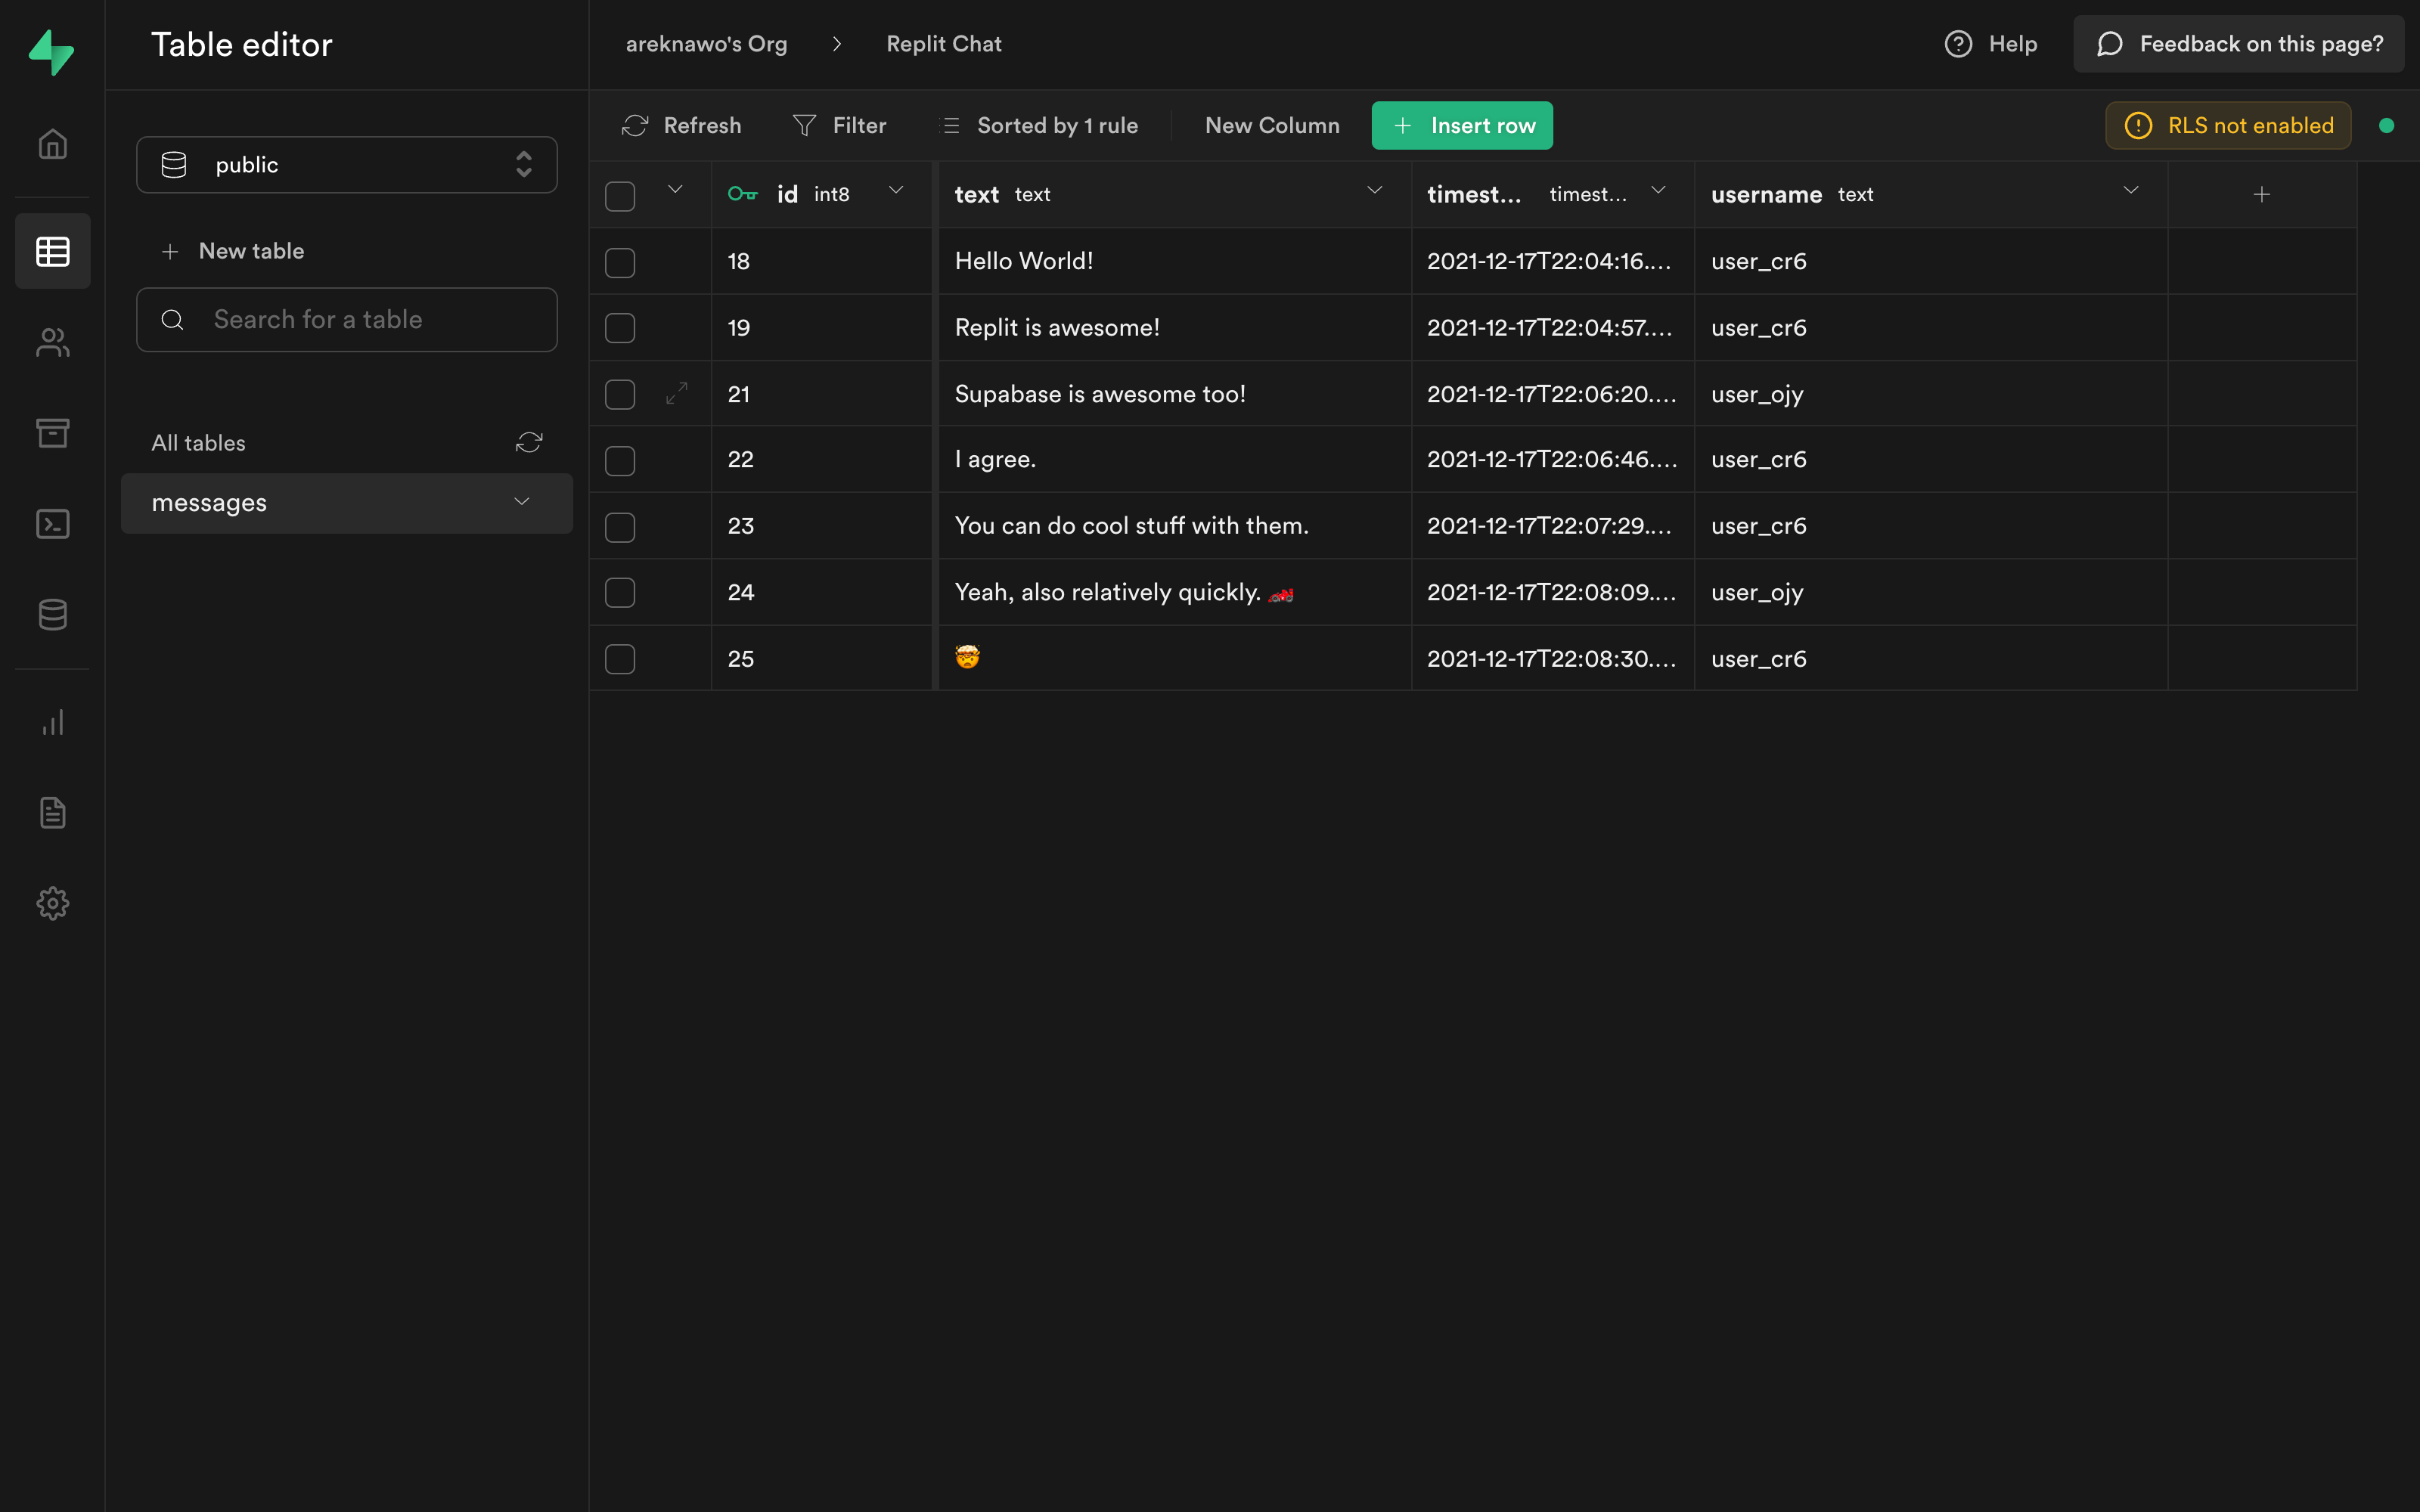
Here’s an example chat:
Conclusion
The chat app you’ve just built only scratches the surface of what can be created using Replit and Supabase. These tools have incredible potential, and with some time and patience, you can use them to build pretty much anything you want.
Feel free to experiment with the chat you’ve just created. You can use Supabase Auth to add authentication, or storage to allow for file transfers. Or, you can expand the UI and integrate other APIs right from Replit. It’s your chance to build something extraordinary!
Replit is a simple yet powerful online IDE that can help you build all sorts of apps. A chat app is only the beginning, because Replit encourages you to code for fun and explore the unknown.