
Many developers are familiar with Replit, the in-browser IDE. However, you may not know that it can be used to make full applications and games.
With Kaboom, a JavaScript game-programming library that helps you quickly make fun games, and Nakama, an open source distributed server created by Heroic Labs, you can easily create a multiplayer game that runs on Replit.
In this article, you’ll learn how to make a multiplayer game using Kaboom in Replit, utilizing Heroic Labs as the game server.
If you want to check out the finished product or just follow along with this tutorial, you can use this REPL.
What Are Multiplayer Games
Multiplayer games are usually played as matches, where players join a match and compete for high scores or try to defeat each other in a battle royale with other players from all over the world. The action is happening in real time and can be played as a team or individual; Nakama can support both kinds.
No matter what type of game you want to create, you’ll need to understand two key concepts of multiplayer games: sessions and users. Users are simply the individual players participating in a game, whereas a session is an instance of a game. For example, if you have a racing game, it might consist of a single race. Once all the players pass the finish line, the race is over and the session is complete.
What Goes into Making a Multiplayer Game
Making a video game can be incredibly complicated. You need to worry about level design, art direction, physics, and gameplay—and that’s just scratching the surface. Adding a multiplayer aspect makes it even more difficult.
In this tutorial, you’ll focus mostly on making your game one in which multiple players can participate. If you want to learn more about creating games and game design with Kaboom, this tutorial is a great starting place.
As you build your multiplayer game, you’ll learn how to do the following:
- create a match so that multiple players can join and compete together
- let players join an existing match that’s already in progress
- make sure that every player in the game can receive updates from every other player (i.e., when a player in Seattle makes their character jump, a player in Miami will see that character jump as well)
- set up a backend server so that all players can communicate with each other
- add some Kaboom basics, including adding sprites to the game world and player movement
Prerequisites
Before you begin, you’ll need to create a Replit account as well as install Docker locally. In addition, a basic understanding of JavaScript will be helpful.
Install Nakama Server
For this tutorial, Nakama will act as the backend to your multiplayer game. It will handle keeping track of who the users are, whose logged in, and who joined specific matches of the game.
To start, create a file on your local machine called docker-compose.yml. Go to the Nakama website and copy the contents of the Docker Compose file into your local Docker Compose file using docker-compose-postgres.yml.
Once you have the proper Docker Compose file, use the cd command to get into the directory and run docker-compose up. This will set up the Nakama server for you.
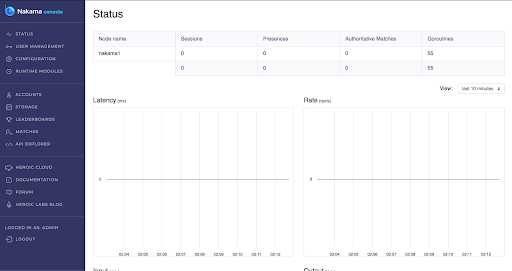
Once it’s finished spinning up, you should be able to access the dashboard by going to http://127.0.0.1:7351 in your browser. You’ll find that the default username is admin and the password is password. Now, you’re already finished setting up Nakama.
You’ll use the dashboard to confirm that some features of your game are working, but for the most part, you’ll interact with Nakama using a JavaScript library that you’ll install next.
Set Up the Replit Environment
Nakama lets you connect multiple players together, but in order to actually build a game for multiple people to play, you’ll need to set up Replit and Kaboom.
Replit is the environment for your game, and it lets you easily write and run code in your browser. Kaboom is a game engine written in JavaScript that lets you actually build your game.
Sign in to your Replit account and, in the left-hand menu, select Templates and search for Kaboom (not Kaboom light). Once you select the Kaboom template, it should open up a new REPL environment with everything you need to get started creating games with Kaboom.
Now you need to add the library that will allow you to communicate with Nakama. Click the Packages tab on the left and use the search bar at the top to search for Nakama.
Click on the + sign next to @heroiclabs/nakama-js to install the package. Then go back to your files and select the main.js file. Under import kaboom from "kaboom", add import {Client} from "@heroiclabs/nakama-js" and then delete everything else in the main.js file.
And that’s it. Now you’re ready to start building a multiplayer game.
Connect to Nakama and Create a Session
Now you need to establish a connection between your JavaScript code and Nakama:
// client
const server_url = "127.0.0.1"
const client = new Client("defaultkey", server_url)
client.ssl = false
The Nakama server that you set up in the last section is running on localhost (127.0.0.1), and you need a way for your game code to talk to your server so that you can pass data between players.
To do this, you create a Nakama client and pass it the server_url.
In this tutorial, you won’t be dealing with SSL, so you can set it to false in order to avoid any errors in regard to missing certificates.Once your client is working, you need to create a session for your user. Nakama keeps track of which users are logged in, for how long, and what kinds of actions they perform while logged in.
In order to play your multiplayer game, all players will need to create a Nakama session. Thankfully, Nakama gives you several options for logging users in.
One way is to use a social provider, like Facebook or Google. Or you can have Nakama try to recognize the user based on which device they are logging in with, but for your purposes, it will be easier to use the Nakama email authentication to create and log in users.
const email = "[email protected]"
const password = "Password123";
let session;

async function getSession() {
  session = await client.authenticateEmail(email, password)
  console.log('get session', session)
  return session
}

getSession()
In the code above, the email and password are hardcoded. Then you call authenticateEmail on your Nakama client object. If the user email exists in the database, Nakama will check that the password is correct and, if so, log the user in. If the email is not present, it will create a new user for the email.
The session object that gets returned has a lot of useful attributes, but the ones you’re most concerned with are username and user_id.
There is a way to allow your user to choose their own username, but for now, you can let Nakama assign one, which will be a bunch of random letters.
Now, you need to confirm that everything is working on the Nakama side. After you run the code, go back to the Nakama console at http://127.0.0.1:7351. Click Accounts on the menu on the left. Here, you’ll be able to see a list of all the users that have logged in. You should see an entry with a username and user_id that match what you saw in the console output on the Replit side to know that you’ve successfully created a session for your user.
Create Kaboom REPL
Before you can get to the multiplayer aspect, you need to set up Kaboom with a small game world and a player. You won’t be building out a full game in this tutorial since you’re primarily focused on making it possible for multiple players to join a match, but you do want to make it possible for those players to be able to move and jump around. To do this, add the following code to main.js:
kaboom({width: 640, height: 480});

// add platform
add([
    rect(width(), 48),
    pos(0, height() - 48),
    outline(4),
    area(),
    solid(),
    color(127, 200, 255),
])

function createPlayer(x, y){
  return add([
    rect(48, 64),
    area(),
    outline(4),
    pos(x, y),
    color(255, 180, 255),
    body(),
    "player", // add a tag here
  ]);
}

let localPlayer = createPlayer(100, 150)
In this code, you initialize Kaboom. This gives you access to a bunch of functions that will help you build your game, like add(), which lets you add players, objects, and obstacles to your game; and jump(), which lets your character jump.
You also pass a simple object that tells Kaboom how big you want your game world to be. Then you add a simple platform that will be the ground in your second game. Finally, since you’ll eventually need to add additional players to your game world, you create the function createPlayer.
For now, you don’t need to worry about loading in any sprites or working with any animations; the players will simply be small rectangles that can move and jump around. If you want to learn more about adding sprites to the game, check out the Kaboom docs.
Now, select Run at the top of the Replit environment. You should see a pink rectangle drop into the game. That’s your player. But they don’t have the ability to really do anything yet, so let’s make some updates to the code to allow them to move around.
const MOVE_SPEED = 200

onKeyPress("space", () => {
    if (localPlayer.isGrounded()) {
          localPlayer.jump()
    }
})

keyDown('left', () => {
  localPlayer.move(-MOVE_SPEED, 0)
  localPlayer.dir = vec2(-1, 0)
})

keyDown('right', () => {
  localPlayer.move(MOVE_SPEED, 0)
  localPlayer.dir = vec2(1, 0)
})
Kaboom gives you several functions that allow your player to react to key presses. The onKeyPress() function you call first takes a key; in this case, space for space bar. Then you pass in a function that tells Kaboom what you want to happen when the player presses the space bar. In this case, the space bar causes your player to jump.
The next two functions are similar, and they allow the player to move left and right. Using keyDown() instead of onKeyPress() means the player can hold the key down to keep moving instead of having to press it over and over.
Add these functions and reload the game. The keys should now be working as described above. This is as much of the game as you’re going to build out in this article, but feel free to check out Kaboom’s docs to add more functionality.
Matches
Now that you have players and those players can have sessions, you can move to the most essential piece of our multiplayer game: creating and joining matches.
A match represents a period in which an instance of your game is played. This is where the power of Nakama really shines. Once you create a match, you can have other players join. You can then use the match to broadcast the game state to the different players. That way, when you make your character jump, your friend, who is playing on their computer thousands of miles away, will also see your character jump.
For the rest of the tutorial, you’ll be primarily focused on having two players as you develop; however, when you’re done, it’s easy to have more join.
Let’s call the first player the host player. This will be the player that actually creates the match. The second player will be the guest player. The guest player will be the one joining the match that the host player creates. In every game, there is only one host player.
Matches work by transmitting real-time data between all the match participants. In order to do this, you need to open a socket connection with the Nakama server.
const secure = false; // Enable if server is run with an SSL certificate
const trace = false;
const socket = client.createSocket(secure, trace);

async function createSocketConnection(sess) {
  await socket.connect(sess, false)
}
// replace your original getSession with this.
getSession()
  .then((data) => {
    createSocketConnection(session)
  })
Next, you need to tell the socket which session (or which logged in user) wants to open a socket connection. Because you need to have the session first before you can connect the socket, you need to add a .then() to our getSession function call to make sure you have a session to pass to your createSocketConnection function. Update your original getSession() call to match the code above.
Creating a Match
By now, you may have noticed that your Replit environment has its own mini browser build where you can see the game world. Copy the URL you see in that browser (not the URL in your main browser) and load it in a separate browser window. This should load another instance of the game world, but you shouldn’t see the IDE or the Replit console. Moving forward, you’ll consider this new window as the guest player and the one in your Replit environment as the host player. Let’s focus on the host for now.
let matchID;

async function createMatch() {
  let response = await socket.createMatch()
  matchID = response.match_id
  console.log("match id", matchID)
}

async function getMatch() {
  let startNewMatch = confirm('Start a new match?')

  if (startNewMatch) {
    createMatch()
  } else {
    let id = prompt('Please enter a match id to join.')

  }
}
And again, you need to update this function.
getSession()
  .then((_data) => {
    return createSocketConnection(session)
  })
  .then(getMatch)
In the code above, you create a variable for the matchID since you’ll need that elsewhere. For now, you can set it outside of the function. Then you create a function that uses your socket from earlier to create the match. You need the matchID from the match object that’s returned. You’ll also apply a console log to the matchID since you’ll need access to it to join the match later. Don’t forget to update the getSession() function to match the code above.
You could just call the createMatch function on its own, but depending on the player, you might not always want to create a match. Sometimes you may want to just join one, so you’ll need to create a function getMatch, which asks the player if they would like to create or join a match.
You can get creative with game menus for this step, but to keep it simple, you’ll use JavaScript prompts. If a player says ok to creating a match, one will be created. If they say cancel, then the function will assume they want to join an existing match and prompt them for the match ID.
Before you continue, let’s test to make sure the code you’ve implemented so far is working. Run the code on the host side and click OK when the dialog box asks if you would like to start a match. If everything is working properly, you should see a match ID similar to 09456488-eae7-4ac7-9f05-6468326fb0ff. printed on the console.
Note that all match IDs end in a period, .. Make sure you include it when you attempt to join a match.Joining a Match
Now that you have the ability to create the match, you can set up a function to join a match. However, before you set up this function, you need to make one tweak to the code.
So far, you’re hardcoding the email:
const email = "[email protected]"
This means that no matter what, you’re always going to sign in as that [email protected].
In order to test your multiplayer capabilities, you’ll need to be able to log in as several different users. So you need to change the email attribute you set earlier to read from user input.
const email = prompt('enter your email address', '[email protected]')
In a real game, you’d want to let users define their own passwords, but to make it easier here, you’ll leave the password variable as is, so all users will have the same password.
Now, let’s add a function to join an existing match.
let activePlayers = {}

async function joinMatch(match_id) {
  matchID = match_id
  let match = await socket.joinMatch(match_id);
  match.presences.forEach( player => {
    if(player.user_id !== session.user_id){
      console.log('spawning players')
      activePlayers[player.user_id] = ' '
    }
  })
}

async function getMatch() {
  let startNewMatch = confirm('Start a new match?')

  if (startNewMatch) {
    createMatch()
  } else {
    let id = prompt('Please enter a match id to join.')
    joinMatch(id)
  }
}
This function takes in a match_id that the host will need to provide guests with. It sets your global variable for matchID since you’ll need this later; then it uses the socket connection to join a match with the given match ID. Then back in your getMatch function, you can call joinMatch.
Run the code on the host side. When the dialog box prompts you to create a match, click OK. Copy the match ID from the console on the host side and then run the code in the guest window. Make sure to enter a different email address. When it prompts you to create a match, click Cancel; then enter the match ID and click OK.
When the match object is returned to you, it will have the attribute presences. This is an array with every user currently connected to the match. In this case, it should have only one user in it, and the user_id and username should match what you have on the host side.
Now, there are two problems you still need to solve:
- Your guest player has now joined your game, but how will your guest player know if more players join after them?
- Your guest knows about your host, but how does your host know about your guest?
You can solve both of these issues by setting up a listener called onmatchpresences. This function will fire every time someone leaves or joins the current match.
async function listenForPresences() {
  socket.onmatchpresence = (players) => {
    if(players.joins) {
      console.log('A player joined')
      console.log(players.joins)
      addPlayers(players.joins)
    }
    if(players.leaves) {
      players.leaves.forEach(player =>{
        destroy(activePlayers[player.user_id])
        delete activePlayers[player.user_id]
      })
    }
  }
}

function addPlayers(players) {
  players.forEach( player => {
    if(player.user_id !== session.user_id){
      console.log('spawning players')
      activePlayers[player.user_id] = ''
    }
  })
}
Here, your listenForPresences function contains your listener. The listener will fire whenever anyone joins the match, but it will also fire if someone leaves the match. In each case, you’ll need to locally update your game to reflect that.
To help you keep track of all the players in the game, you can create an activePlayers object that will hold the players currently logged into the match. The key for each entry will be the player’s Nakama user_id, and the value will start as an empty string but eventually be set as the Kaboom player object.
In addition, since you’ll want to add players to activePlayers in a couple more places, you create a function to handle this process. For example, you can replace the code in joinMatch with this function call.
Notice that you’re initially setting the values to an empty string. You’ll come back to this later.
Now all you have to do is activate your listener in the getMatch function. While you’re there, let’s make a few more updates:
let localPlayer;

async function getMatch() {
  let startNewMatch = confirm('Start a new match?')
  let starting_x = randi(20, 400)
  let starting_y = 30

  listenForPresences()

  if (startNewMatch) {
    activePlayers[session.user_id] = createPlayer(starting_x,starting_y)
    createMatch()
  } else {
    let id = prompt('Please enter a match id to join.')
    joinMatch(id)
    activePlayers[session.user_id] = createPlayer(starting_x,starting_y)
  }
  localPlayer = activePlayers[session.user_id]
}
In the code above, you create a player once a user creates or joins a match. You add that player to your activePlayers and then set a variable localPlayer so you can keep track of them throughout the game.
Now you should be able to create a new match on the host side and then join the match on the guest side and see a single player for each. On your host side, you’re aware of your guest but only as a key in your activePlayers object. You haven’t created a Kaboom player object for them, so you can’t see them in the game world. The same goes for the host player on the guest side of things. To fix this, you need three things:
- A way to transmit the state of your
localPlayerto all the other players in the match. - A way to create player objects locally for any player that joins the match.
- A way to be able to update in real time the state of all the players that aren’t
localPlayer.
Basically, you want to send and receive a bunch of data, and you want to do it fast (i.e., every frame) to make sure there is no lag between what a host sees and what the guests see.
Sending Data
Let’s start by sending data anytime you update the state of your localPlayer. You can do that by revisiting the code you set up for player movement.
onKeyPress("space", () => {
    if (localPlayer.isGrounded()) {
      localPlayer.jump()
      socket.sendMatchState(matchID , 2, localPlayer)
    }
})

keyDown('left', () => {
  localPlayer.move(-MOVE_SPEED, 0)
  localPlayer.dir = vec2(-1, 0)
  socket.sendMatchState(matchID , 3,  localPlayer)

})

keyDown('right', () => {
  localPlayer.move(MOVE_SPEED, 0)
  localPlayer.dir = vec2(1, 0)
  socket.sendMatchState(matchID , 4, localPlayer)

})
Here, you again use your socket connection to send data to the server. The server will take care of broadcasting your data to the rest of the players connected to the match. All you need to provide is a matchID, an op_code (more on this later), and your data, which in this case is the entire player object. Now, anytime your localPlayer moves or jumps, their information will be sent to the server.
Listening for Data
Now you need to write some code that receives the data you just sent so that you can receive all the data sent by other players and then use it to update the player positions on your local screen.
To do that, you can create another listener:
async function listenForData() {
  socket.onmatchdata = (res) => {
    player = activePlayers[res.presence.user_id]
    console.log(player)
  }
}
And then you need to call it in the getMatch function:
async function getMatch() {
  let startNewMatch = confirm('Start a new match?')
  let starting_x = randi(20, 400)
  let starting_y = 30

  listenForPresences()
  listenForData()
Rerun the code on the host side; then join the new match on the guest side. Start moving your player on the host side, and you should see your print statement on the guest side. Your listener should be working.
Note that if you encounter an error, like TypeError: cyclic object value, you’ll need to take an additional step here. Copy the code from this file into your project. Then anywhere you are callingsendMatchState, you’ll need to wraplocalPlayerinJSON.decycle(). So for example,socket.sendMatchState(matchID , 3, localPlayer)would becomesocket.sendMatchState(matchID , 3, JSON.decycle(localPlayer)).
But you don’t want to just print the data to a console. You want to use it so you know how to update the player in the game. That’s where the opt_code comes in. You can use the player user_id to look them up in your activePlayers object and then update the player object based on the opt_code. The opt_code can be any integer, so you can decide what each one stands for.
async function listenForData() {
  socket.onmatchdata = (res) => {
    player = activePlayers[res.presence.user_id]
    if(player == ''){
      res.op_code = 1
    }
    switch (res.op_code) {
      case 1: // create a new player after they join
        activePlayers[res.presence.user_id] = createPlayer(res.data.pos.x, res.data.pos.y)
        break
      case 2: // jump
        player.jump()
        break
      case 3: //left
        player.move(-MOVE_SPEED, 0)
        player.dir = vec2(-1, 0)
        break
      case 4: //right
        player.move(MOVE_SPEED, 0)
        player.dir = vec2(1, 0)
        break
    }
  }
}
Let’s also add a line to transmit player data after they join a match:
// This is inside of getMatch
let id = prompt('Please enter a match id to join.')
joinMatch(id)
activePlayers[session.user_id] = createPlayer(starting_x,starting_y)
// after we create a player object, send that data out to the other users connected to the match.
socket.sendMatchState(matchID , 1, activePlayers[session.user_id])
Now, if you create a new match and then join it on the guest side, you should see all your actions on the guest side reflected on the host side.
One problem you may notice is that you don’t see the host player appear on the guest side until you have the host player move. That’s because you aren’t sending any data on the player’s location until they move. You need to be sending data even if the player is idle; this way, if you join a match where a player isn’t moving, you still see their player object show up on your screen.
In your getMatch function, you can add a listener to the localPlayer that will send data even when the player isn’t moving:
// in getMatch function
  localPlayer = activePlayers[session.user_id]
  localPlayer.onUpdate(() => {
    socket.sendMatchState(matchID , 5, activePlayers[session.user_id])
  })
}
Then you can add a case to your switch statement in listenForData:
  case 5: // idle.
    player.x = res.data.pos.x
    player.y = res.data.pos.y
    break
If you take a look at the switch statement, you’ll notice that what actually happens if there is no player object is that the opt_code gets reset to 1 and then enters the createPlayer case. If not, this case will trigger, which shouldn’t move the player at all. It’ll also help if the player gets pushed by another player. If the player isn’t moving by triggering any button presses, you can still keep track of where they are.
Now, if you run the game again, you should see all the players in the game instantly show up when you join a match. Try opening a few more windows and joining the match to see your characters get added as they join.
Conclusion
In this tutorial, you learned how to make a multiplayer game using Kaboom in Replit. By using Heroic Labs as the game server, you created a game with multiplayer functionality that has a lot of cool features that enhanced the game and brought it to life.
Replit is a simple yet powerful online IDE and AI game builder tool that can be used to make games (among other things). Replit makes development a breeze. With a Kaboom template provided by Replit, you were able to create, test, and share your game without having to manage any deployments or servers beyond your Heroic Labs backend.

