If you’ve been debating which new programming language to learn, Rust is a strong option. According to a recent Stack Overflow developer survey, Rust is:
- The most loved programming language, according to almost eighty-seven percent of surveyed developers.
- One of the highest-paid languages, only behind Ruby, Perl, and a pack of ever-lucrative functional languages.
The best way to learn Rust, of course, is to start coding. This is where Replit comes in.
Replit is a collaborative in-browser integrated development environment (IDE) that supports over fifty programming languages with built-in tooling to write and organize code; manage dependencies; perform version control; and build, run, test, and visualize execution of applications.
There are a few reasons to use Replit when learning Rust:
- Replit gives you a ready-to-use environment to play with a new language or framework. No need to worry about prerequisites, SDKs, package managers, or runners—just focus on coding.
- Replit’s real-time collaborative environment is a great fit when you learn in a group or want to perform assignments in a guided learning setup.
In this tutorial, you’re going to roll out a ready-to-use Rust development environment using Replit and then build a demo application.
Creating a Rust Workspace on Replit
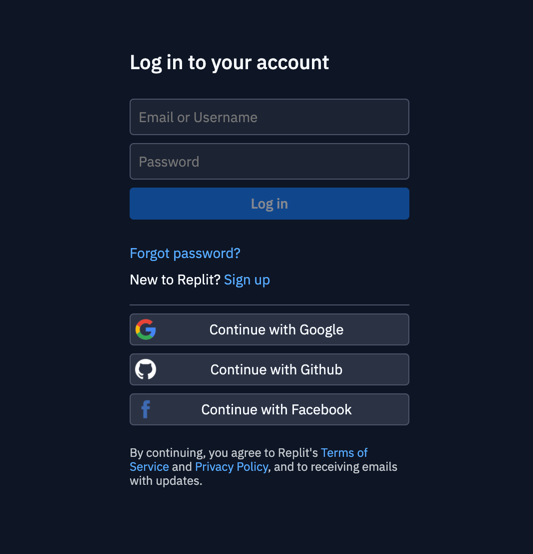
First, set up your workspace. Log in to Replit using your Google, GitHub, or Facebook account:
You’ll see the home page:
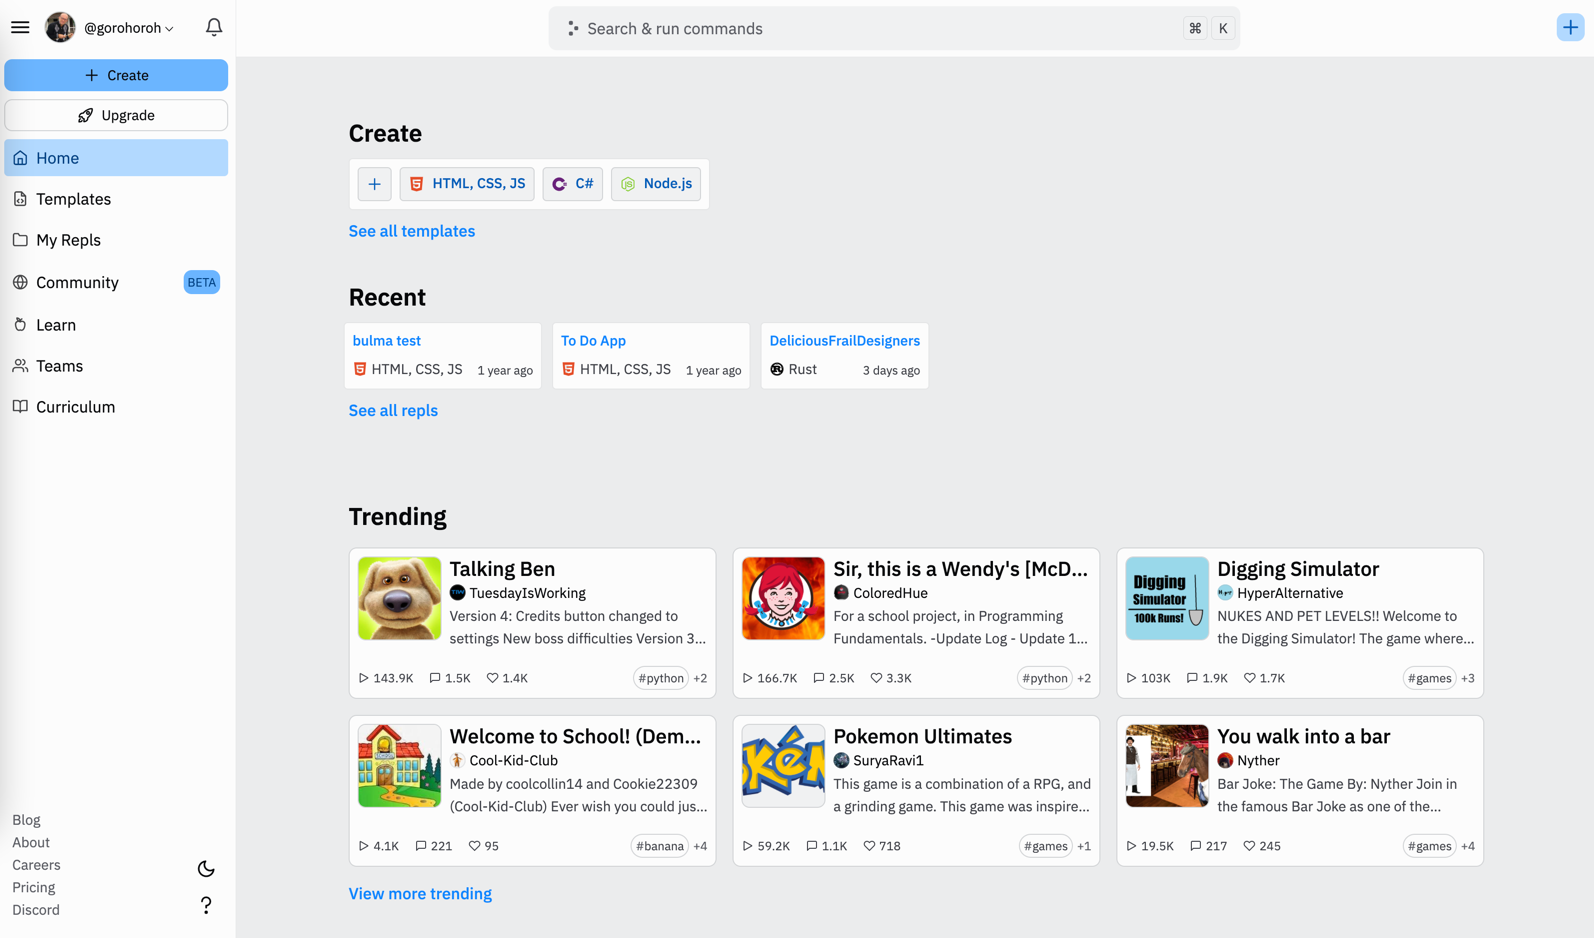
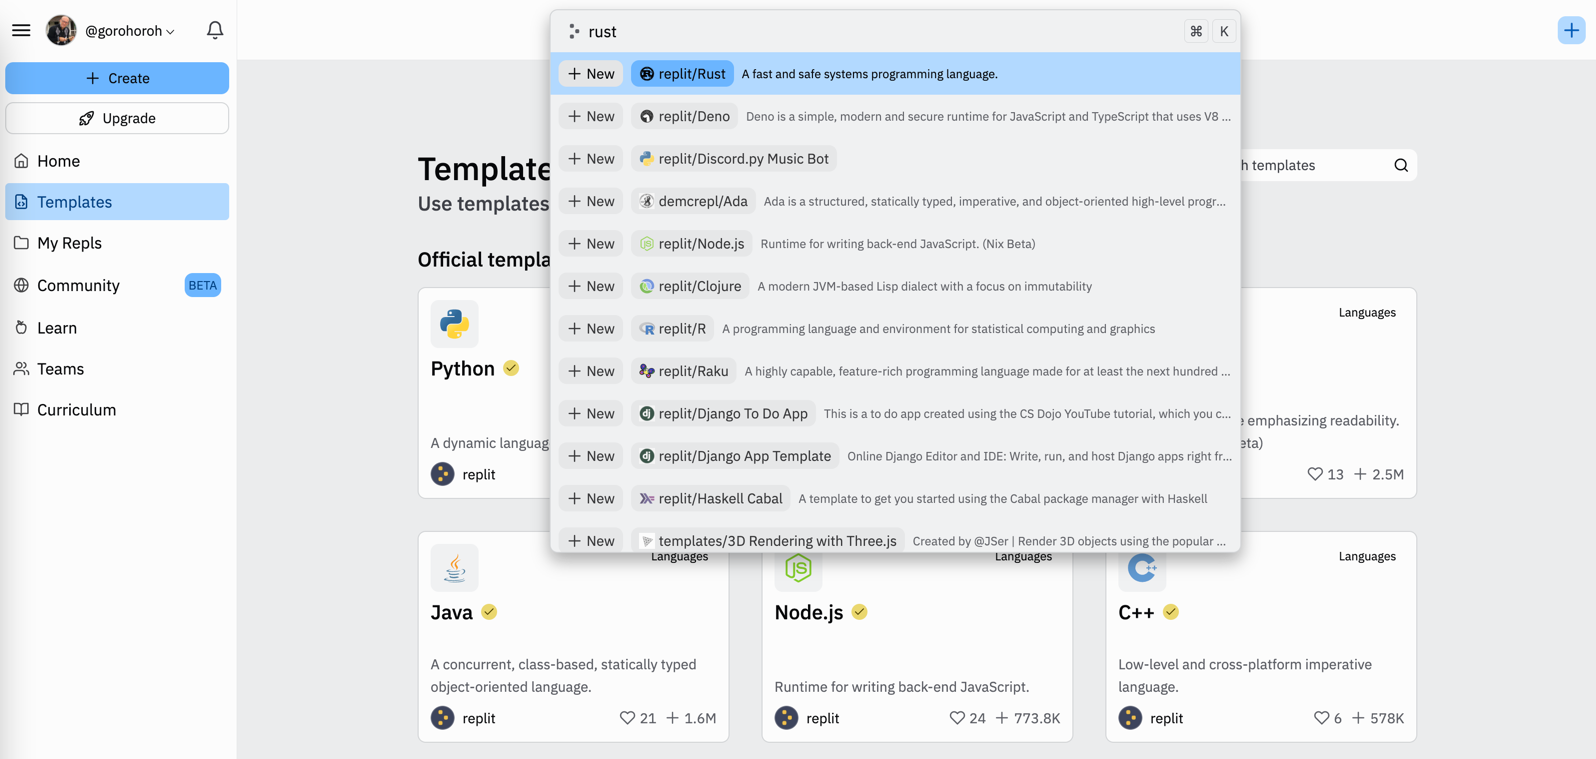
To create a new Replit workspace (a.k.a. repl) for Rust development, click the blue + icon in the top right corner. For a shortcut, go to the Search & run commands field, type rust, and select the suggested replit/Rust project template:
Confirm or correct the suggested repl settings and click Create Repl:
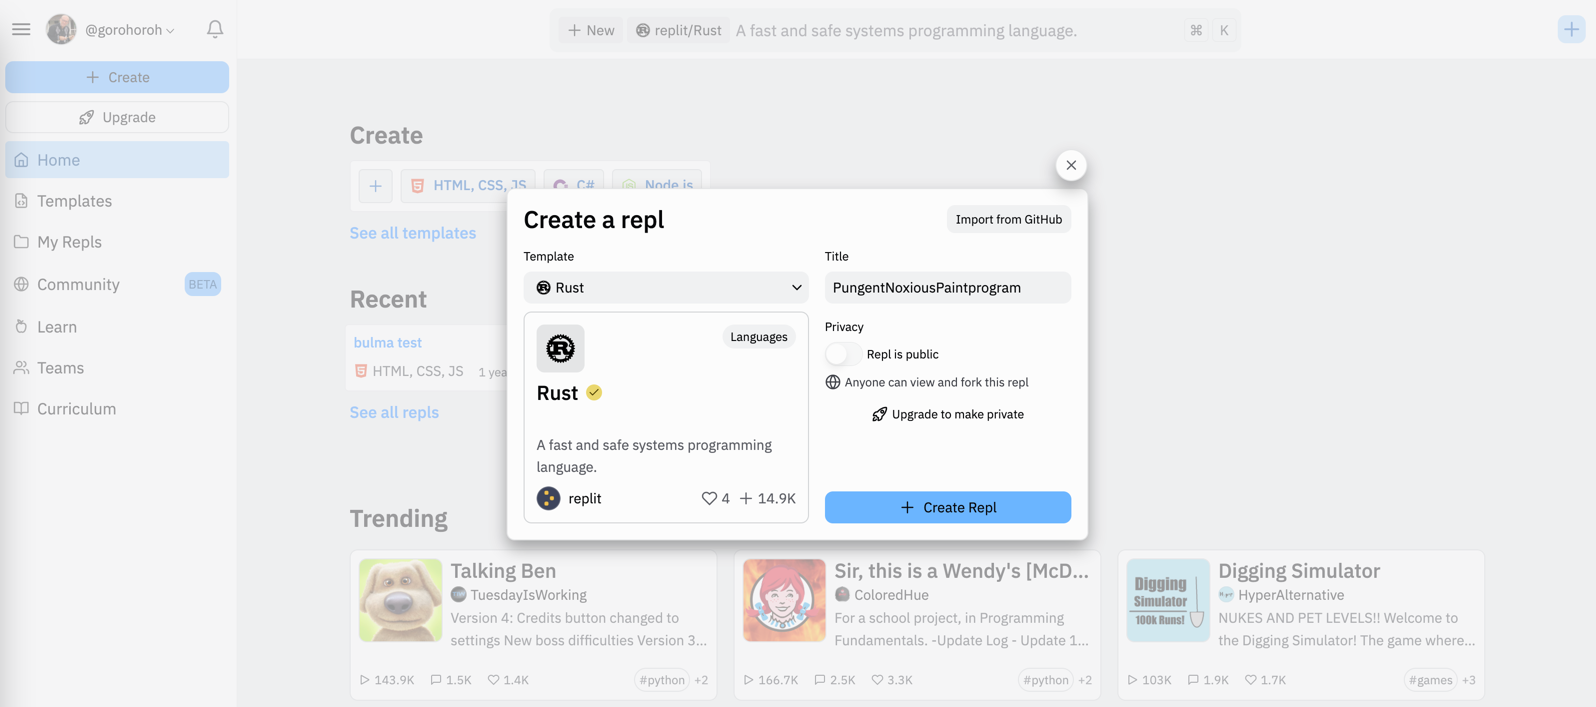
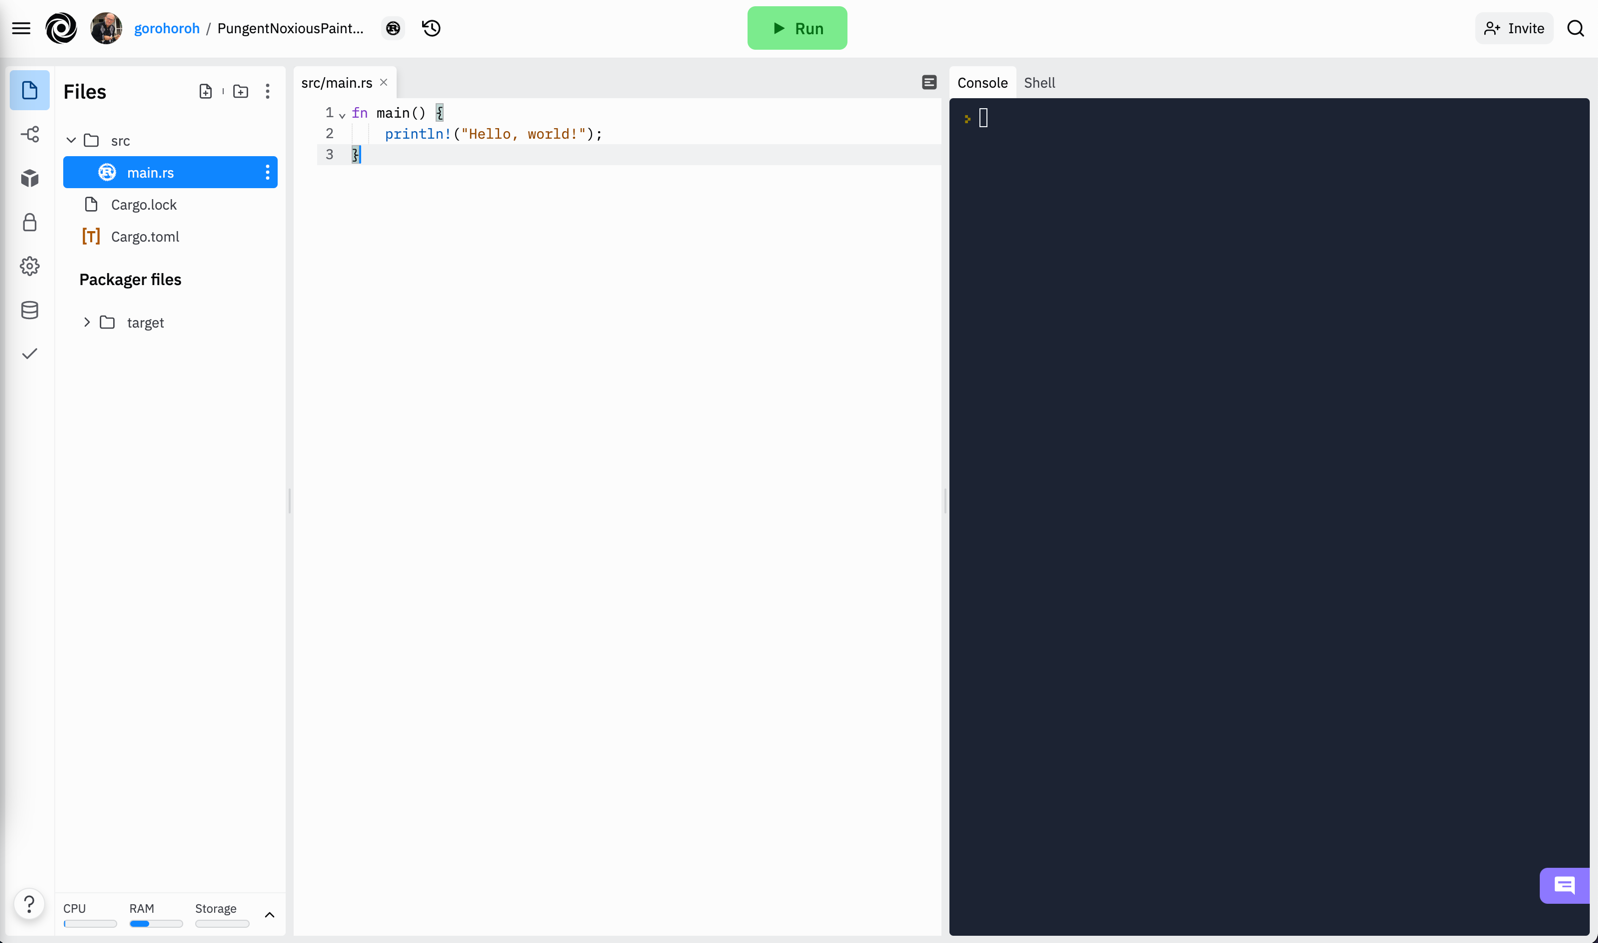
You should see a ready-to-use Rust repl with a basic Hello, world! Rust application:
Exploring the Rust Workspace
Your workspace view will consist of a few major components:
- The code editor in the middle is where you’ll spend most of your time. Based on CodeMirror, it provides basic Rust code editing functionality like syntax highlighting, matching delimiters, and code folding, as well as more advanced features like navigation, reference search, formatting, and code actions.
- On the right, you can see a pane with two tabs: Console and Shell. Both can be used for performing Bash-style commands, but the Console is also used to display the output of your Rust application whenever you click Run.
- On the left, the Files pane displays the structure of your repl, including source files and package manager configuration files, as well as the build output in the Packager files section.
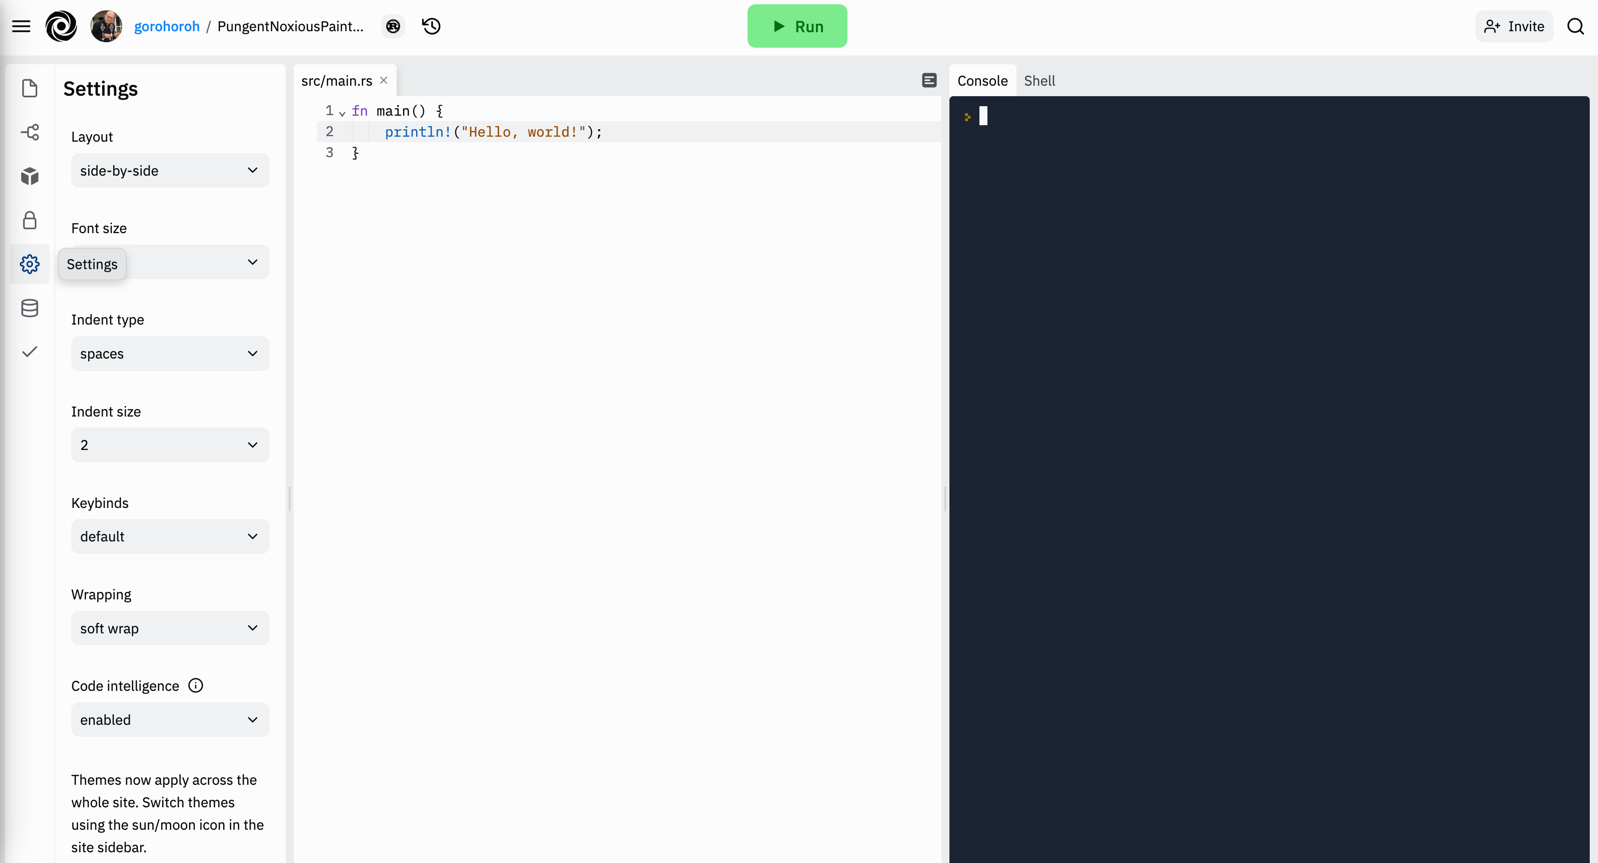
- The vertical control bar to the left of the Files pane lets you open other panes in the same area. These include Version control, Packages, Secrets, Settings, Database, and Unit tests.
- The Run button at the top helps build and run your application.
By default, a new Rust repl contains a single source file, main.rs, inside the src directory. The file contains the entry function main() that prints “Hello, world!”
The repl also contains two configuration files, Cargo.toml and the auto-generated Cargo.lock, which are related to Cargo, Rust’s package manager. Cargo uses a few package layout conventions, one of which makes src/main.rs the default executable file.
If you click Run and watch the Console pane, the cargo run command will start, followed by a few lines of build progress reports, and Hello, world! will be displayed:
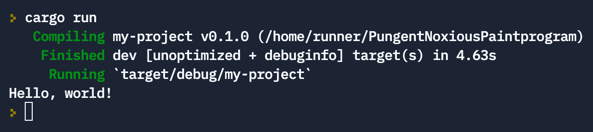
This means that the Rust environment set up by Replit is working just fine.
Writing a Rust Application on Replit
You’re going to write a small Rust application using your new repl. This application will consist of a few source files and unit tests, depend on an external package, and use Replit’s built-in key-value database.
Adding a Library Function
The default repl currently contains a single file, src/main.rs, with the main() function serving as the application’s entry point. You’ll extend this file later, but for now, add a different file to host a function that implements the binary search algorithm:
In the Files pane, right-click the src node and select Add file:
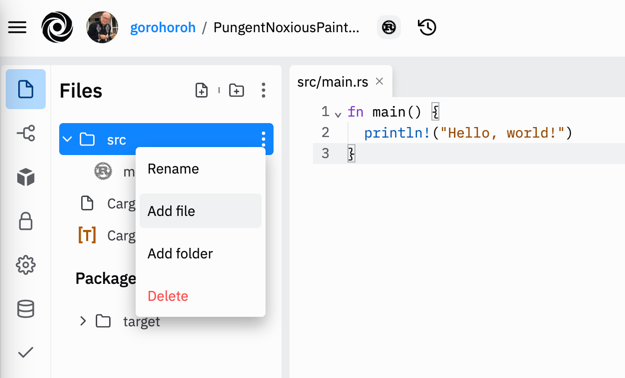
Name the file lib.rs and press Enter. The file will be created and opened in the code editor.
Switch to the code editor and paste the following code into lib.rs:
pub fn find(array: &[i32], value: i32) -> Option<usize> {
    let mut left_boundary = 0;
    let mut right_boundary = if array.len() > 0 { array.len() - 1 } else { 0 };
    let mut diff_between_boundaries = right_boundary - left_boundary;
    let mut index;

    if array.len() == 0 || value > array[array.len() - 1] || value < array[0] {
        return None;
    }

    while diff_between_boundaries > 1 {
        index = left_boundary + (diff_between_boundaries / 2);
        if value == array[index] {
            return Some(index);
        } else if value > array[index] {
            left_boundary = index;
        } else if value < array[index] {
            right_boundary = index;
        }
        diff_between_boundaries = right_boundary - left_boundary;
    }

    if value == array[left_boundary] {
        return Some(left_boundary);
    }
    if value == array[right_boundary] {
        return Some(right_boundary);
    }
    return None;
}
Here are some notes on the code you just added:
src/lib.rsis the default location for a library file. This is based on the same Cargo conventions that makesrc/main.rsthe default executable file.- The
find()function takes two parameters. One of the parameters,&[i32], is an immutable reference, a.k.a. borrow. For more on borrowing and references, see the Rust book. - The
find()function returns a value of typeOption<usize>.Optionis a generic enum to represent nullable values. The enum contains two members,Some(value)andNone, either of which can be returned from the function. - The four local variables declared at the start of the function all have the
mutkeyword to allow updating their values. This is necessary because by default, local variables in Rust are immutable. - The
right_boundaryvariable demonstrates thatifcan be used as an expression the same way that ternary conditional operators are used in other languages.
Adding and Running Unit Tests
Next, add unit tests to check that binary search works correctly. You’ll borrow a test suite from Exercism’s binary search exercise.
In the Files pane’s toolbar, click Add folder:

Name the folder tests and press Enter. If necessary, drag the new folder to the root of the file tree to place it alongside src and Cargo.toml.
Right-click the new folder and select Add file. Name the new file tests.rs and press Enter.
Switch to the code editor and paste the following code into tests.rs:
use binary_search::find;

#[test]
fn finds_a_value_in_an_array_with_one_element() {
    assert_eq!(find(&[6], 6), Some(0));
}

#[test]
fn finds_first_value_in_an_array_with_two_element() {
    assert_eq!(find(&[1, 2], 1), Some(0));
}

#[test]
fn finds_second_value_in_an_array_with_two_element() {
    assert_eq!(find(&[1, 2], 2), Some(1));
}

#[test]
fn finds_a_value_in_the_middle_of_an_array() {
    assert_eq!(find(&[1, 3, 4, 6, 8, 9, 11], 6), Some(3));
}

#[test]
fn finds_a_value_at_the_beginning_of_an_array() {
    assert_eq!(find(&[1, 3, 4, 6, 8, 9, 11], 1), Some(0));
}

#[test]
fn finds_a_value_at_the_end_of_an_array() {
    assert_eq!(find(&[1, 3, 4, 6, 8, 9, 11], 11), Some(6));
}

#[test]
fn identifies_that_a_value_is_not_included_in_the_array() {
    assert_eq!(find(&[1, 3, 4, 6, 8, 9, 11], 7), None);
}

#[test]
fn a_value_smaller_than_the_arrays_smallest_value_is_not_included() {
    assert_eq!(find(&[1, 3, 4, 6, 8, 9, 11], 0), None);
}

#[test]
fn a_value_larger_than_the_arrays_largest_value_is_not_included() {
    assert_eq!(find(&[1, 3, 4, 6, 8, 9, 11], 13), None);
}

#[test]
fn nothing_is_included_in_an_empty_array() {
    assert_eq!(find(&[], 1), None);
}
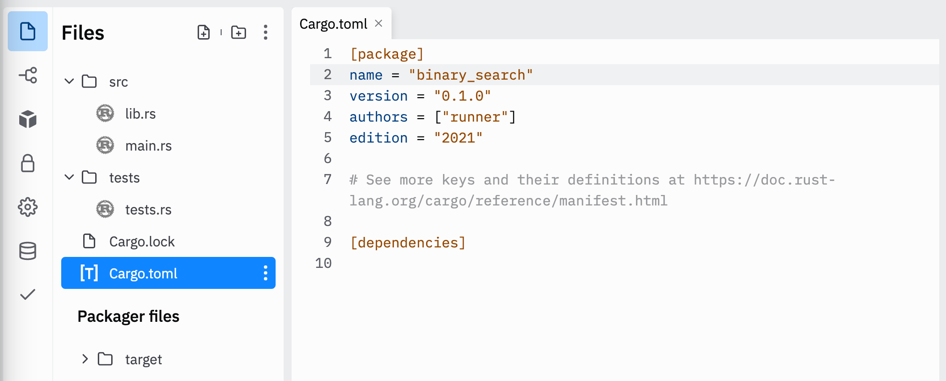
Open Cargo.toml in the editor. In the [package] section, locate the line with the name property and change it to read name = "binary_search":
In the Console pane on the right, run the following command:
cargo test
You should see the following output in the console:
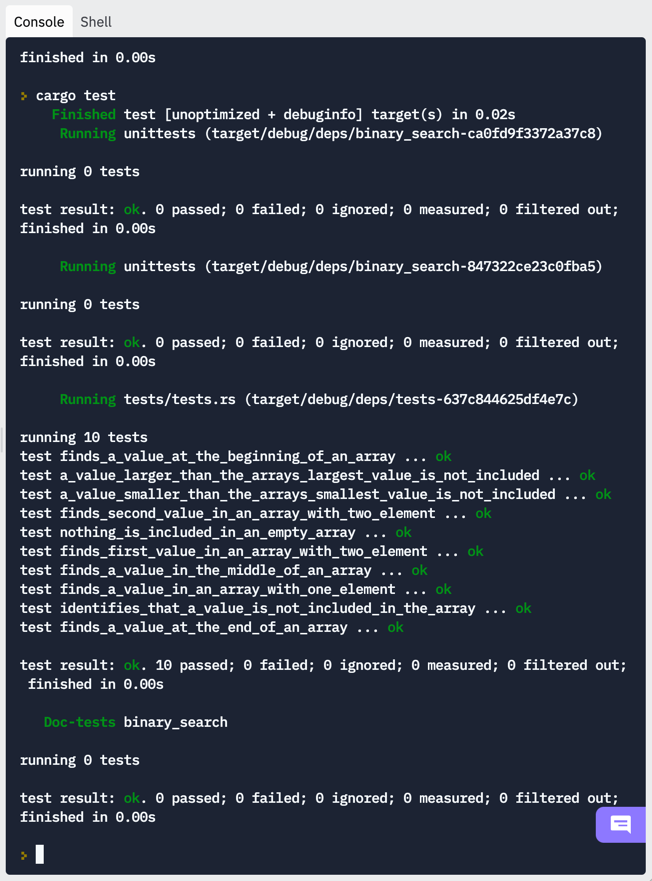
Cargo has detected unit tests in the tests directory, run them all, and reported that ten of ten available unit tests were passing.
Next you’ll return to the default executable file, src/main.rs, to perform binary search with user-submitted values.
Reading User Input
The executable file in your repl runs in a console environment. You’re going to add interactivity and enable it to read user input. Since the binary search function works with numbers, you’ll need to make sure that user input can be converted to an integer.
Open src/main.rs in the editor. Select all and paste the following code:
use std::io;

fn main() {
  read_input();
}

fn read_input() -> Option<i32> {
    println!("Please provide an integer value to search:");

    let mut input_text = String::new();
    io::stdin()
        .read_line(&mut input_text)
        .expect("Failed to receive value");
    let trimmed_input = input_text.trim();

    return match trimmed_input.parse::<i32>() {
        Ok(int_value) => {
            println!("Great! Let's search for {}", int_value);
            Some(int_value)
        }
        Err(..) => {
            println!("Oops, {} doesn't look like an integer", trimmed_input);
            None
        }
    };
}
Here’s what happens in this code:
- The
main()function calls a new function,read_input(). read_input()prompts the user to enter a number to search, reads user input, checks if it’s actually a number (more specifically, if it can be converted to integer typei32), and reports an error otherwise.- The
parse::<i32>()function returns aResult. Similar toOption, this is another commonly used generic enum that helps either return a value or fail. The two variants of this enum areOkandErr, and here they are used as two cases of thematchstatement. - The
..operator inErr(..)is used to ignore the error information object. Here, it’s replaced with a custom error message. - Note that inside the two cases of the
matchblock, there's noreturnkeyword. If the last statement in amatchis an expression without a semicolon, Rust knows it’s a return statement.Some(int_value)in theOkblock is therefore equivalent toreturn Some(int_value);.
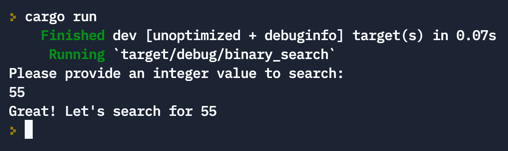
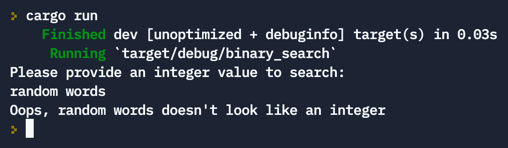
If you click Run, you’ll be prompted to enter a number to search. Here’s what the output is like in two different scenarios.
If you enter an integer, the application will acknowledge the input as valid:
If you enter anything that can’t be interpreted as an integer, the application will report an error:
Passing User Input to the Library Function
Now that the application can perform binary search and process user input, it’s time to connect the dots.
Open src/main.rs in the code editor. Add a new line to the beginning of the file and insert a new import statement:
use binary_search::find;
Select the main() function and paste the following code:
fn main() {
    if let Some(int_value) = read_input() {
        try_find(int_value)
    }
}
At the end of the file, insert the following new function:
fn try_find(int_value: i32) {
    let array = &[1, 3, 5, 8, 13, 21, 34, 55, 89, 144, 233, 377, 634];

    match find(array, int_value) {
        None => println!("This number was not found in the array"),
        Some(found_position) => {
            println!(
                "Found the value at position {}", &found_position
            );
        }
    }
}
Here are a few things to note about these code updates:
- The
main()function now checks ifread_input()returned an actual integer, and if it did, the integer is passed to the newtry_find()function. Notice the use of theif letsyntax, which is significantly shorter than writing amatchand ignoring one of its cases. - The new
try_find()function serves as a wrapper for the binary search function, displaying user-friendly messages depending on search results. It also hard-codes an array to search in.
Click Run and try entering a valid number to search for.
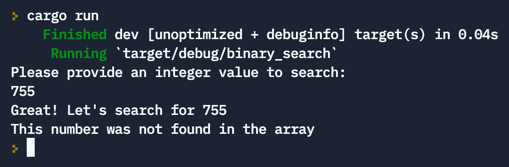
If you enter 755, which is larger than the largest number in the hard-coded array, the application will correctly report that it’s not found in the array:
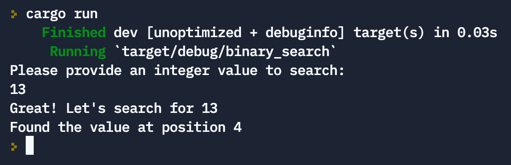
If you enter 13, which is in the array, the application will report that the number is found and specify its exact position in the array:
The application now receives user input, validates it, passes over to the binary search function, and reports readable results.
Adding a Third-Party Package
This demo application uses Cargo to maintain its structure and run commands. Cargo is a package manager that helps add and use packages from the community registry. For example, if you don’t like the way the application displays its messages in the console, you can install a package to change that.
To the left of the Files pane, click the Packages icon to display the corresponding pane:
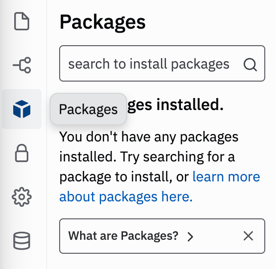
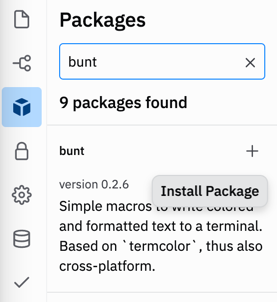
Using the search bar in the Packages pane, look for a package called bunt.
When search results appear, click the + icon next to the search result for bunt to install the package:
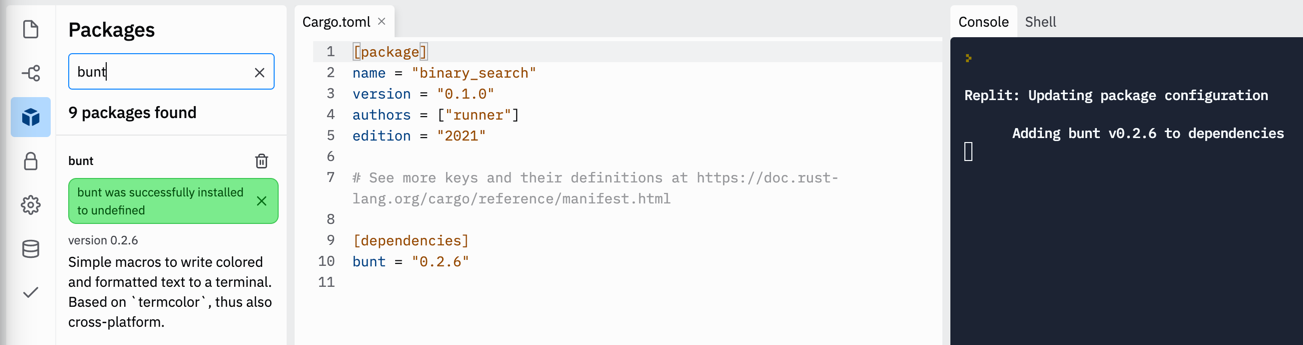
Replit will launch a Cargo command to install the package and report progress in the Packages and Console panes. Once installation is complete, open Cargo.toml from the Files pane and verify that the bunt package is added to the [dependencies] section:
Open src/main.rs and add a new import statement at the beginning of the file:
use bunt;
Inside the try_find() function, locate the second print statement:
println!("Found the value at position {}", &found_position);
And replace it with the following:
bunt::println!("{$green}Found{/$} the value at position {[green+bold]}",
                &found_position);
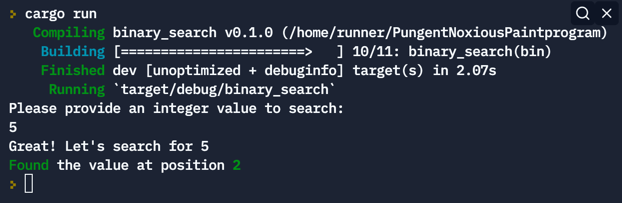
The application now uses formatting style tags provided by the bunt package to format the console output when it finds a submitted number. To see what it looks like, click Run and search for a number that you know can be found in the hard-coded array, such as 5:
Working with the Replit Database
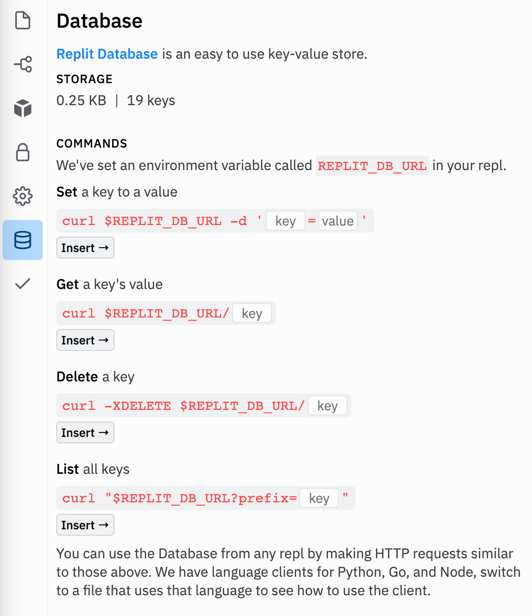
Every repl, including this Rust repl, comes with a bundled key-value database that can be accessed via an environment variable, REPLIT_DB_URL. The Database pane on the left contains quick documentation on the various commands that you can perform with the database:
You’ll add two functions to work with the database. One will save each found number along with its position in the array, and the other will read and display all numbers found in the array so far.
In the Files pane, right-click the src folder and select Add file.
Name the file db.rs and press Enter. The file will be created and opened in the code editor.
Switch to the code editor and paste the following code into db.rs:
use std::env;
use std::process::Command;

pub fn read_all_from_db() {
    let read_all_command = Command::new("curl")
        .arg(format!("{}?prefix=", get_replit_db_url()))
        .output()
        .expect("Failed to read all keys");

    println!(
        "All numbers found in the array so far: \n{}",
        String::from_utf8_lossy(&read_all_command.stdout)
    );
}

pub fn save_to_db(key: &i32, value: &usize) {
    let key_value_pair = format!("{}={}", key, value);

    Command::new("curl")
        .arg(get_replit_db_url())
        .arg("-d")
        .arg(&key_value_pair)
        .output()
        .expect("Failed to create a new key-value pair");
}

fn get_replit_db_url() -> String {
    return env::var("REPLIT_DB_URL").unwrap();
}
Open main.rs in the code editor and insert the following code between the import statements and the main() function:
mod db;
In main.rs, select the try_find() function and paste the following:
fn try_find(int_value: i32) {
    let array = &[1, 3, 5, 8, 13, 21, 34, 55, 89, 144, 233, 377, 634];

    match find(array, int_value) {
        None => println!("This number was not found in the array"),
        Some(found_position) => {
            bunt::println!(
                "{$green}Found{/$} the value at position {[green+bold]}",
                &found_position
            );
            db::save_to_db(&int_value, &found_position);
        }
    }

    db::read_all_from_db();
}
Here’s what’s happening:
db.rscontains three functions:get_replit_db_url()reads the URL of the database from the environment variable.save_to_db()programmatically performs acurlcommand to write a new key-value pair.read_all_from_db()performs anothercurlcommand to read all keys that were previously added to the database, then writes the list of keys to the console.
- Two of the three functions in
db.rsuse thepubmodifier that is necessary to make them visible from the call site. By default, all functions in Rust are private. - In
main.rs, the statementmod db;declaresdbas a submodule ofmain.rs, which is what makes functions defined indb.rsaccessible frommain.rs. - The
try_find()function calls two database functions by prefixing each of them with the module name.save_to_db()is only called when a submitted number is found in the array, andread_all_from_db()is called every time after a search.
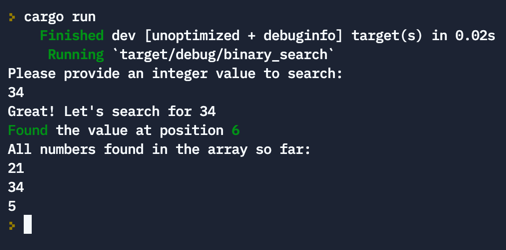
If you run the application and search for a few numbers, you’ll see that each new found number is saved to the database and immediately displayed in the console along with all numbers found previously:
Conclusion
That’s it! You’ve learned how to create a simple Rust application online using Replit. Now you know how to create a Rust repl, run Rust applications and unit tests, install third-party packages, and interact with Replit’s bundled key-value database.
With this tutorial, you’ve gotten a good start in learning Rust. Be sure to keep expanding on this knowledge. Experience with this popular language can be a real asset to you as you build your programming career.