Django is a Python framework for building out full-fledged web applications. It’s loved by developers due to its battery-included philosophy and comes preloaded with features you can use to rapidly develop your web application.
Authentication and authorization have been previously incorporated into Django, which means you can focus on writing your app because the basic web development functionality has already been done.
Deploying Django can be taxing due to the production environment varying from the development environment on your local machine forcing you to use different operating systems and system configurations.
Technology like Docker can simplify this process. However, Replit simplifies the process even more by handling environment configuration and dependencies, which means less configuration on your end.
Replit also allows for real-time collaboration. You can access Replit on any platform that has an active internet connection, and you can edit your code and connect with other developers anytime and anywhere.
In this tutorial, you’ll learn why you should use Replit and how to deploy your Django project to it.
Disclaimer: You’ll still want to do some advanced database configuration in order to make your application robust and secure. This additional configuration helps to make your application production ready.
Getting Started with Replit
To get started, navigate to Replit and create an account.
Once signed up, you’ll be taken to the dashboard where you can create a new application.
Create an application by selecting the plus icon as shown in the screenshot below.
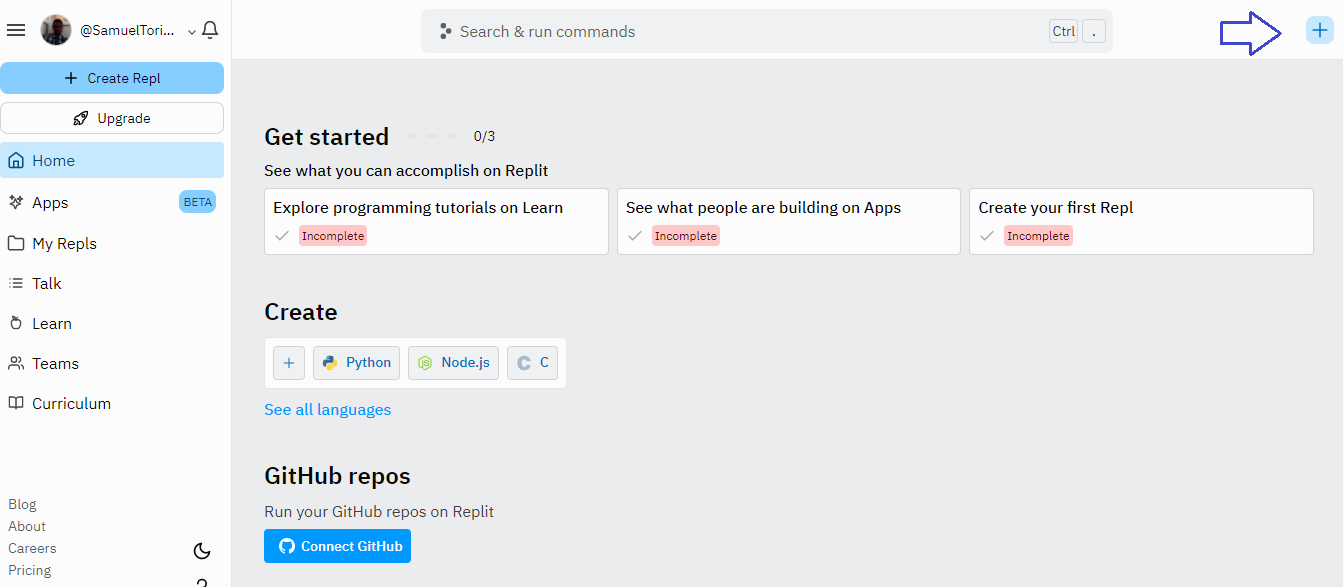
Replit provides you with a base template to work with while using Django, so you don't have to start from scratch.
After clicking on the plus sign, a modal will appear where you can search for Django App Template and give the repl a name. If your Django project is already on GitHub you can import it from this same modal screen.
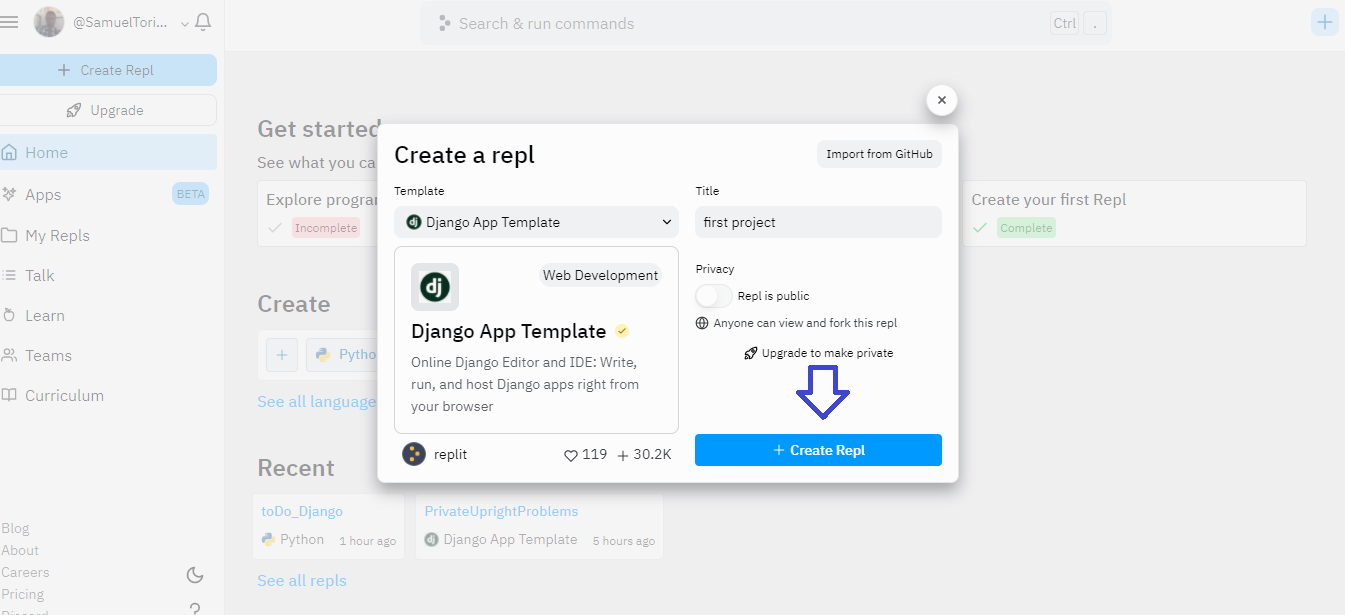
Click Create Repl and Replit will create a Django project and navigate you to the online code editor, where you can start hacking.
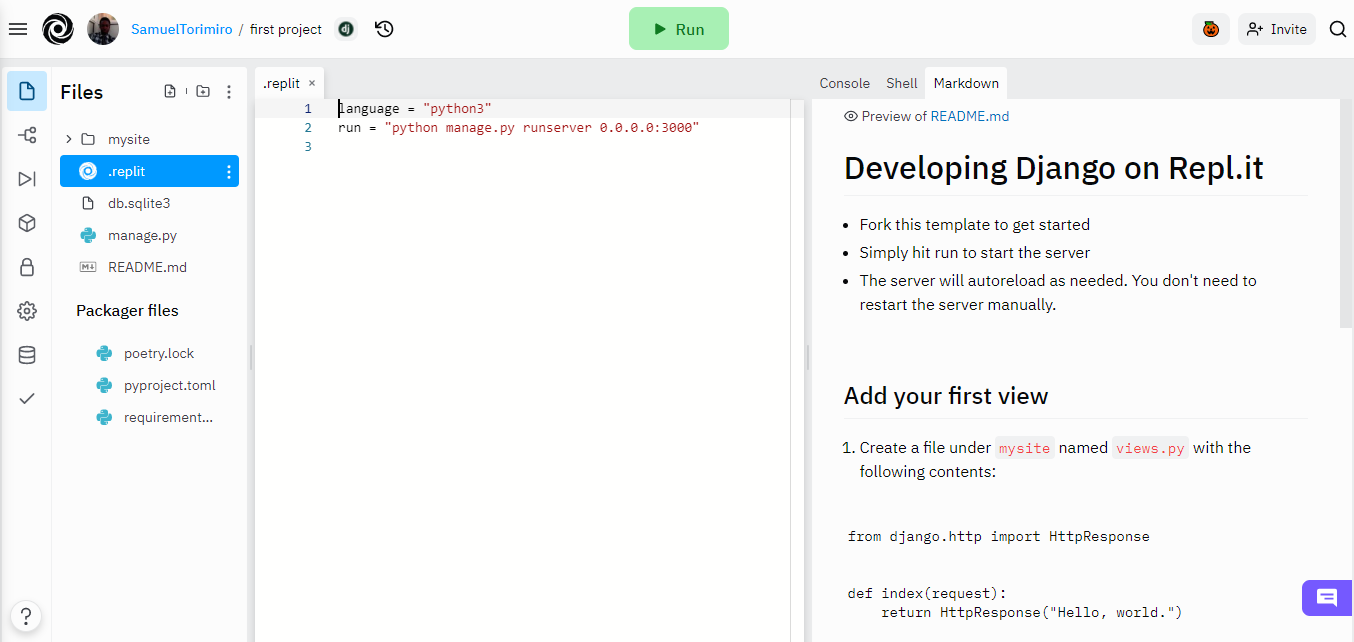
On the left section of the project page, you have the files and folder that have been created. You also have the ability to create your file or folder, as is standard in most code editors.
The middle section has the code editor itself, where you can write your code and on the right, you have the output/shell/console.
Take note of the .replit file. This is very important once you want to deploy your application to the internet. If you imported your code through GitHub, you may need to manually add this file. This will be addressed later in the article.Deploying Django
Before you begin, the code must be written that will import to the required framework or library. In this case, the code has been written for you using the default Django App Template.
Replit deploys to a web server by:
- Listening to the port in order to start the server successfully. In this case, this step is taken completed for you with the
replitfile. - Then directly start the server and the application will be hosted automatically. When you click on the play button, the web application will appear with the domain Replit supplies.
Now you have successfully deployed Django to Replit and can share the domain, so others can view your application.
Creating a Django Application
After deploying to Django, it’s time to create the application.
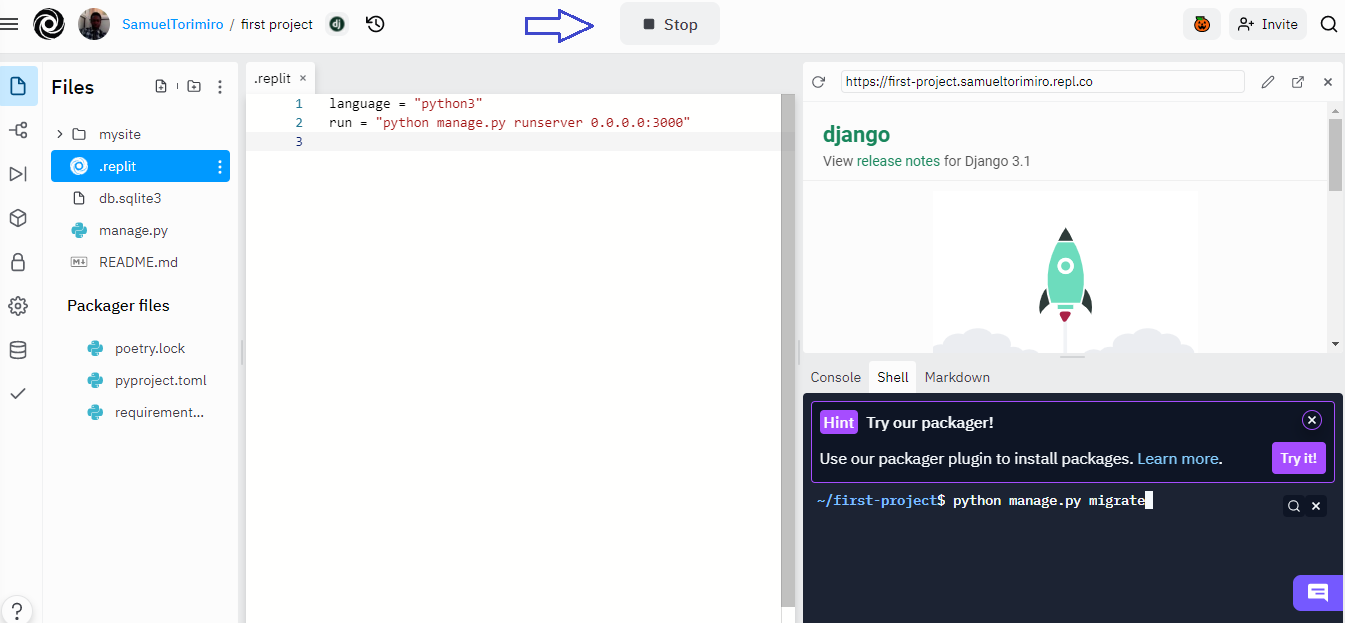
Before you begin, you need to migrate your database, by running the python manage.py migrate in the Shell.
Then create a new Django application called tasks by running python manage.py startapp tasks in the Shell.
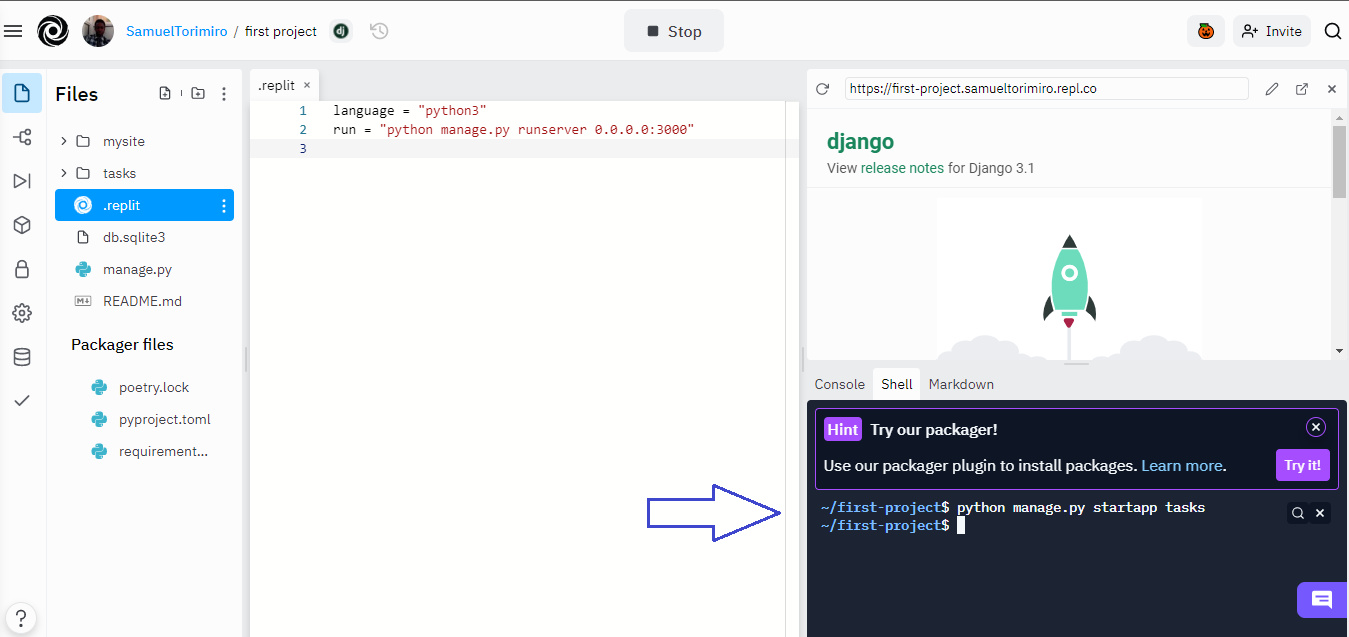
This will create a new folder called tasks with all the necessary files.
Include this code inside the INSTALLED_APPS array under the mysite/settings.py file.
py
...
'tasks.apps.TasksConfig',
Here, you are telling Django about the new application that was created.
The server automatically reloads and reflects necessary changes, however, you can also refresh your browser.
Next, update the mysite/urls.py file, by adding the path below to the existing path:
py
...
path("", views.index),
Don't forget to include the imports:
py
from tasks import views
Next, update the tasks/views.py file.
py
from django.shortcuts import render

# Create your views here.

def index(request):
    return render(request, "index.html", {})
Finally, you need to create a new folder called templates inside the tasks application. Then create a new file called index.html inside templates.
Inside index.html add:
html
<!DOCTYPE html>
<html>
    <head>
        <meta charset="utf-8" />
        <meta name="viewport" content="width=device-width, initial-scale=1" />
        <title>Task Tracker</title>

        <link
            href="https://cdn.jsdelivr.net/npm/[email protected]/dist/css/bootstrap.min.css"
            rel="stylesheet"
            integrity="sha384-EVSTQN3/azprG1Anm3QDgpJLIm9Nao0Yz1ztcQTwFspd3yD65VohhpuuCOmLASjC"
            crossorigin="anonymous"
        />
    </head>
    <body>
        {% csrf_token %}
        <div class="container">
            <br />
            <h2><strong>Task Tracker 📝</strong></h2>

            <br />

            <ul class="list-group">
                <li class="list-group-item mb-2">Wash the Car</li>
                <li class="list-group-item mb-2">Make the Bed</li>
                <li class="list-group-item mb-2">Walk the Dog</li>
            </ul>
        </div>

        <script
            src="https://cdn.jsdelivr.net/npm/[email protected]/dist/js/bootstrap.bundle.min.js"
            integrity="sha384-MrcW6ZMFYlzcLA8Nl+NtUVF0sA7MsXsP1UyJoMp4YLEuNSfAP+JcXn/tWtIaxVXM"
            crossorigin="anonymous"
        ></script>
    </body>
</html>
You have now added an application called tasks with a view function, template, and project URL to create a more presentable application. Refresh your browser and you should see the following screenshot:

This application can be extended further to include database interactions.
Importing from GitHub
In most cases, you will have a Django application running on your local machine that you now want to host on Replit.
Replit allows you to import projects from GitHub. For demonstration purposes, you'll be importing this Django application.
To begin, start on the Replit homepage and click on the plus sign to create a new project. Select Import from GitHub, and you'll see the following screen.
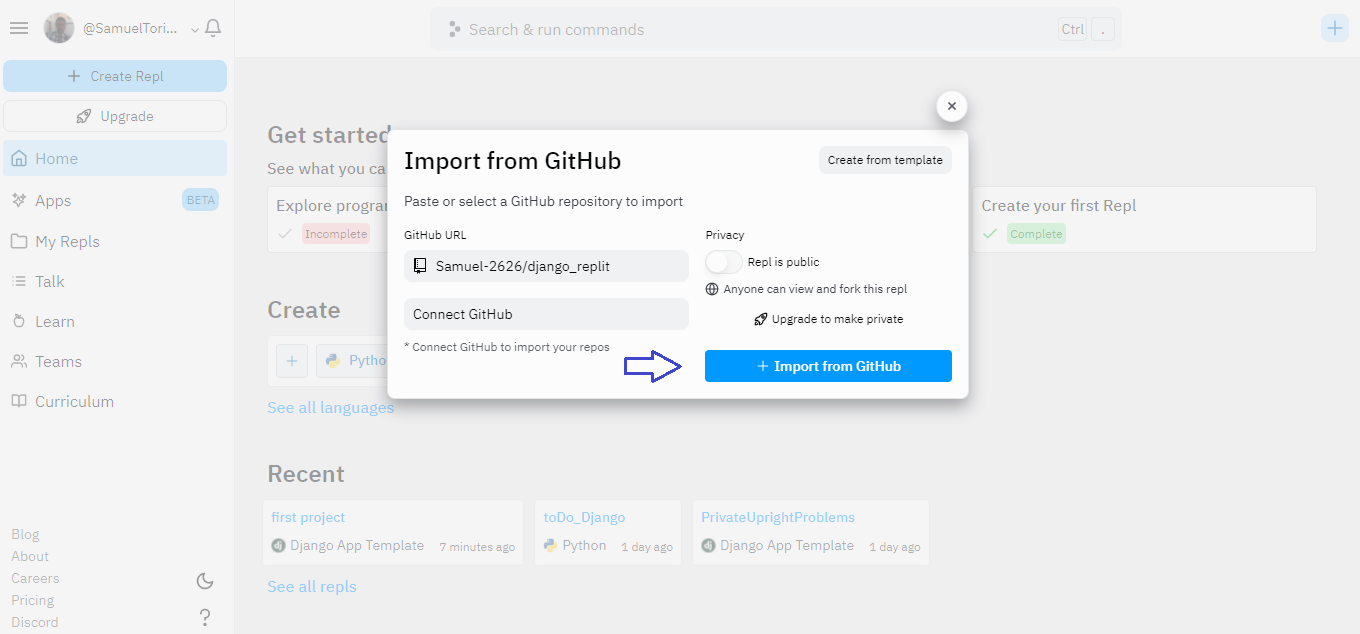
Paste this inside the GitHub URL input field https://github.com/Samuel-2626/django_replit and finally, import using the Import from GitHub button.
Replit will now try to clone the repo and after, you'll be navigated to the code editor where you can start hacking and host the application.
In order to create a .replit file to help bootstrap your server, paste python manage.py runserver 0.0.0.0:3000 by the left section under the configure the run button text.

Before you click on the play button, paste the following code in the replit_django_example/settings.py file. This allows Django to successfully run in Replit:
X_FRAME_OPTIONS = '*'
Run the server by selecting the play button. You’ll get a disallowed host. To solve this, copy your request_url and paste it in the settings.py:
ALLOWED_HOSTS = [ 'cb1a0754-b29b-4fef-a985-935aff18927d.id.repl.co']
You have now successfully deployed Django to Replit using GitHub as the intermediary.
Conclusion
Replit is an online integrated development environment (IDE) that can be used in a variety of ways. In this guide, you were taught how to host Django to Replit in order to take advantage of all the features Replit has to offer, like less configuration, making deploying apps a seamless event.
For serious applications, you’ll have to use a more robust database other than the default sqlite-3 and consider using a more friendly domain name.
Before deploying a production application to Replit, take a look at the official Django docs to learn more.