With the recent shift in the popularity of remote work environments, the demand for livestreaming services has increased. Even prior to the shift, many global companies have used livestreaming services for their organization’s all-hands meetings. api.video provides APIs and SDKs that make it easier to build your own livestreaming service and host it on your website. Additionally, they also provide solutions for uploading videos, encoding videos, video delivery, and video analytics. Here are some of the specific features of api.video:
- You can securely upload and store videos from your own user interface to api.video. The video can then be shared worldwide via their responsive video player. They also support progressive uploads that let you simultaneously upload large videos.
- You can customize your video player by choosing a video player theme, adding your own thumbnail image, and adding your own logo.
- You can create your own livestreaming service, which can either be done by using their API/SDK or by using their User Interface (i.e., you won’t have to code).
- You can access stats and analytics about your videos to learn more about your users and their engagement.
Some of the use cases for api.video include:
- Video Classes: teachers and tutors can use api.video’s video player or livestream facilities to host their classes online.
- Product Instruction Manuals: companies can create videos on how to use their product and host it via api.video’s customizable video player on their own website.
- Livestreams: livestreams via api.video’s livestream service can be used for various purposes, such as gaming, coding, concerts, watch parties, and more.
You can find more use cases on api.video’s blog here.
In this tutorial, you will build your own livestream service using api.video’s Node.js Client. You will then create a simple React App to host your livestream. All the development will be done using Replit, an in-browser IDE that supports more than fifty languages.
For easy access, here are some resources to help you follow along:
Implementing Your Own Livestream Service
The tutorial can be broken into three parts. In the first part, you will use api.video’s Node.js Client to create your own livestream service. In the second part, you will create a simple React App to host your livestream service. The UI can be built using any framework you prefer. For this tutorial, we’ll stick with React. Finally, you will connect Zoom to your livestream service for users to be able to view it.
Creating the Livestream Service
Before proceeding, you will have to create an account with api.video. Once you have an account, log in and head over to your dashboard. Scroll down, and you should see a Sandbox API Key:
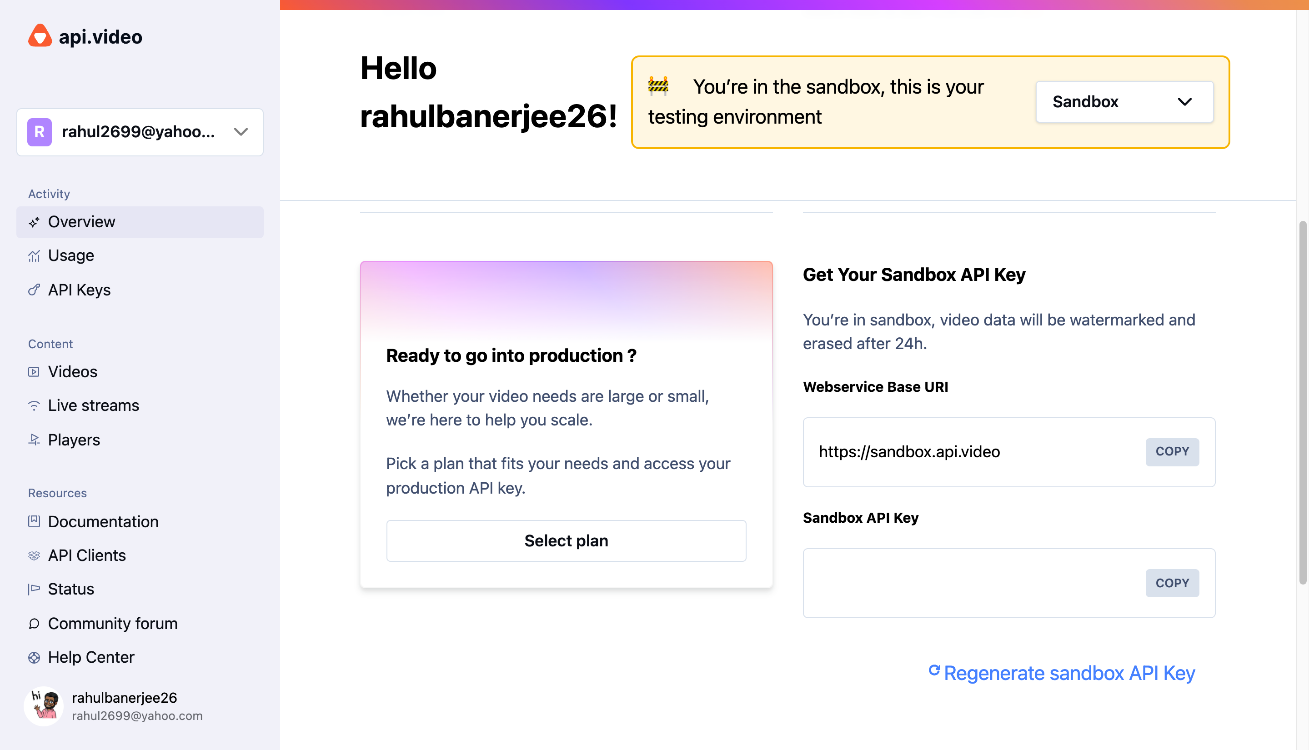
Copy this key. This will be used by api.video’s API to authenticate you. For this tutorial, you can work in a Sandbox environment.
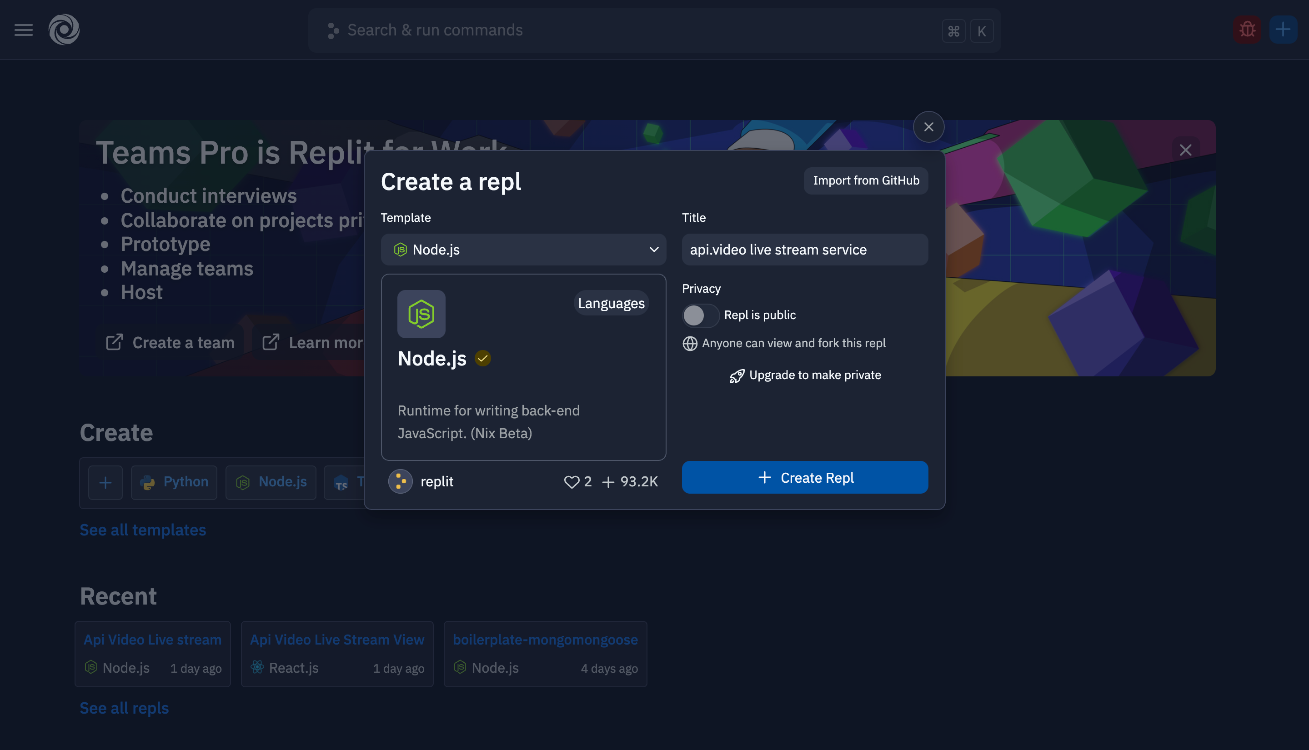
Next, head over to Replit. If you do not already have an account, you can create one here. Create a new repl and select Node.js for the template:
Then, in your index.js file, you should see options to select a template. If you would like, you can try playing around with a template. However, for this tutorial, you can simply start from scratch.
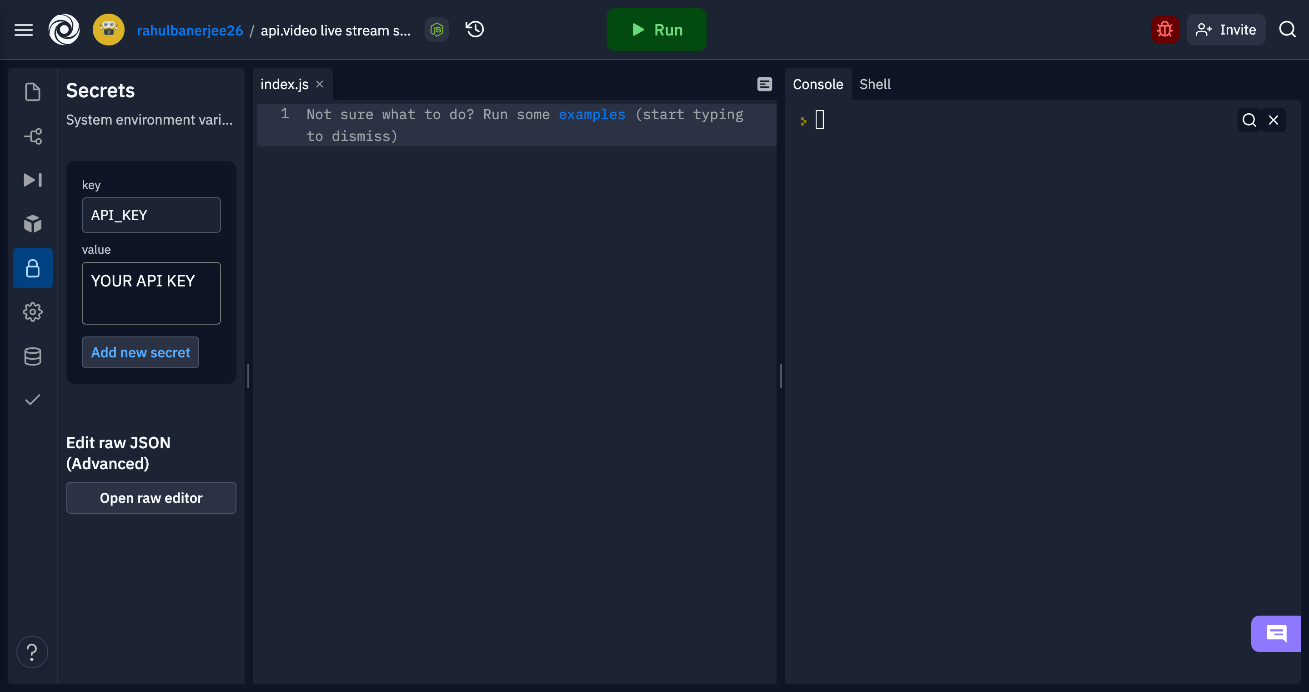
Save your api.video API Key as an environment variable. Replit has a feature that allows you to conveniently store your secrets as environment variables:
Replace the value for the variable with your api.video Sandbox API Key. After you create your environment variable, you should see an option to insert a code snippet to import the variable:
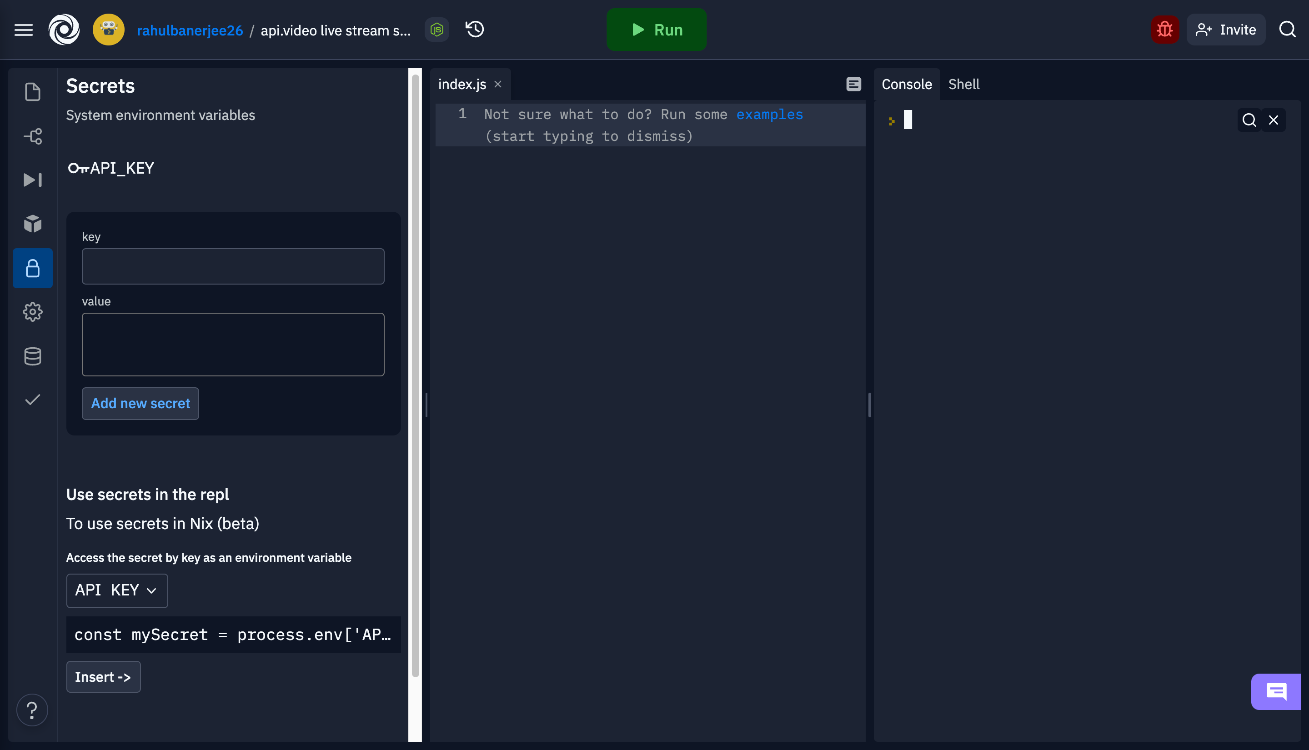
Here’s the code snippet to do so:
const API_KEY = process.env["API_KEY"];
Next, you will have to install api.video’s Node.js Client Library. Replit has a feature that allows you to search for packages and install them. Click on the box icon in the left sidebar and search for “@api.video/nodejs-client.”
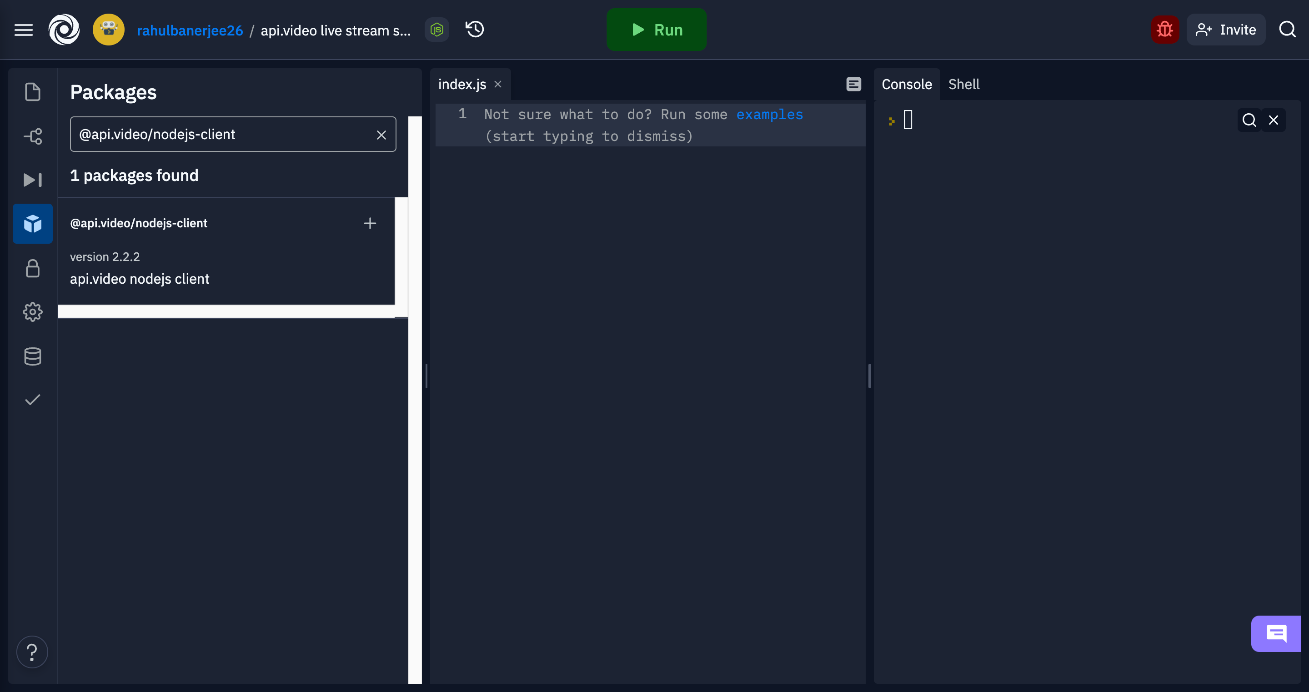
Click on the plus icon to install the package. Optionally, you can use the npm install command in your repl’s shell to install it as well.
Import the package you just installed using this code:
const ApiVideoClient = require("@api.video/nodejs-client");
Now, create an asynchronous function to create the livestream service:
const liveStreamName = "My Live Stream";

async function createLiveStream() {
 const client = new ApiVideoClient({ apiKey: API_KEY });
 const result = await client.liveStreams.create({
    name: liveStreamName,
 });
 return result;
}
You will have to use your API key when creating the client instance. The client instance has a method called liveStreams.create that lets you create the livestream service. You have to create a key-value pair for your livestream’s name. If you would like to add a thumbnail to your livestream, you can use the client instance’s liveStreams.uploadThumbnail method to do so:
async function addThumbnail(liveStreamID, filePath) {
  const client = new ApiVideoClient({ apiKey: API_KEY });
  const result = await client.liveStreams.uploadThumbnail(
    liveStreamID,
    filePath,
  );
  return result;
}
This is another asynchronous function, similar to the previous function. Here, it accepts a couple of parameters: the livestream ID that will be returned by api.video and the path of your JPG file.
Replit lets you upload files to your repl project. Go to Files in the sidebar. You can either drag and drop your image or click on the three dots and select Upload file.
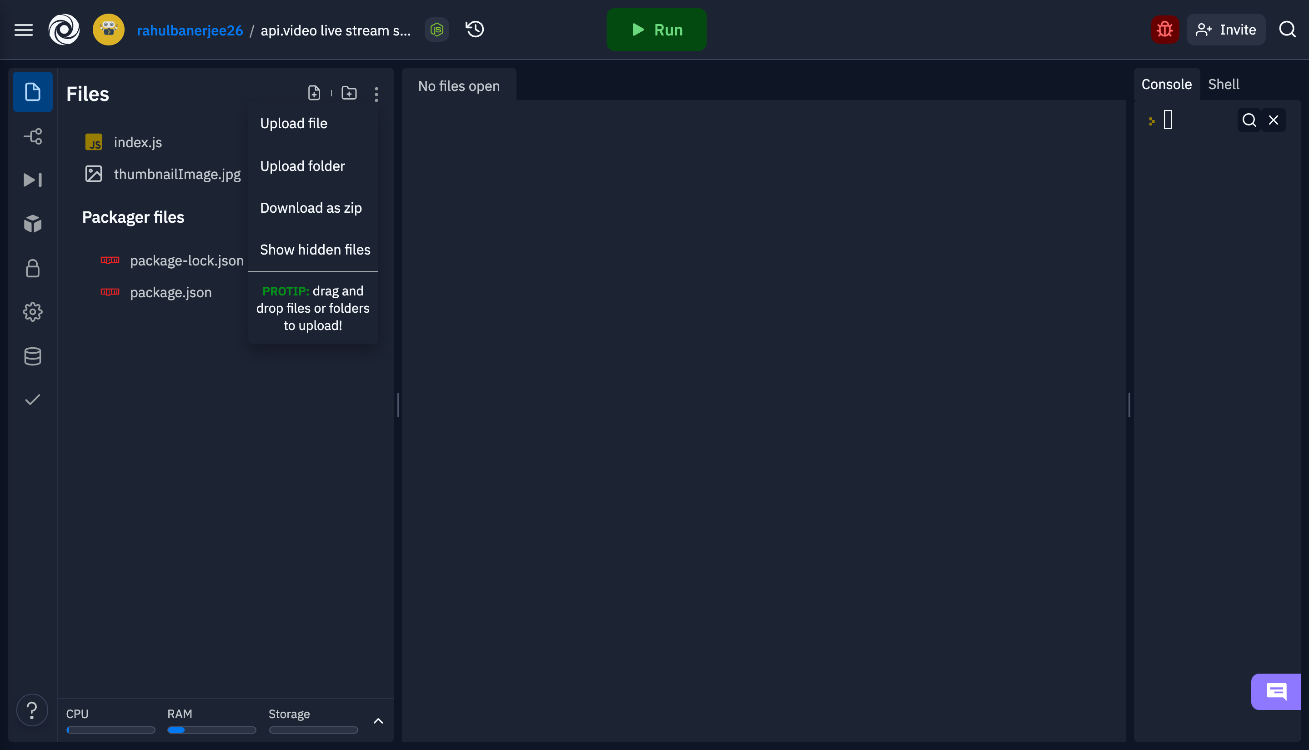
If you need a thumbnail image, you can use this one.
Next, call the function that creates the livestream service and its ID, which will be used to add the thumbnail. Use this code to do both:
createLiveStream()
  .then((res) => {
    console.log("Created a live stream resource successfully. Below is the Livestream resource");
    console.log(res);
    const liveStreamID = res["liveStreamId"];
    const filePath = "thumbnailImage.jpg";
    addThumbnail(liveStreamID, filePath)
      .then((res) => console.log("Added Thumbnail"))
      .catch((err) => {
        console.log(`Encountered following error ${err} while adding thumbnail to live stream`);
      });
  })
  .catch((err) => {
    console.log(`Encountered following error ${err} while creating live stream resource`);
  });
If you stored your thumbnail image in the same level as your index.js file, the path is simply the name of the project.
If you want, you can also optionally install the prettier package to format your code. Once you have installed it, open the package.json file and add the following to your Scripts object:
"prettier": "prettier --write *.js"
Now, you can head over to your repl’s shell and type the following command to format and prettify your code:
npm run prettier
Once complete, you can run your code using either the shell or the green Run button. The output should look similar this:
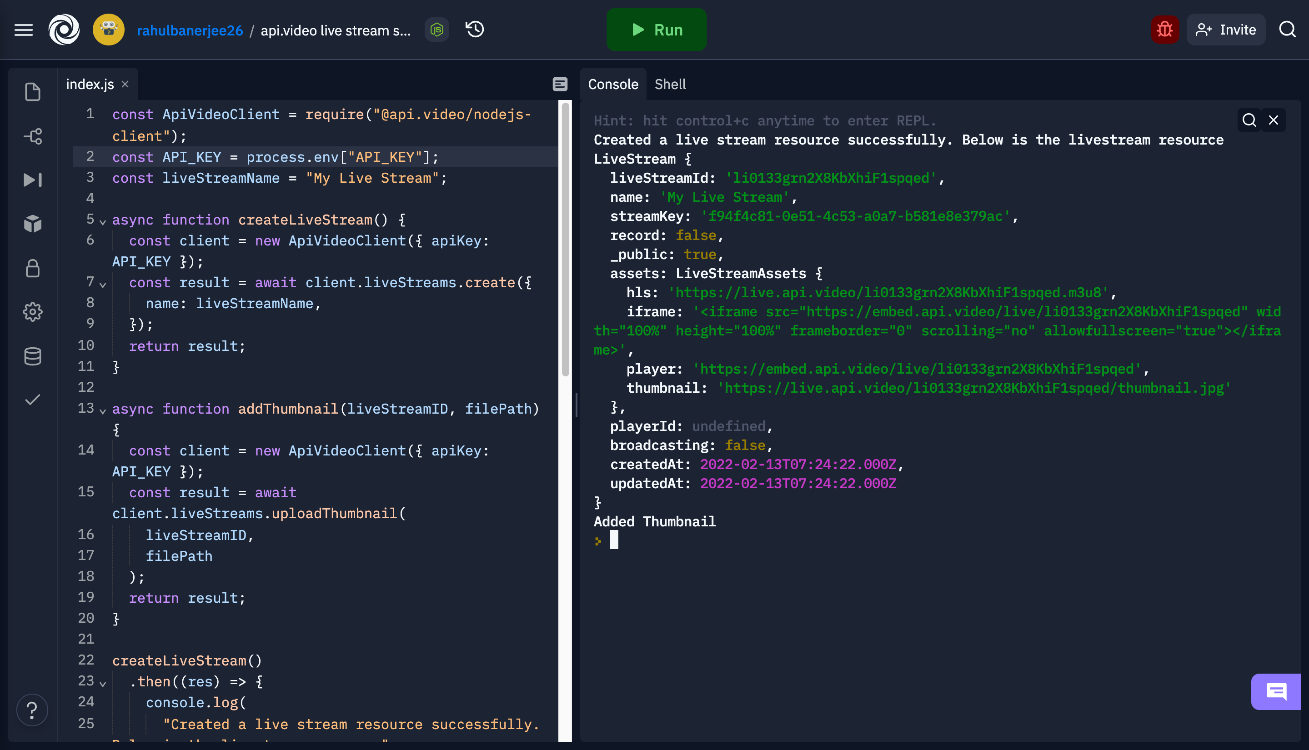
The output should have a key-value pair for the iframe of the livestream. You can use this iframe to display the livestream in your UI, so be sure to save the iframe value.
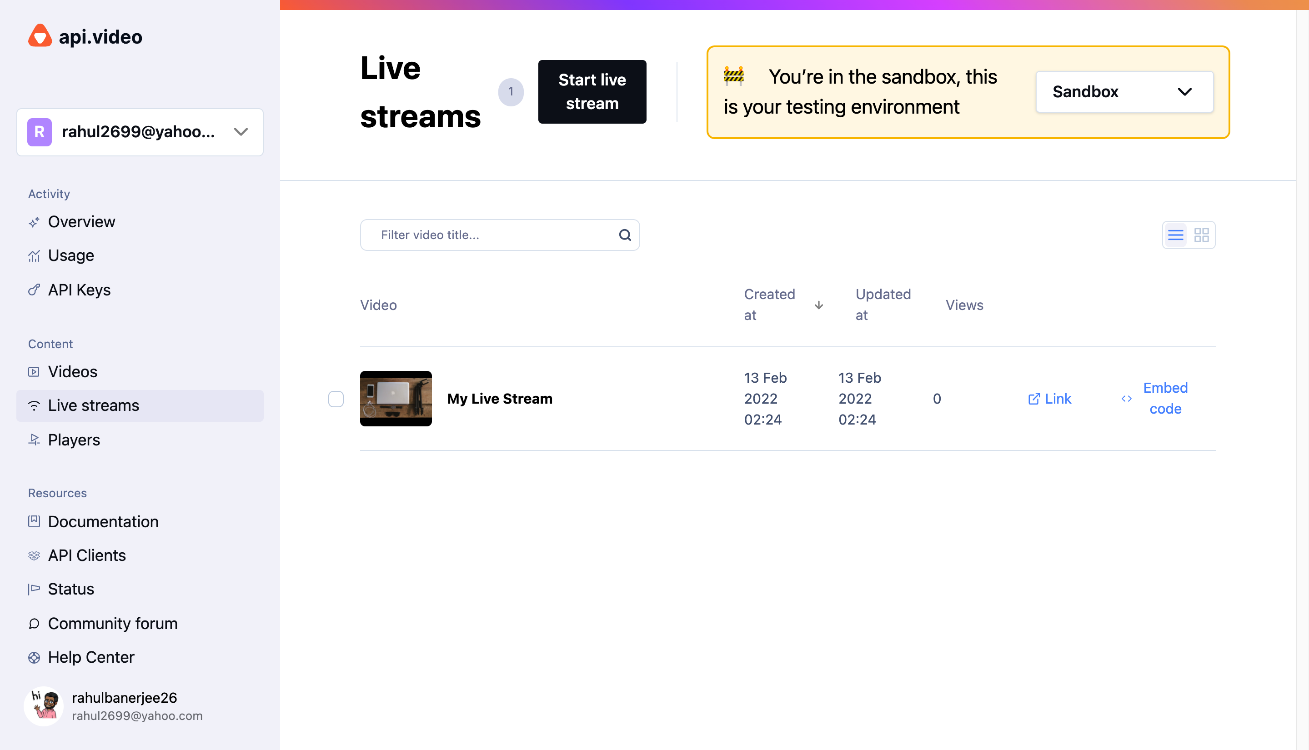
After you have created your livestream service, you can head to your api.video account dashboard to view your livestreams.
Creating the React UI
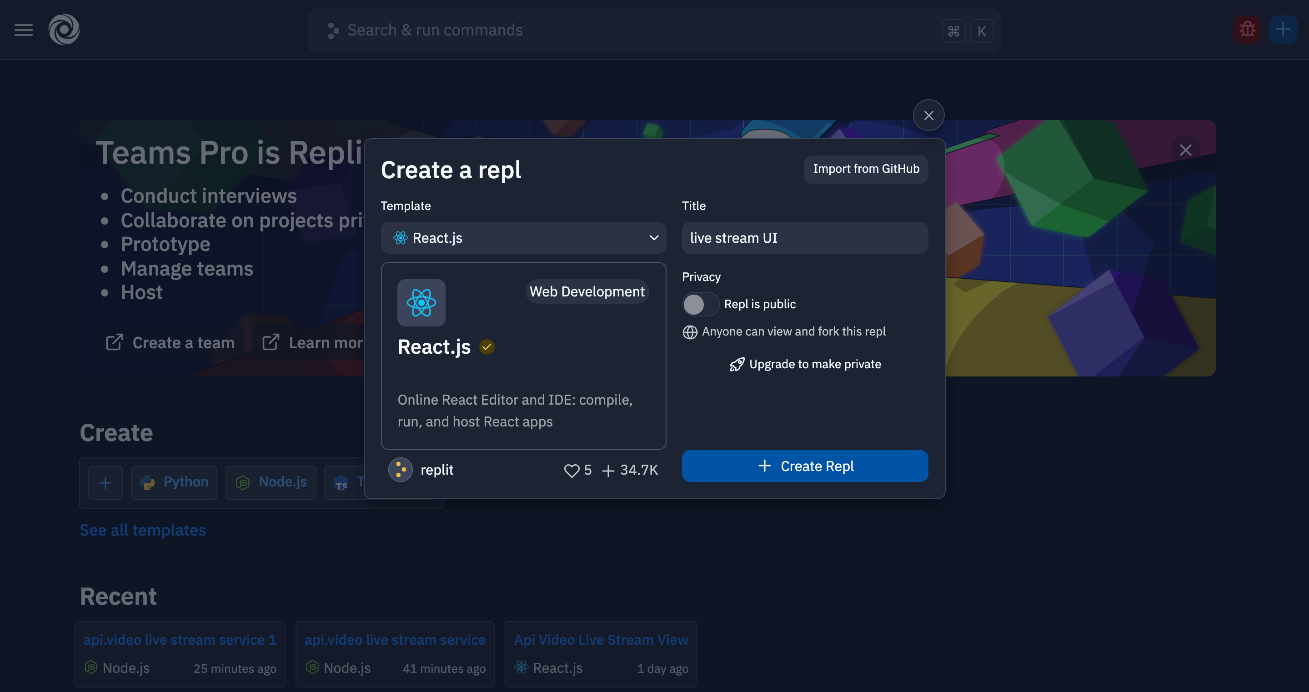
To best manage your code, create a new repl for this step and select React.js for the template.
This will create a React boilerplate. You can run the app:
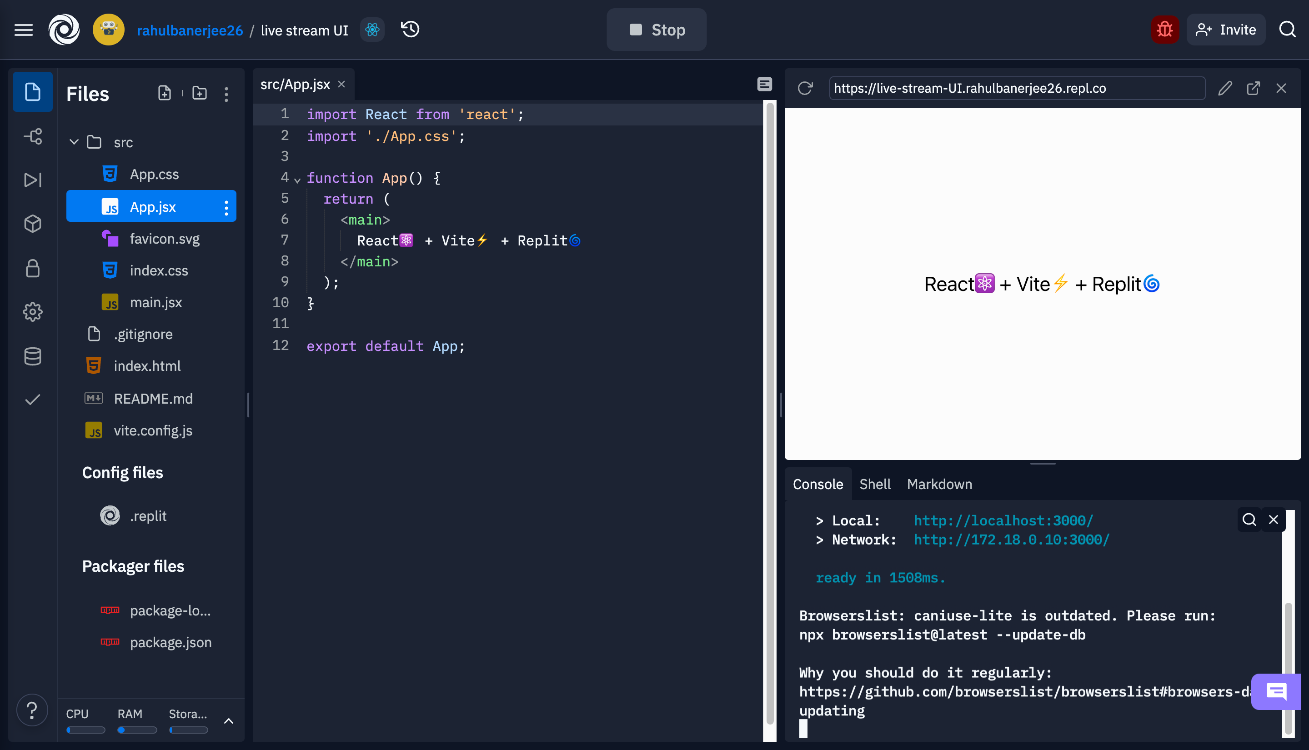
The URL is shown in the browser. In my case, it is:
https://live-stream-UI.rahulbanerjee26.repl.co
If your repl is public, the URL can be accessed from anywhere and by anyone. Additionally, as long as your repl is running, the URL will render your React App. This is a really useful feature if you want to test your app on different screens or if you want to share it with other developers for testing. Replit also supports live reload by default, so any changes you make in your code will be reflected in the browser almost instantly.
For the UI, you can add some text and your livestream’s iframe element. Here is the component to use:
import React from 'react';
import './App.css';

function App() {
 return (
     <main>
         <h1>Welcome to my Live Stream</h1>
         <iframe
             src="https://embed.api.video/live/li0133grn2X8KbXhiF1spqed"
             className='videoPlayer'
             width="100%"
             height="100%"
             frameborder="0"
             scrolling="no"
             allowfullscreen="true">
         </iframe>
     </main>
  );
}

export default App;
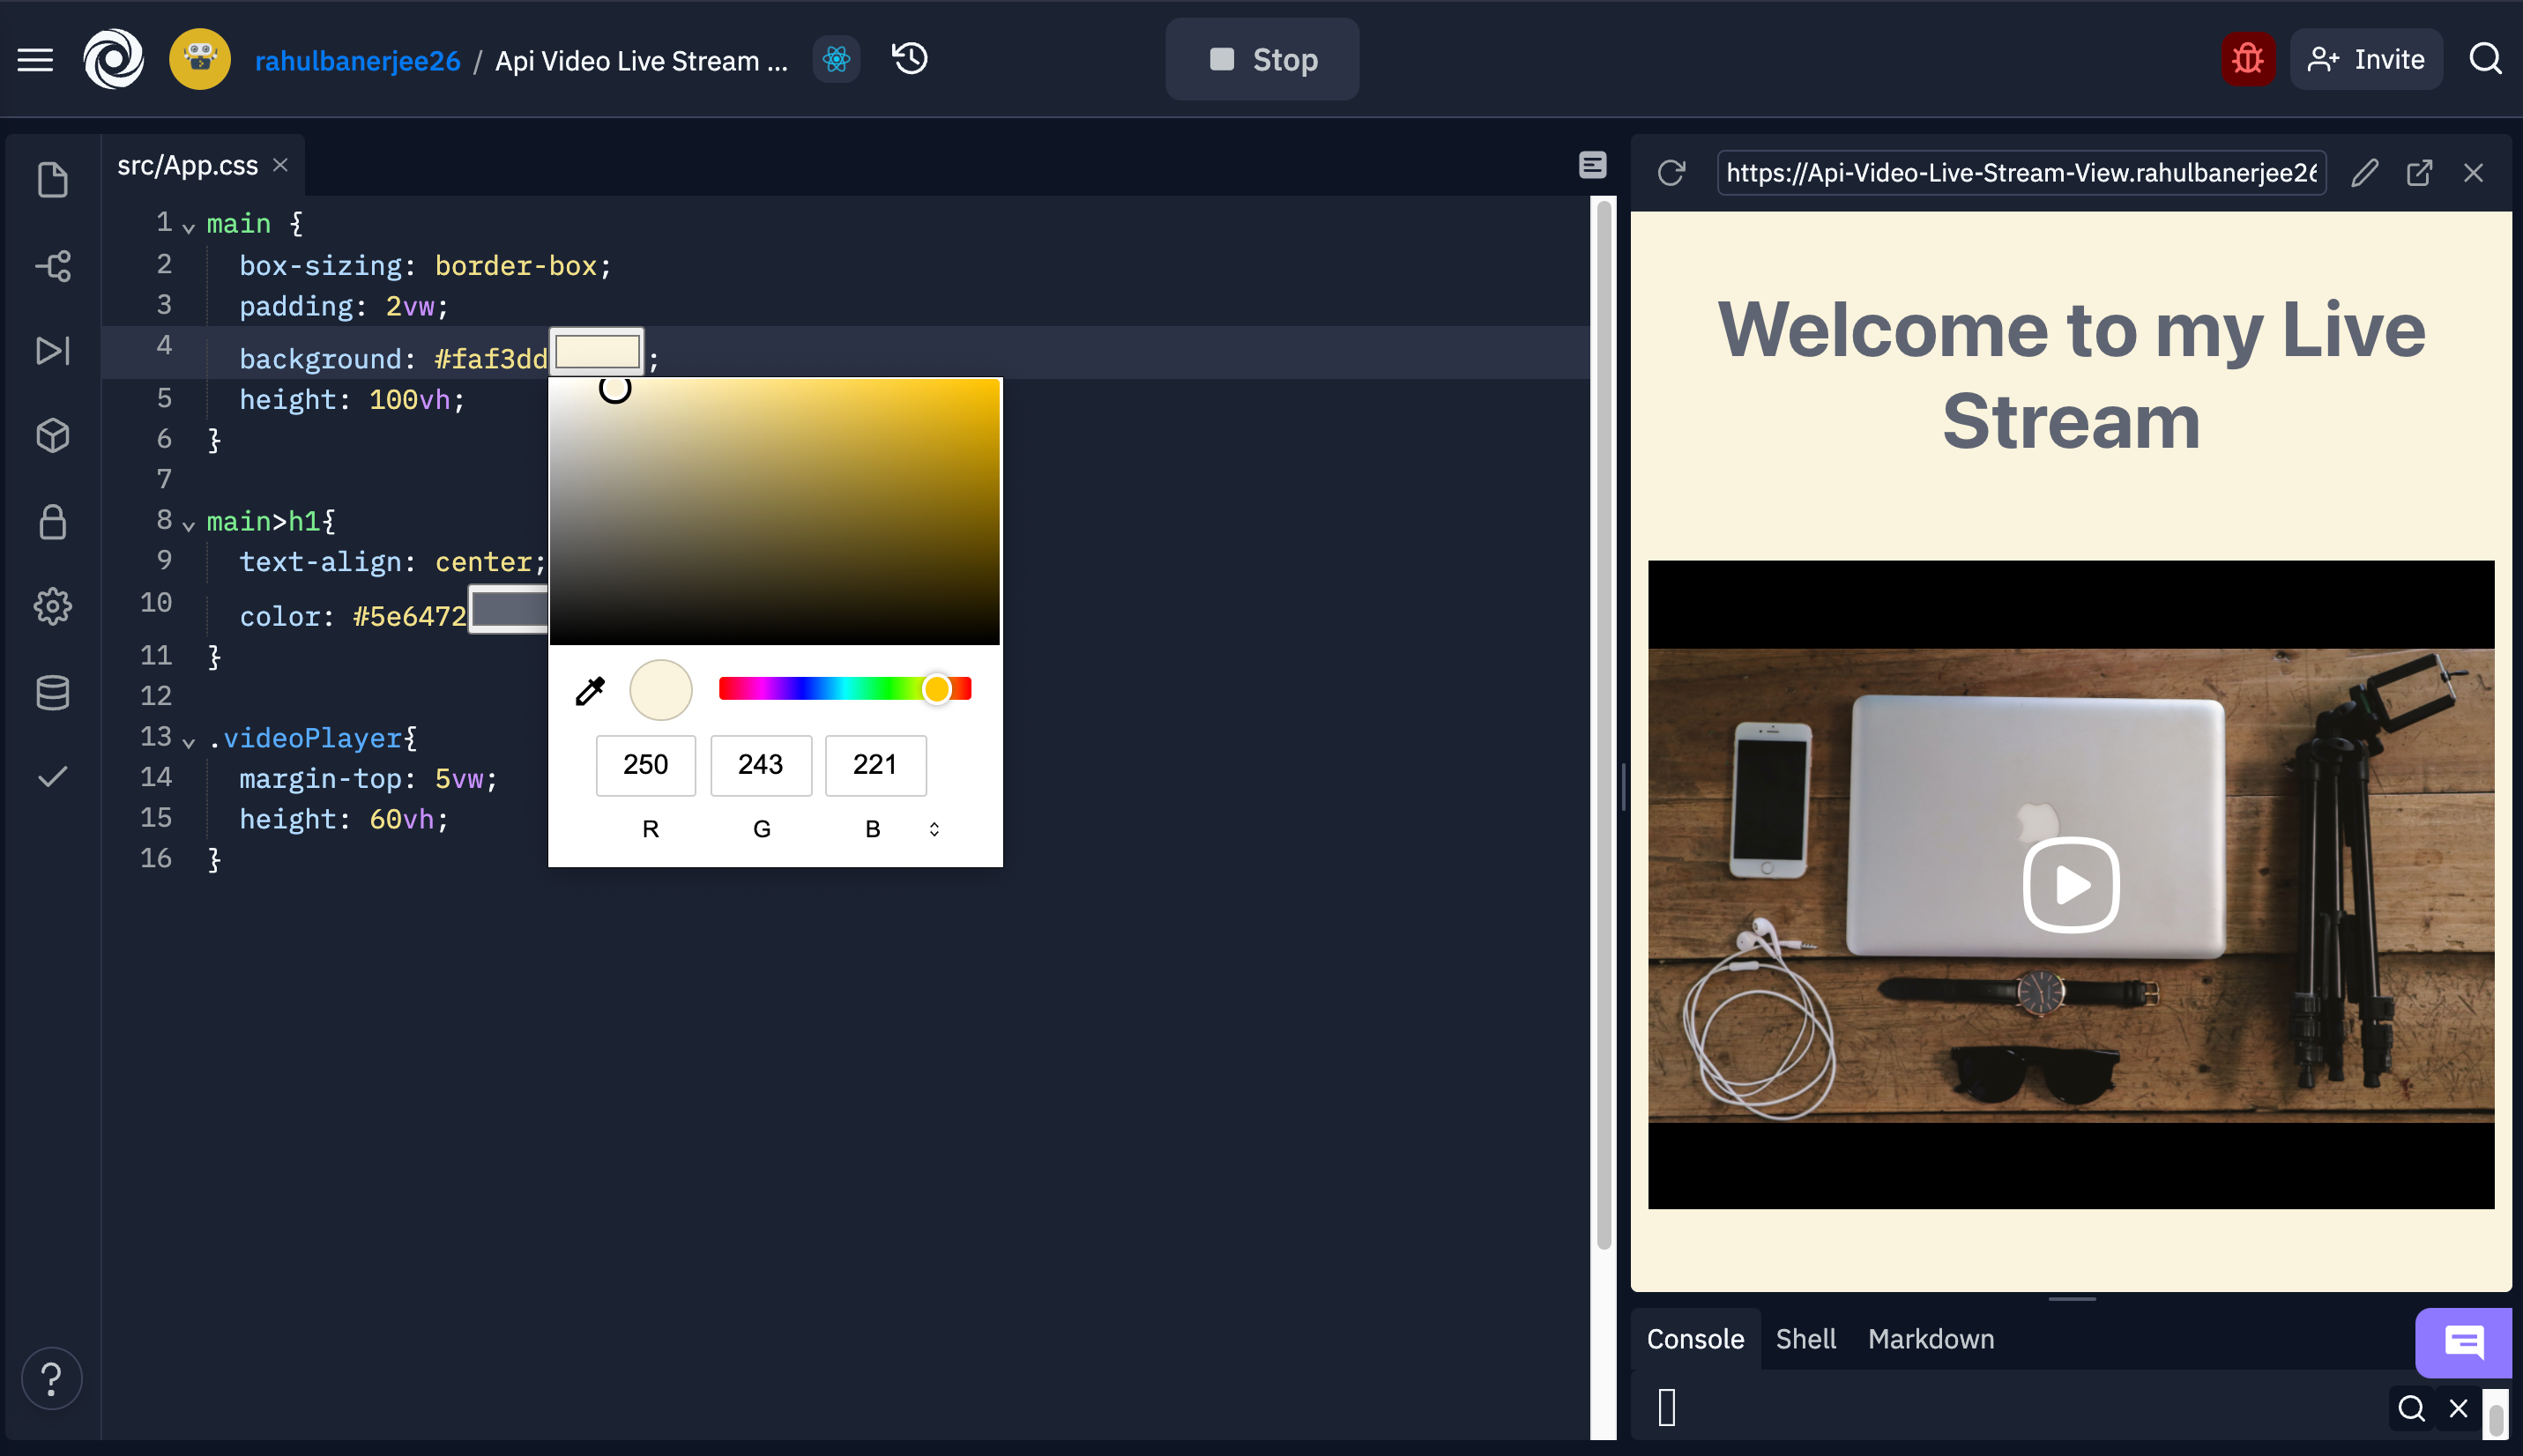
Replace the iframe element with the iframe value you saved in the previous section. Then, head to your browser, and you should see your thumbnail image along with the text in the h1 tag. You can add some CSS to style the app if you’d like:
main {
     box-sizing: border-box;
     padding: 2vw;
     background: #faf3dd;
     height: 100vh;
}

main>h1{
     text-align: center;
     color: #5e6472;
}

.videoPlayer{
     margin-top: 5vw;
     height: 60vh;
}
Replit adds a small box with a preview of the color next to your color hex codes. If you click on it, you should see a color picker to select a color of your choice.
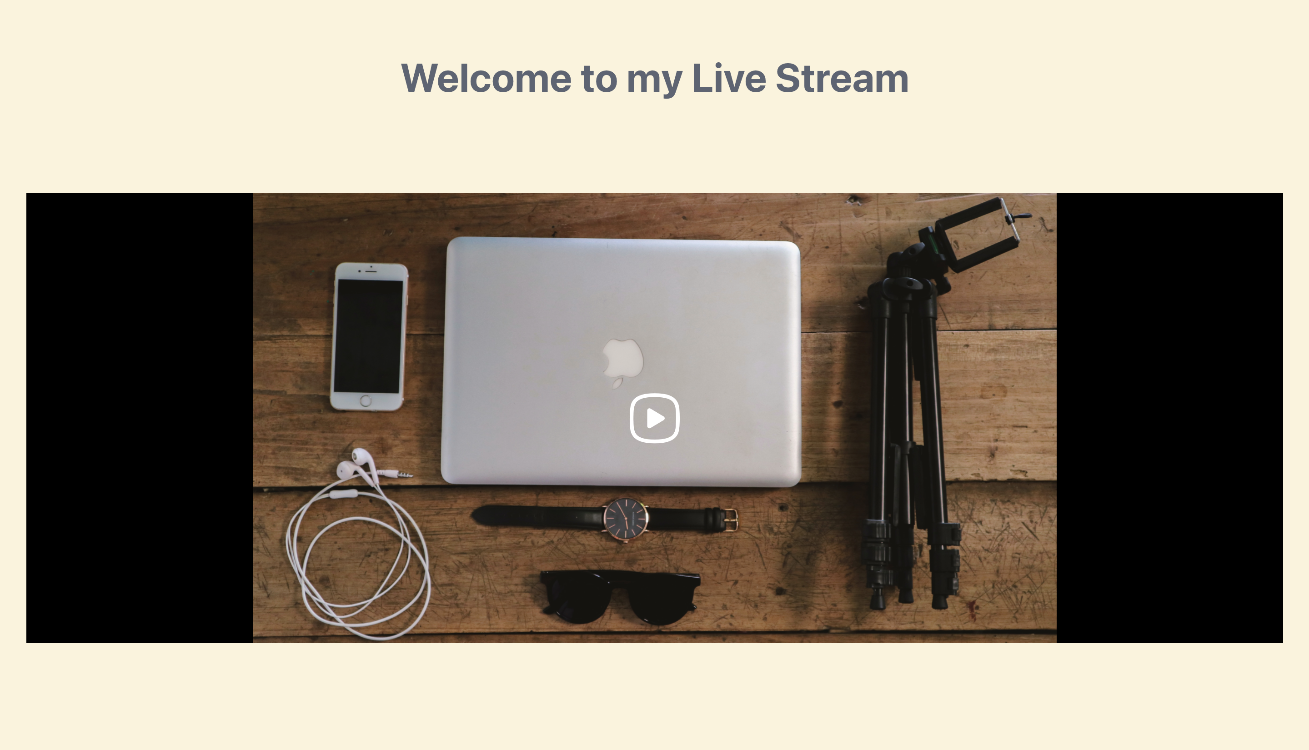
After you have added your styling, your React App should look something like this:
Connecting Zoom to Your Livestream Service
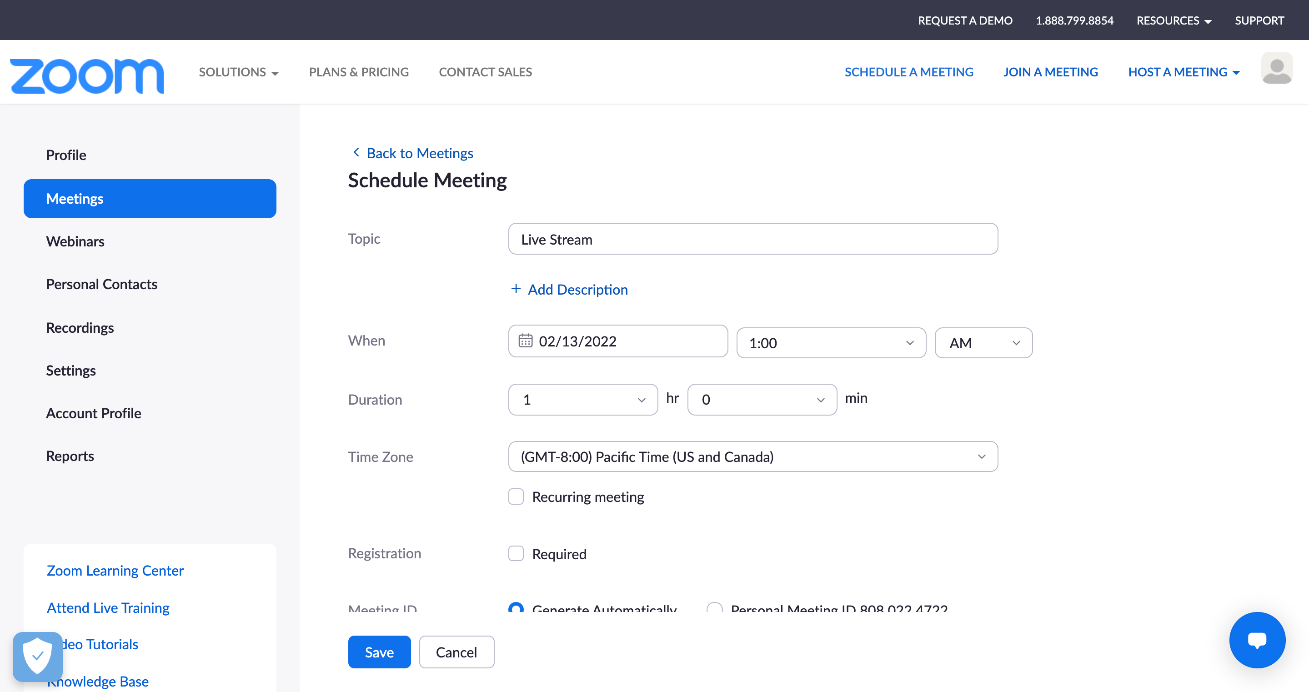
Log in to your Zoom account and create a meeting:
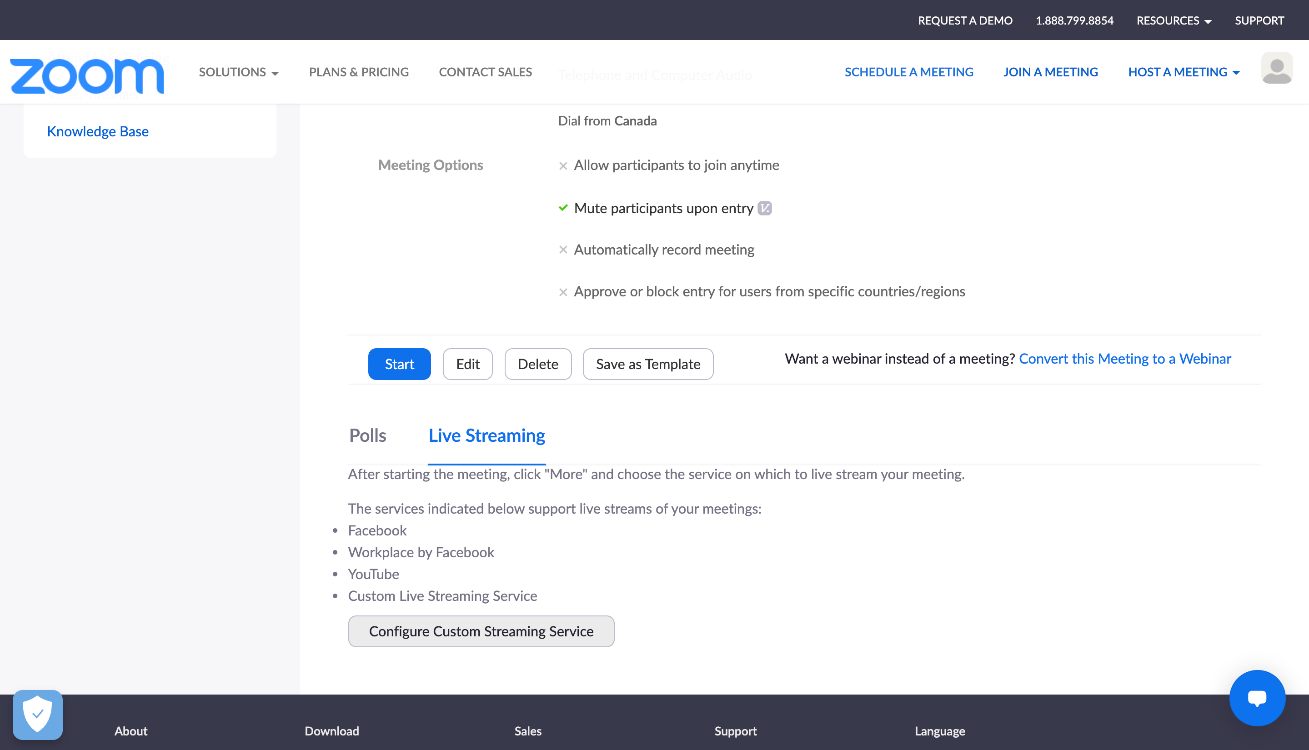
After you create your meeting, go to your meeting information and scroll down to select Configure Custom Streaming Service.
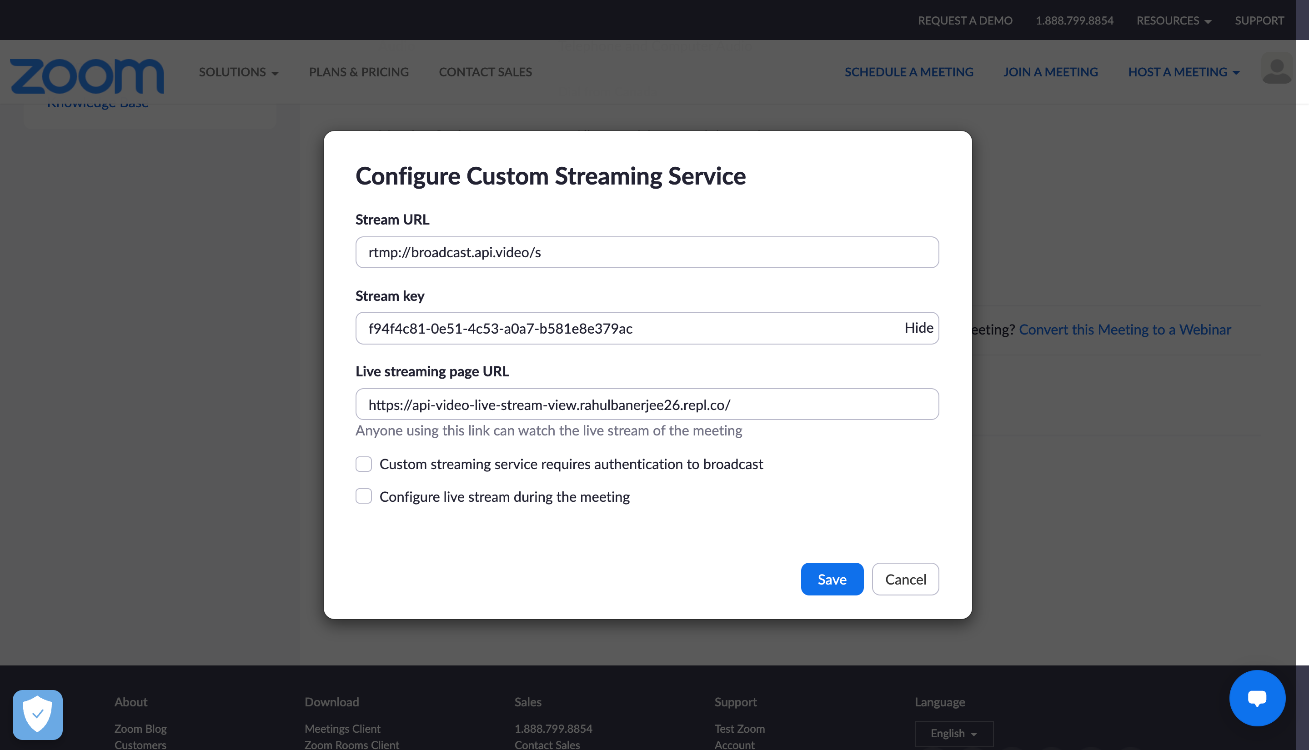
Now, you will need some information from the livestream service you created in the previous steps. Head over to your api.video dashboard and go to your livestream service. Click on the See details option for the service. You should see your stream key and the RTMP Server URL. You’ll need both these values. Go back to your Zoom meeting details. For Stream URL, add the RTMP Server URL from api.video, and for Stream key, add your api.video livestream’s key. Then, for Live streaming page URL, add the URL to your React App. Here’s what my Zoom livestream configuration looks like:
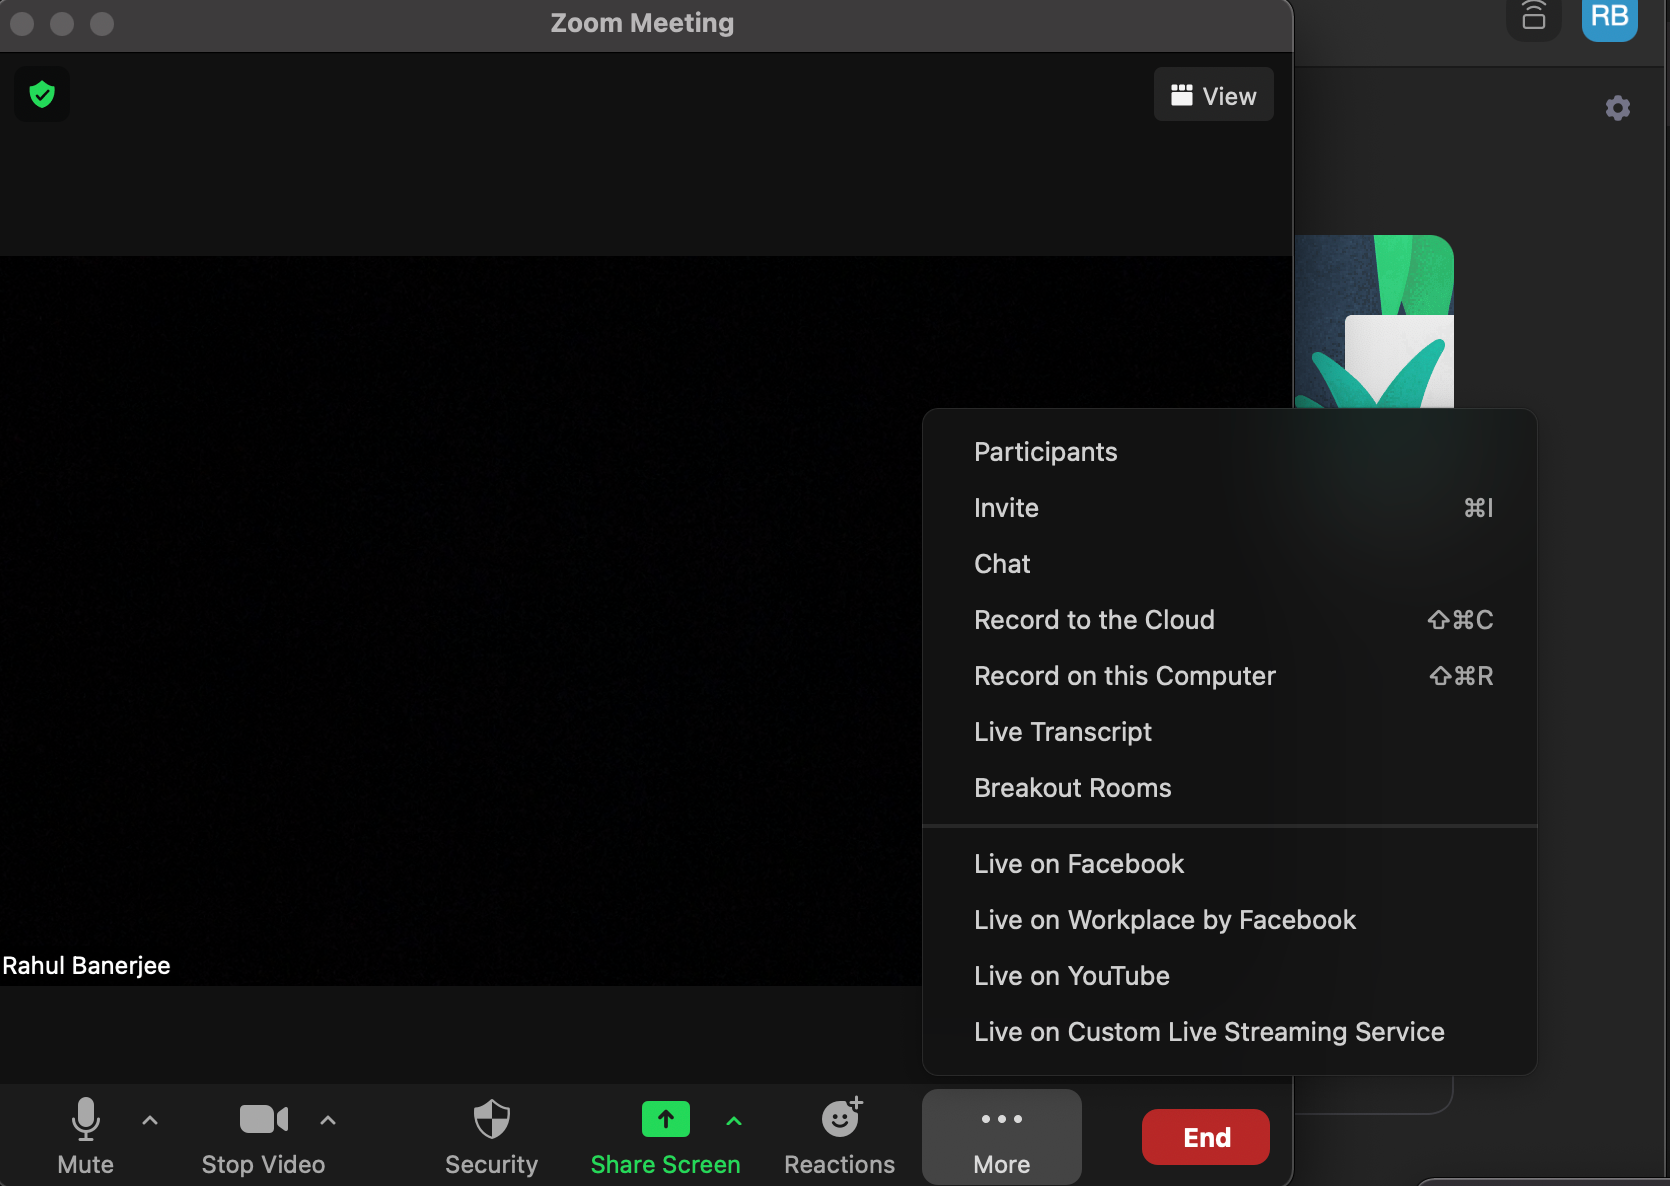
When you are hosting your Zoom meeting, simply click on More > Live on Custom Live Streaming Service.
Your React App should now display your livestream. I tried live sharing VS Code in my Zoom meeting, and here’s the result in the React App:
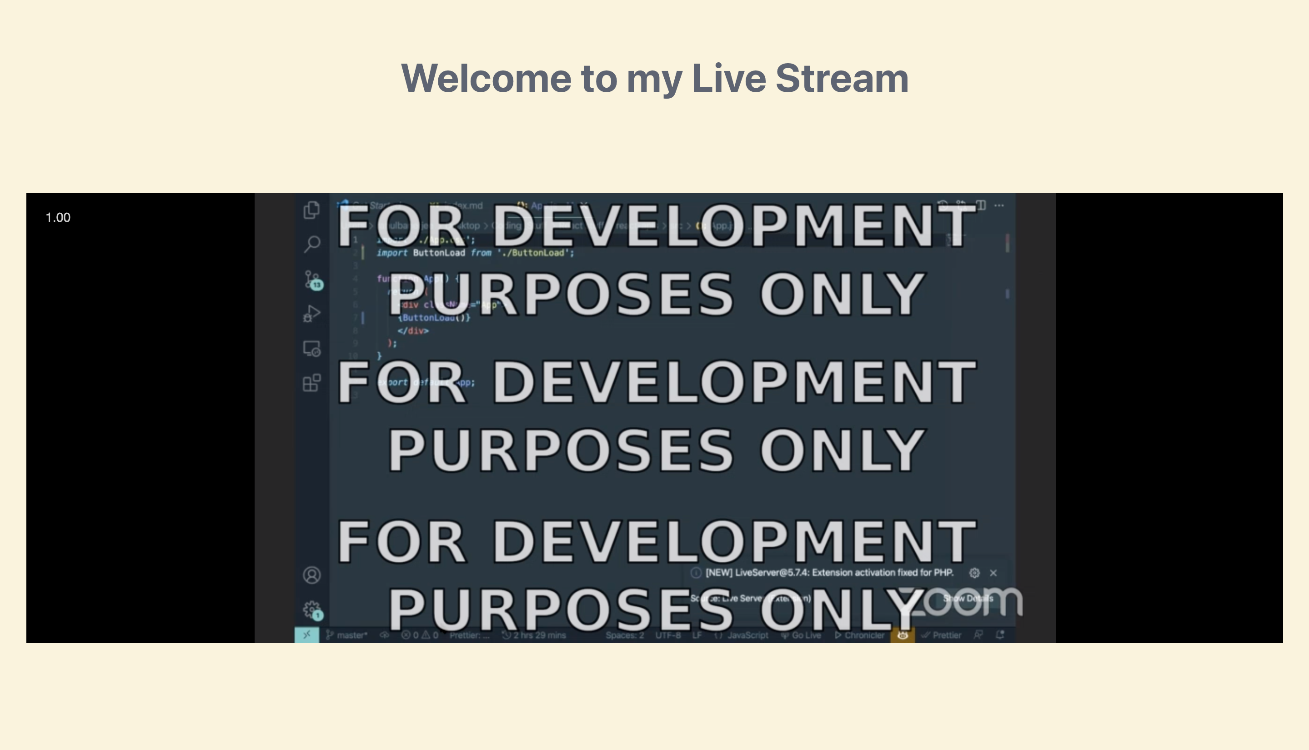
Since I am in the sandbox environment, there is a watermark. To remove it, you can upgrade to the production plan.
Conclusion
In this tutorial, you built your own livestreaming service using api.video. You also created a simple React App for others to view your livestream via Zoom. You were also introduced to Replit, an in-browser IDE that can be used for livestreaming, among many other things. Although this tutorial only discussed support for Node.js and React, Replit supports other languages and frameworks as well, including C++, Python, Vue.js, Svelte, and more.
Replit also has support for unit tests and version control and comes with a built-in database. You can read about more projects done in Replit on their blog.